Settings
Overview
The Settings module in Infosys Equinox Commerce enables Business administrators to configure the foundational operational parameters of a store. These configurations govern how transactions are processed, how shipments are handled, how entities such as accounts and products are enriched with additional data, how the underlying data models are structured, and how the cart processing pipeline is orchestrated.
Settings are store-specific, meaning each store within a business maintains its own independent configuration. Changes made in Settings take effect immediately for the associated store and influence behaviors across the Storefront, order processing, and catalog management.
The Settings module is organized into the following functional areas:
- Quick Actions: A landing dashboard with direct links to all configurable settings categories available for the store.
- Account Attributes: Define custom attributes to enrich account-level data. Available on B2B and B2C stores only.
- PIM/Product Attributes: Define custom attributes to extend product and SKU records.
- Price Types: Configure the price types associated with products in the store.
- App Marketplace: Browse, install, and configure application integrations for the store.
- Businesses: Manage businesses and their associated stores, including store-level payment and shipment method configuration.
- Cart Workflow: Configure and monitor the cart processing pipeline, including workflows, flows, adapters, calculations, and cart actions.
Accessing Settings Admin
To navigate to the Settings module:
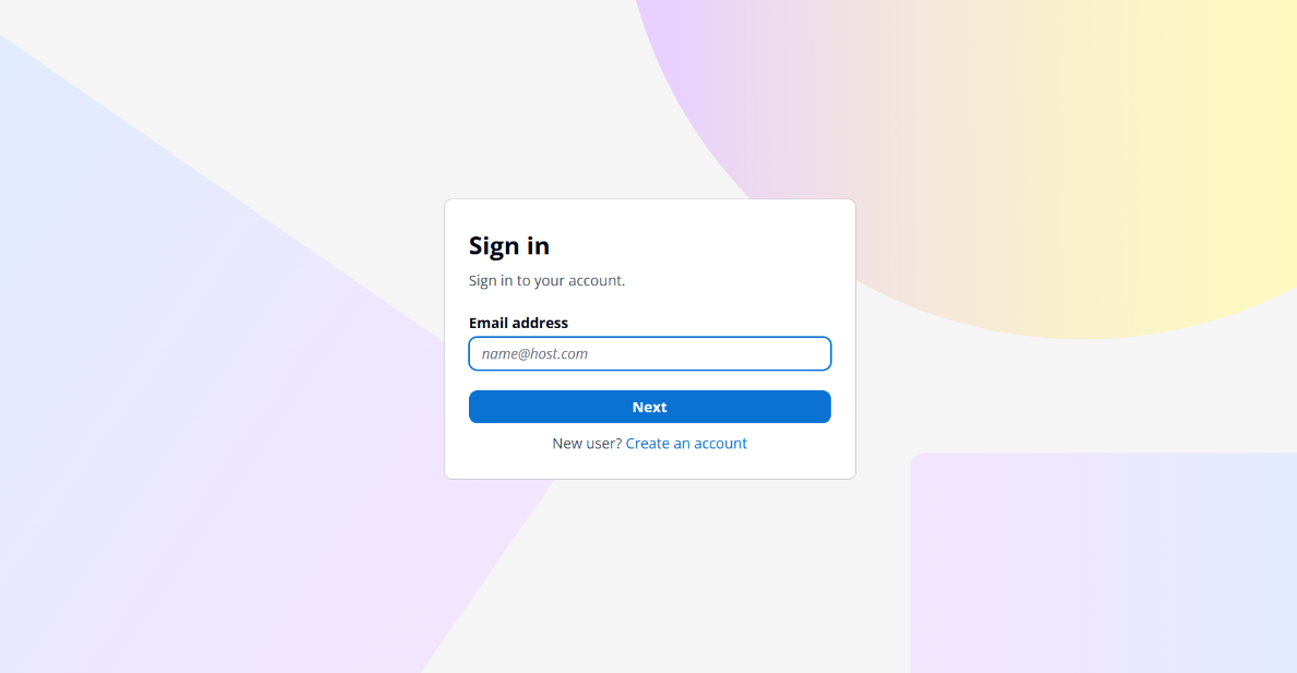
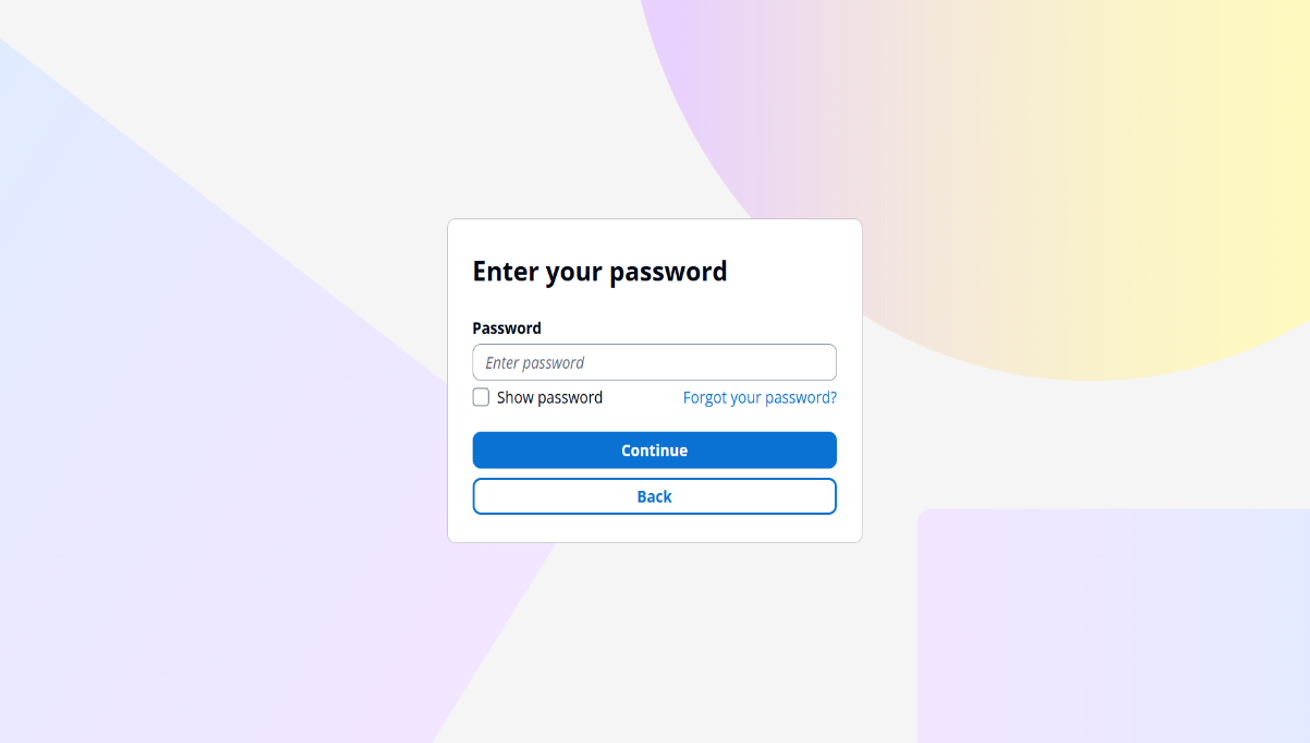
- Log in to the Infosys Equinox Admin Console using your credentials.
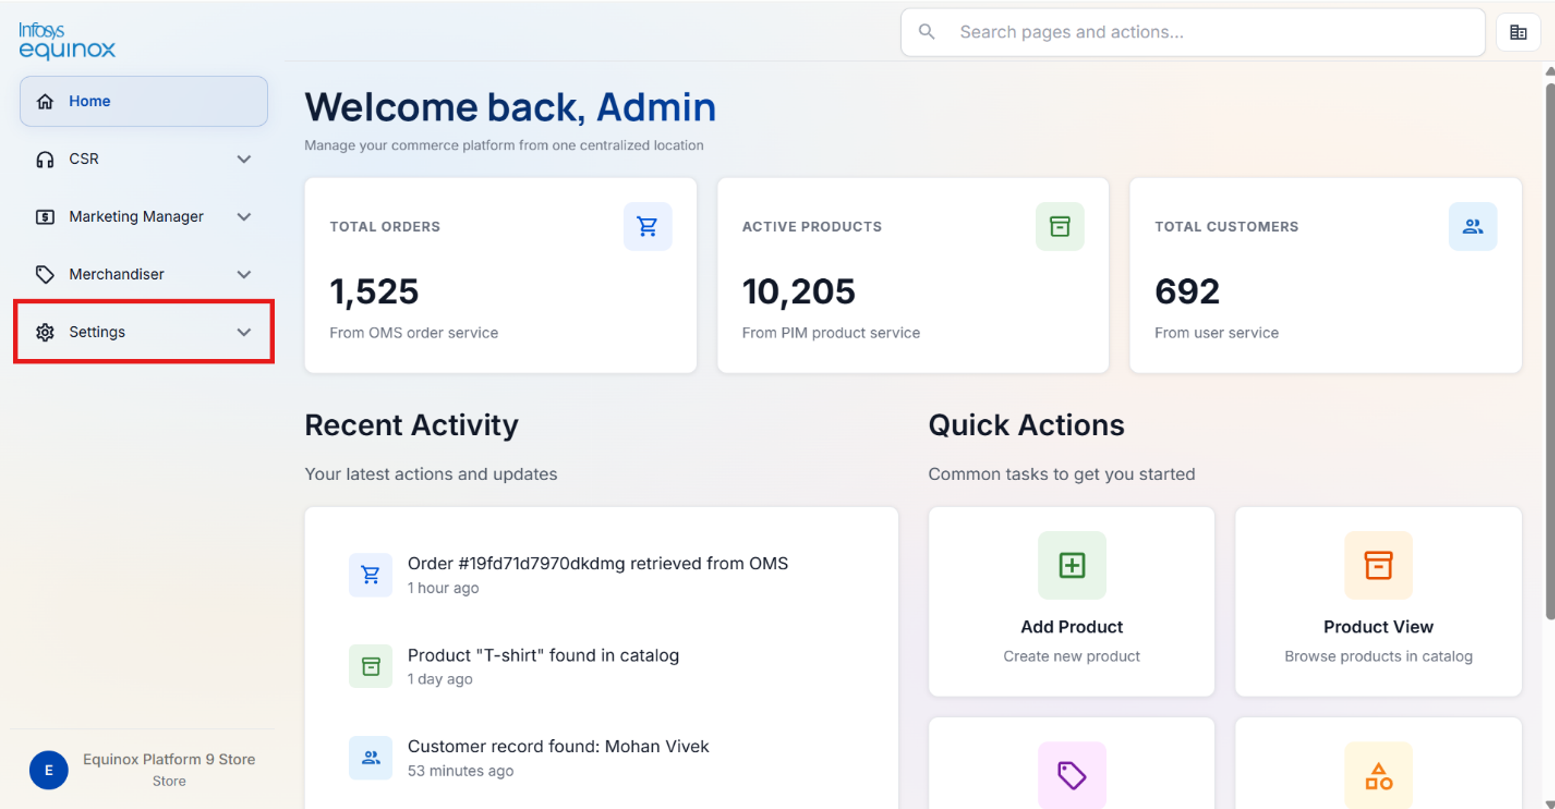
- On the left navigation panel, click Settings.
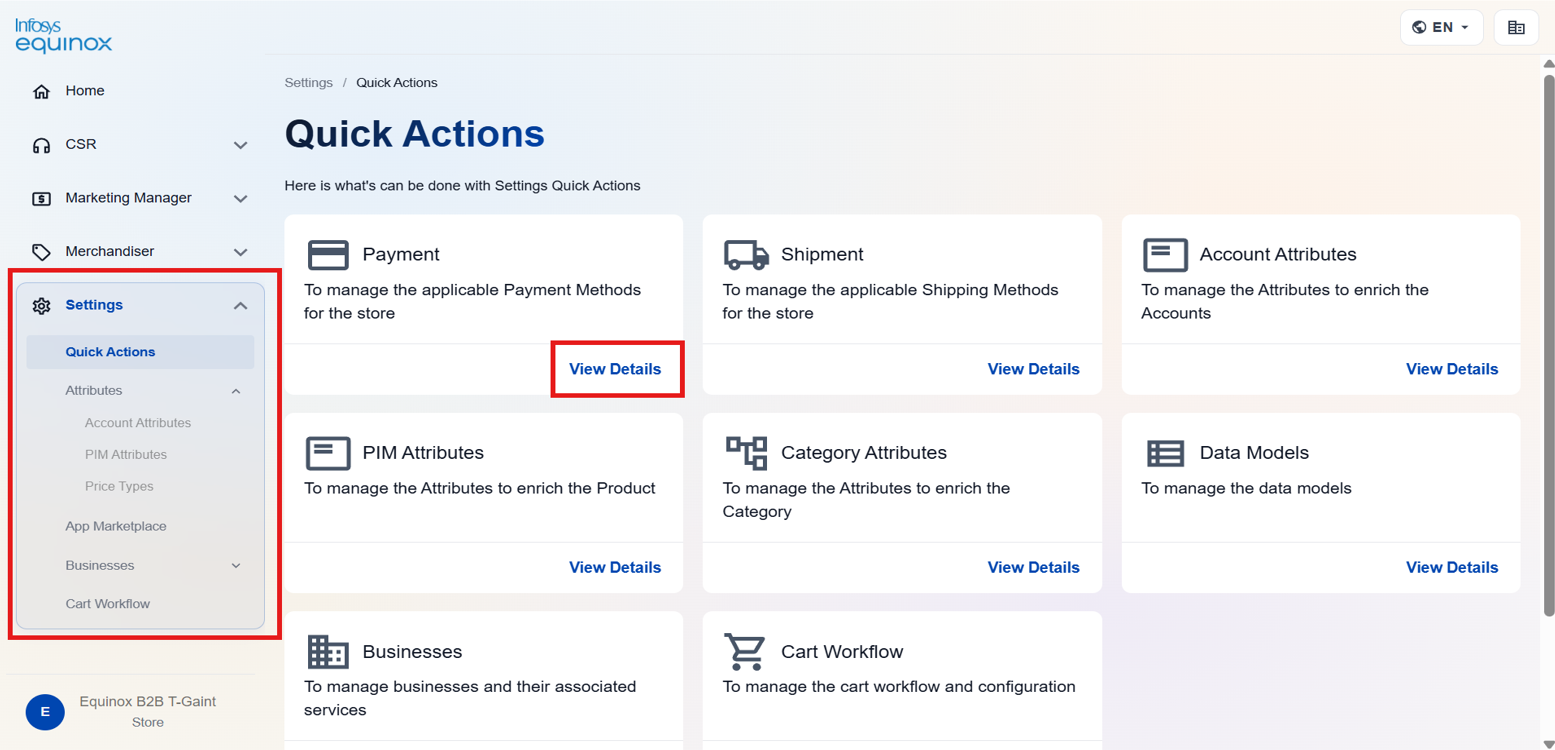
The Settings panel expands to show the following sub-sections:
- Quick Actions
- Attributes (expandable: Account Attributes, Product Attributes, Price Types)
- App Marketplace
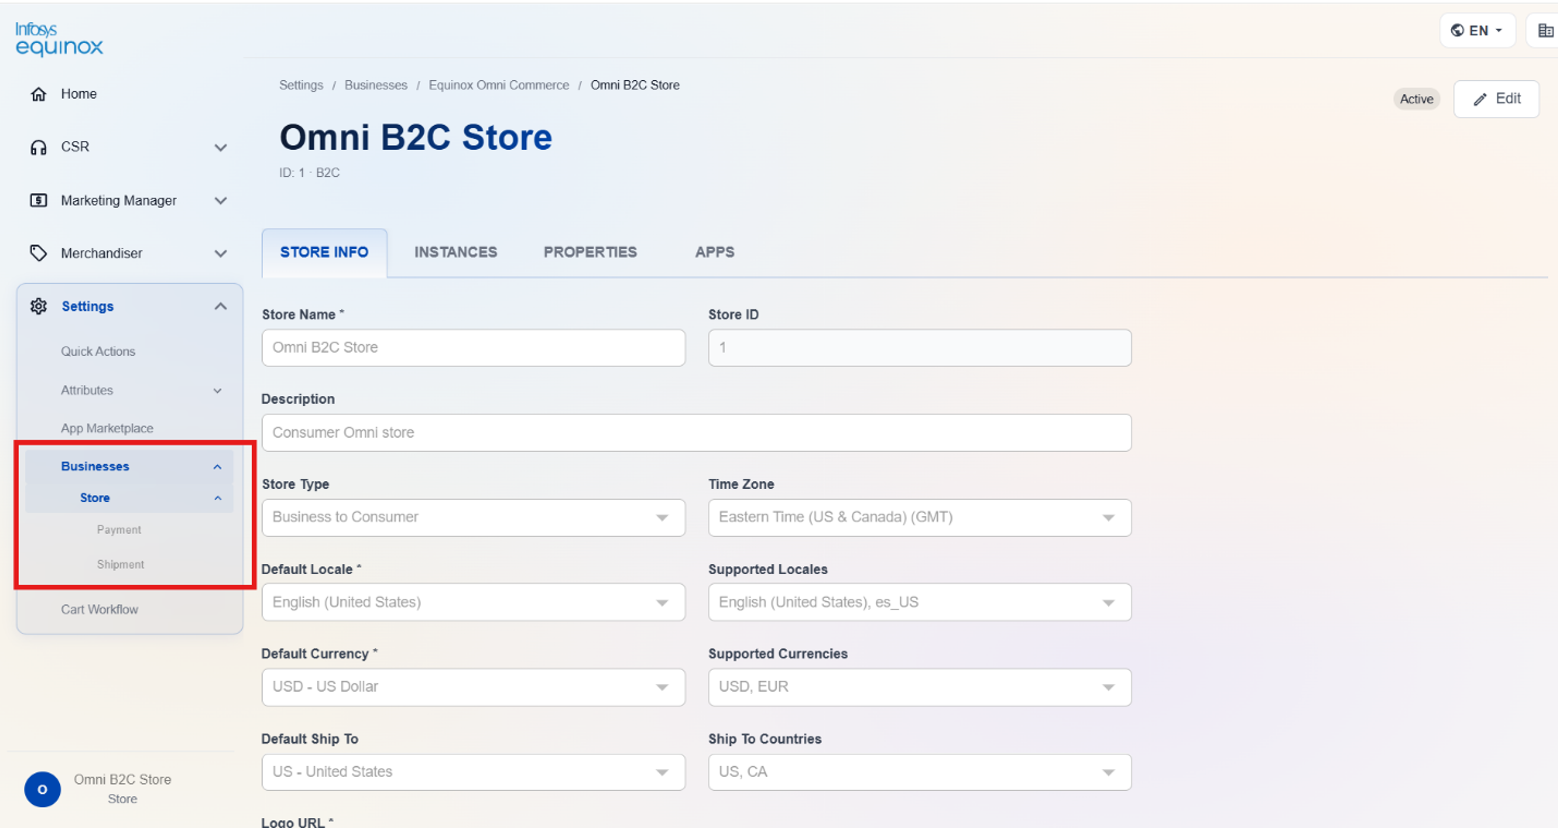
- Businesses (expandable: Store > Payment, Shipment)
- Cart Workflow
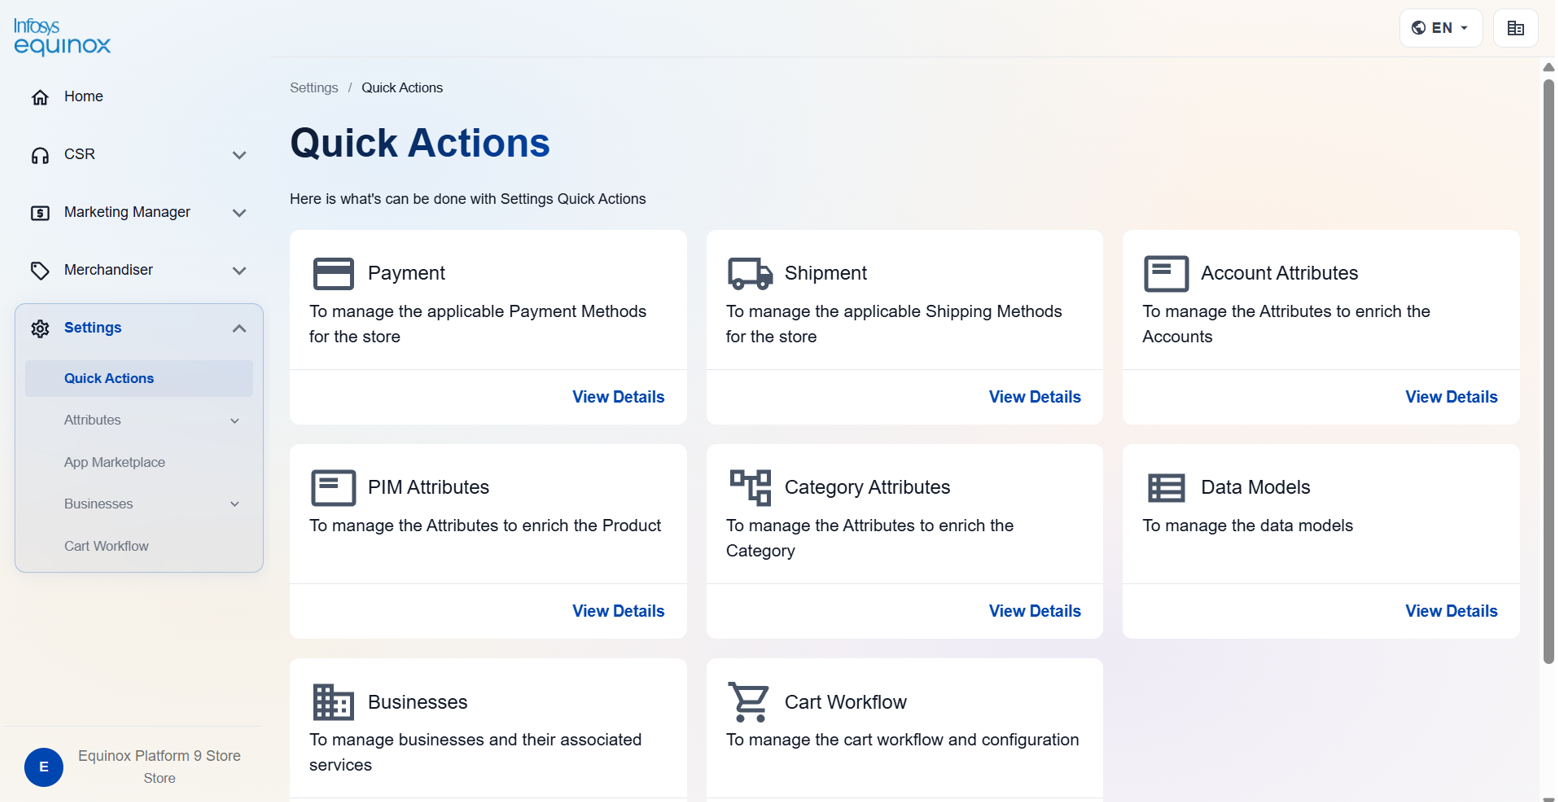
Click Quick Actions to view the Settings landing page, which displays tiles for all configurable settings categories available for the store.
Click View Details on any tile to navigate directly to that configuration section, or click the section name directly in the left navigation panel.
Setting Up Attributes
The Attributes section in the left navigation panel expands into three sub-sections:
- Account Attributes
- PIM/Product Attributes
- Price Types
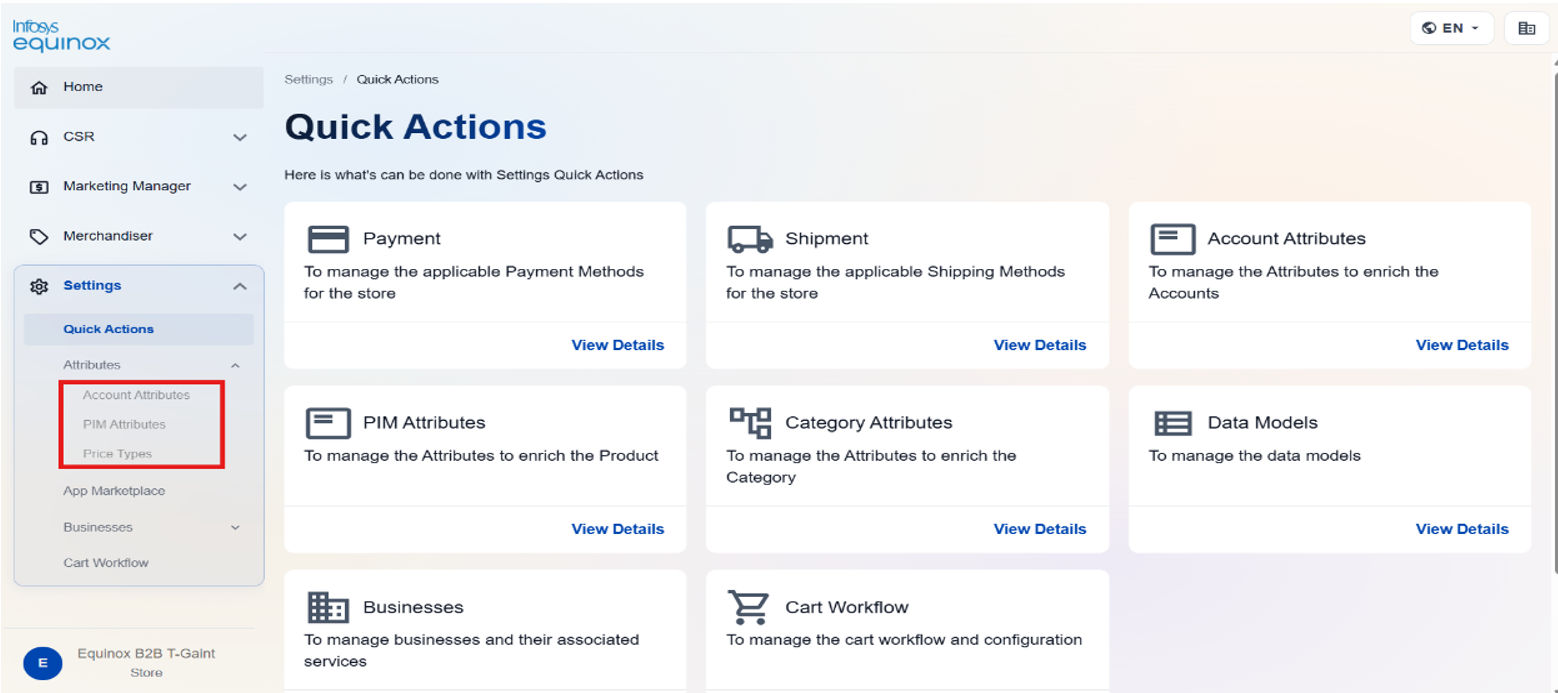
Each sub-section allows administrators to define and manage the custom data fields that extend the corresponding entity type across the store.
Account Attributes
Account Attributes extend the default account (organization or company) record with additional custom fields relevant to the business. These attributes support B2B use cases where accounts represent corporate buyers, contract holders, or other organizational entities that require data beyond the platform’s out-of-the-box account fields.
Viewing Account Attributes
- Log in to the Infosys Equinox Admin Console using your credentials.
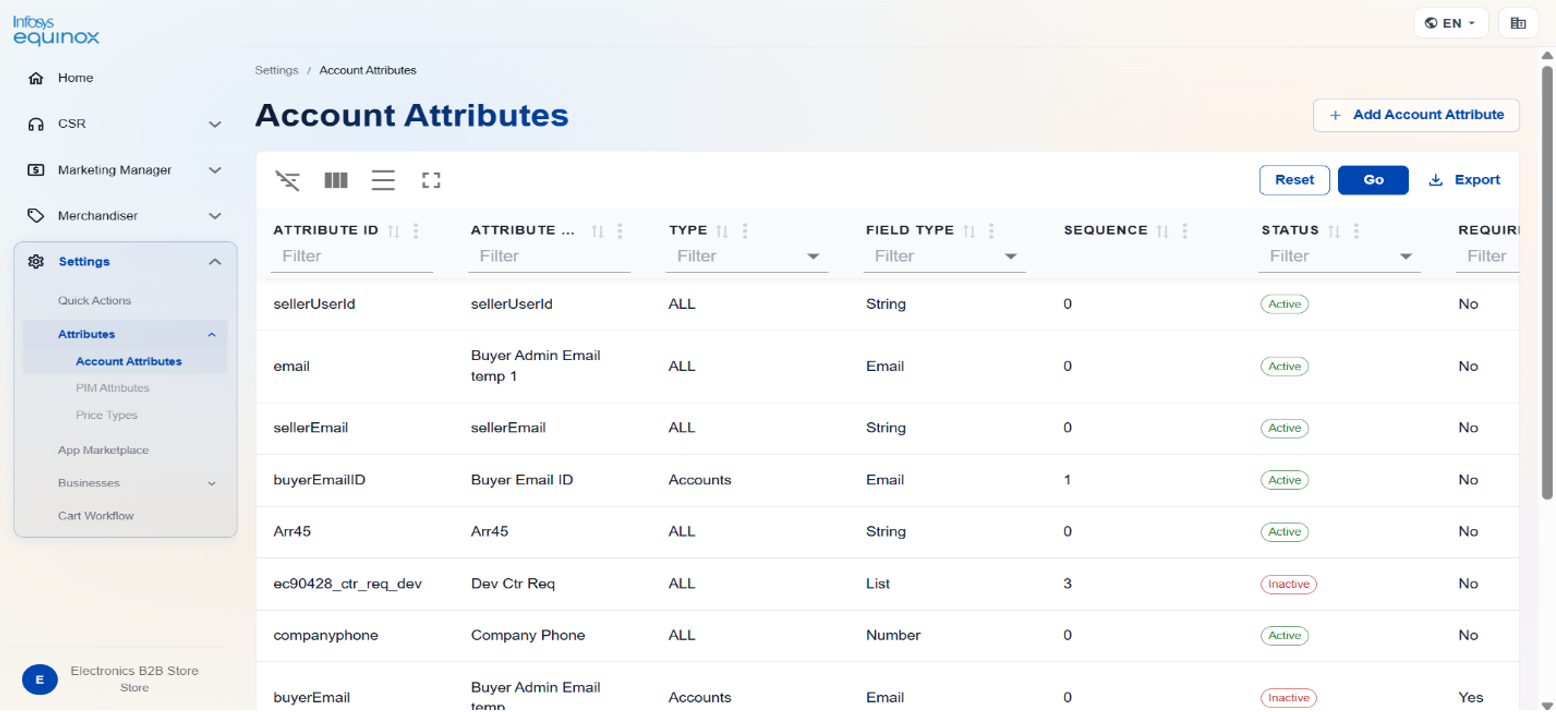
- On the left navigation panel, click Settings > Attributes > Account Attributes.
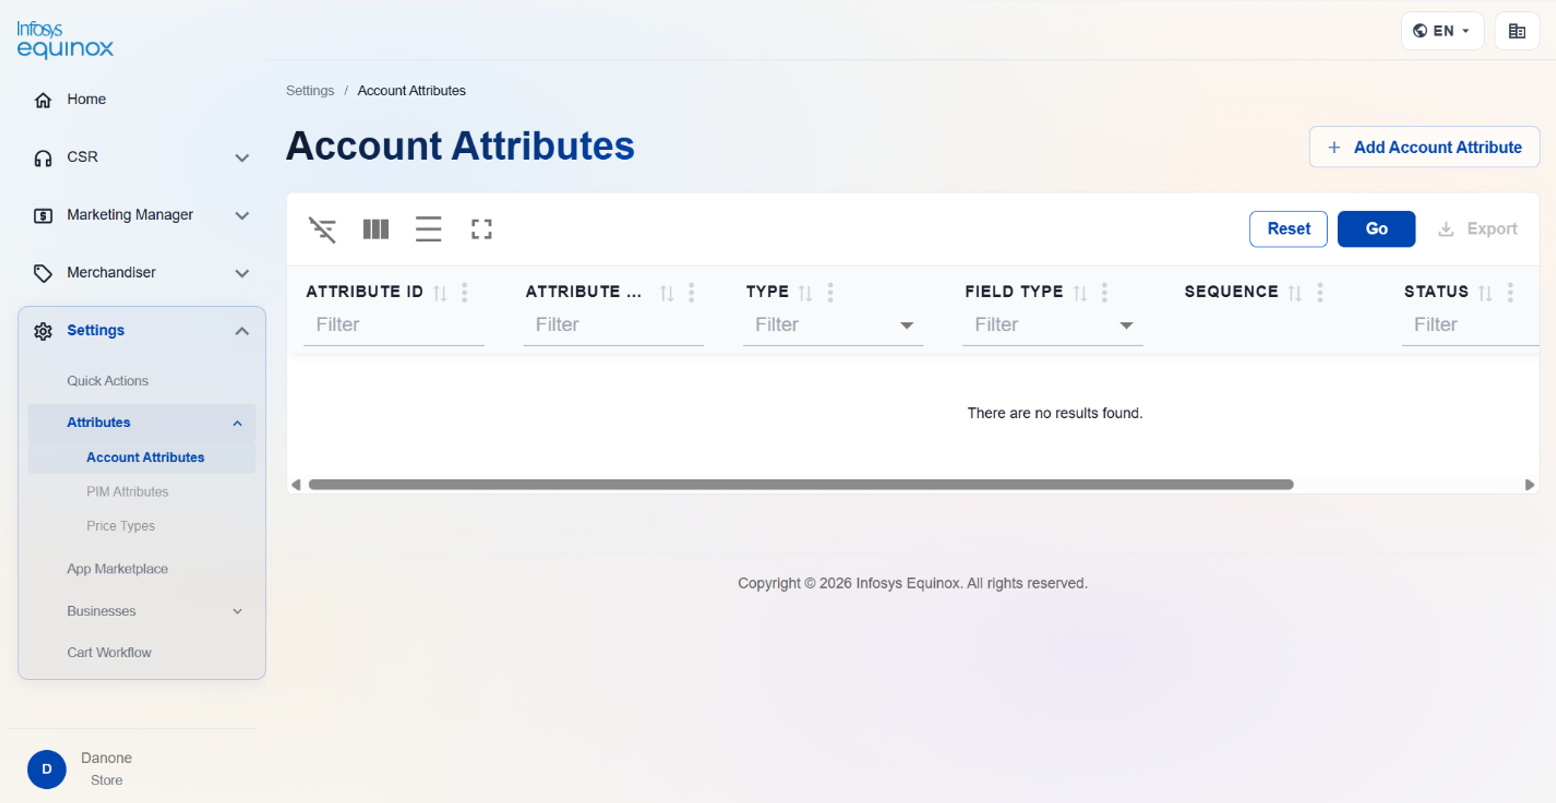
The Account Attributes page opens at the path: Settings > Attributes > Account Attributes.
The Account Attributes table contains the following columns:
| Column | Description |
|---|---|
| Attribute ID | The unique system identifier for the attribute. Sortable and filterable by text. |
| Attribute Name | The human-readable label for the attribute. Sortable and filterable by text. |
| Type | The entity scope to which the attribute applies. Possible values include Accounts, Contracts, Team, Cost Center, and Users. Filterable by dropdown. |
| Field Type | The data type of the attribute value (for example, Boolean, String, Number). Filterable by dropdown. |
| Sequence | The display order of the attribute within the account profile form. Sortable and filterable by text. |
| Status | The activation state of the attribute: Active or Inactive. Filterable by dropdown. |
| Required | It is filtered using YES/NO options |
Create an Account Attribute
- Log in to the Infosys Equinox Admin Console using your credentials.
- On the left navigation panel, click Settings > Attributes > Account Attributes.
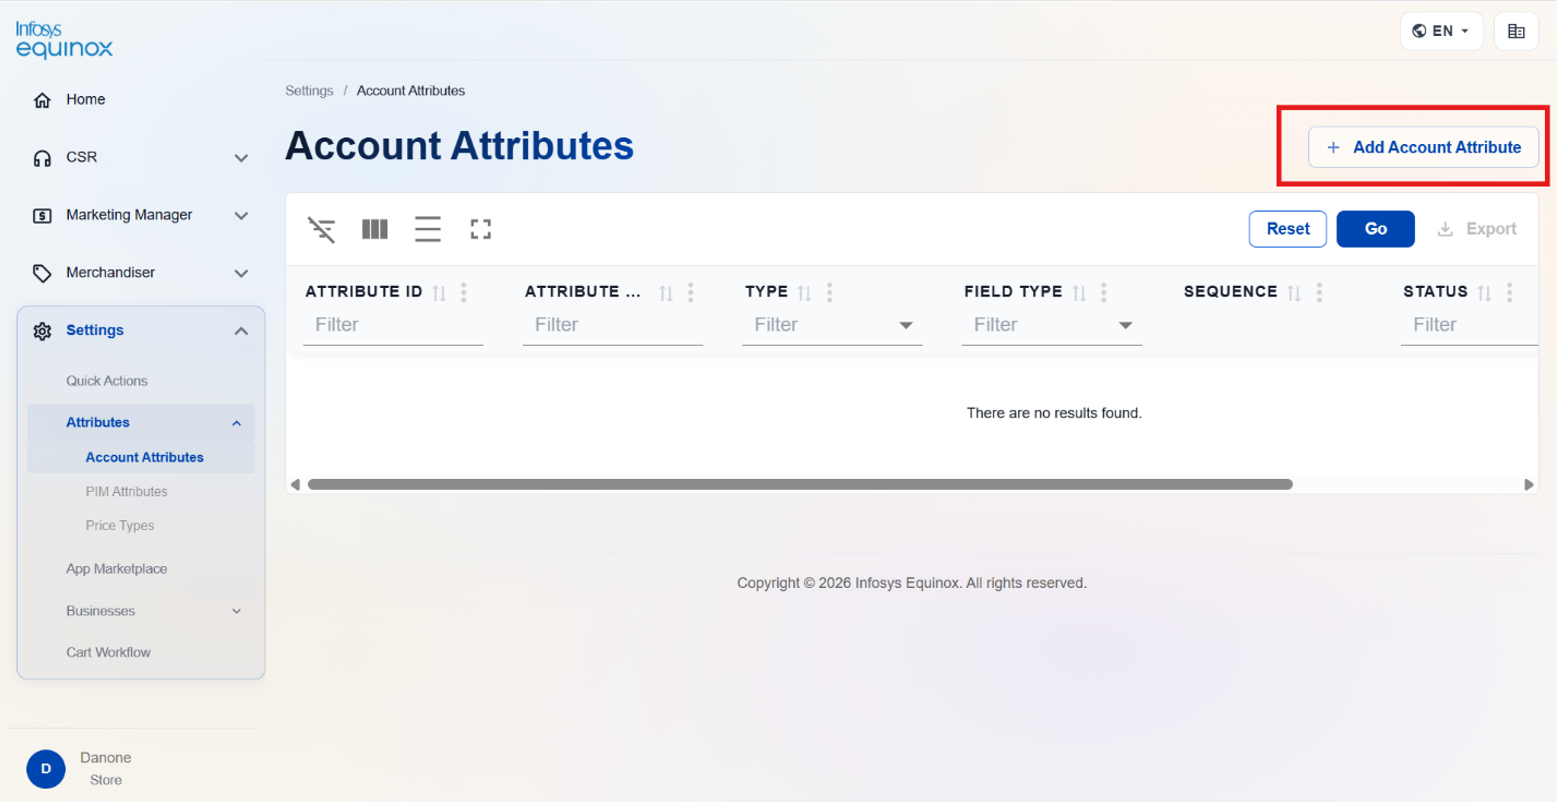
- On the Account Attributes page, click ADD ACCOUNT ATTRIBUTE.
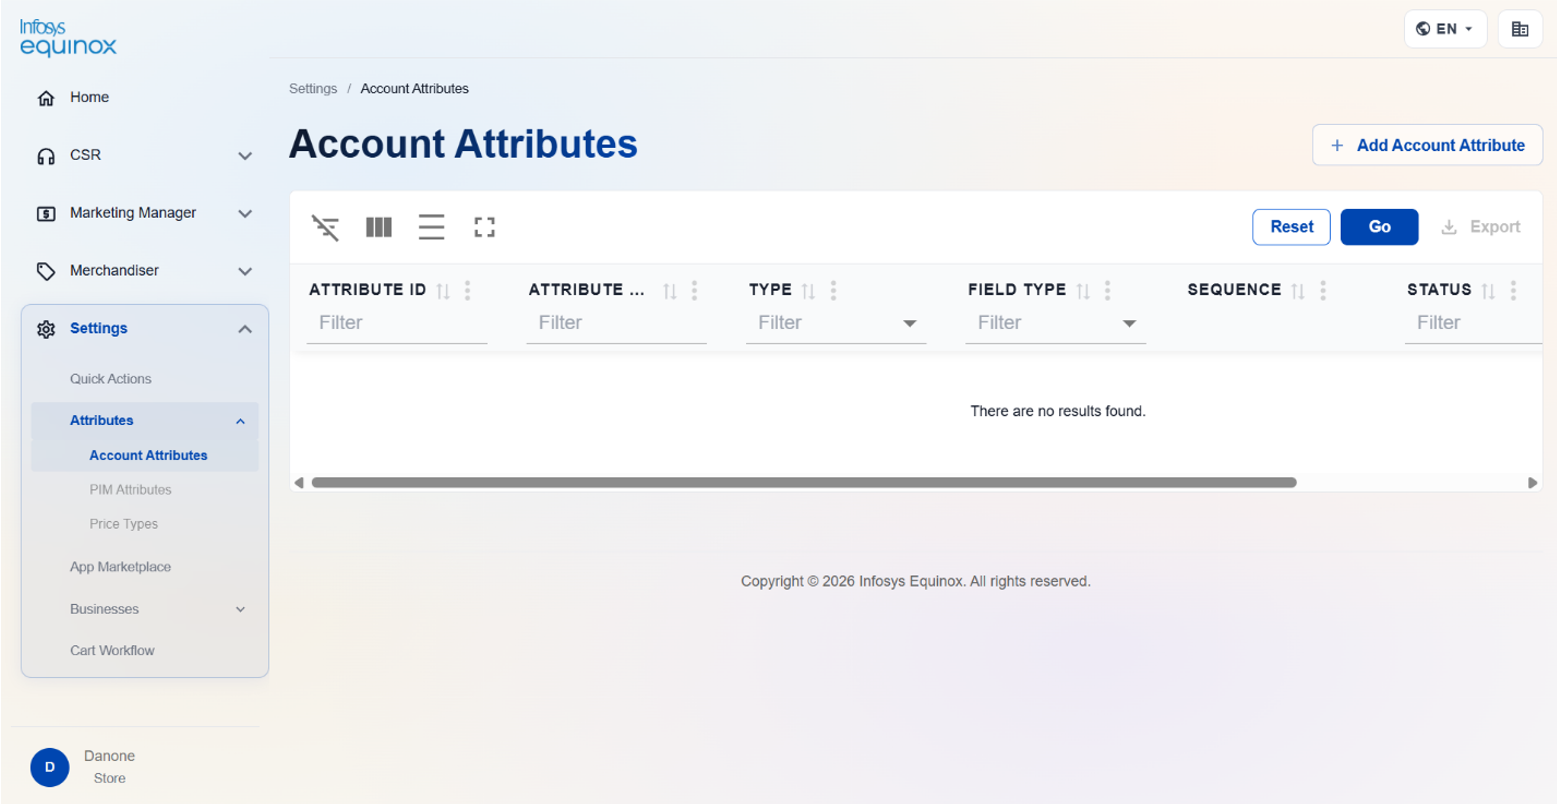
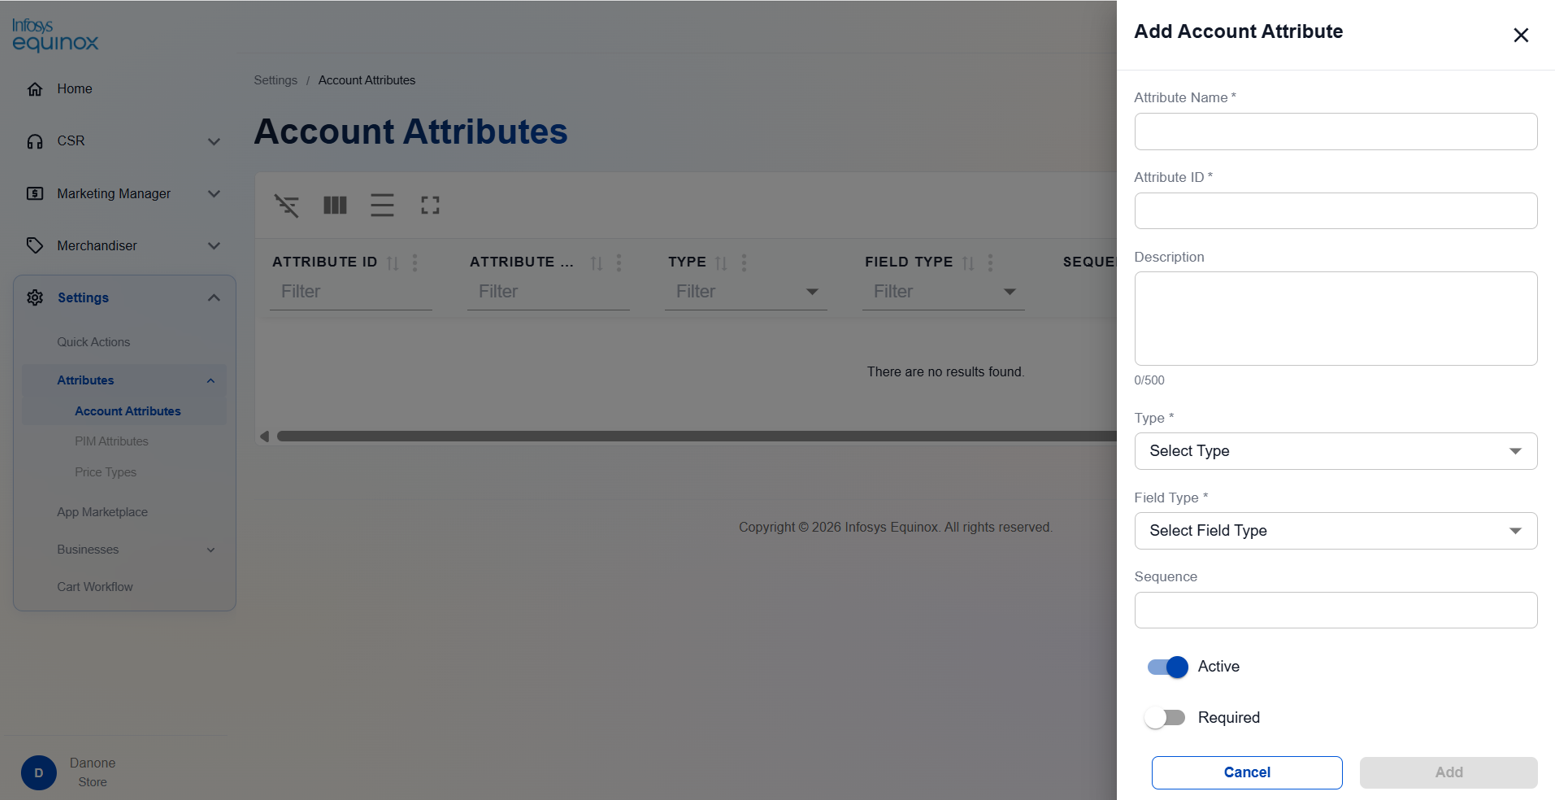
The Add Account Attribute panel opens on the right side of the screen.
Complete the following required fields:
| Field | Description | Notes |
|---|---|---|
| Attribute Name | Enter a human-readable label for the attribute displayed in the account profile UI and admin views. | For example: Country Code, Contract Type. Minimum 2 characters, maximum 100. |
| Attribute ID | Enter a unique system identifier used in API payloads and integrations. | Use alphanumeric characters, hyphens, and underscores only; no spaces (for example: countryCode, contractType). Cannot be changed after the attribute is created. |
| Type | Select the entity scope for this attribute using the Select Type dropdown. | Select Accounts for account-level data, Contracts for contract-related data, Team for team records, Cost Center for cost center data, or Users to extend user records within the account. |
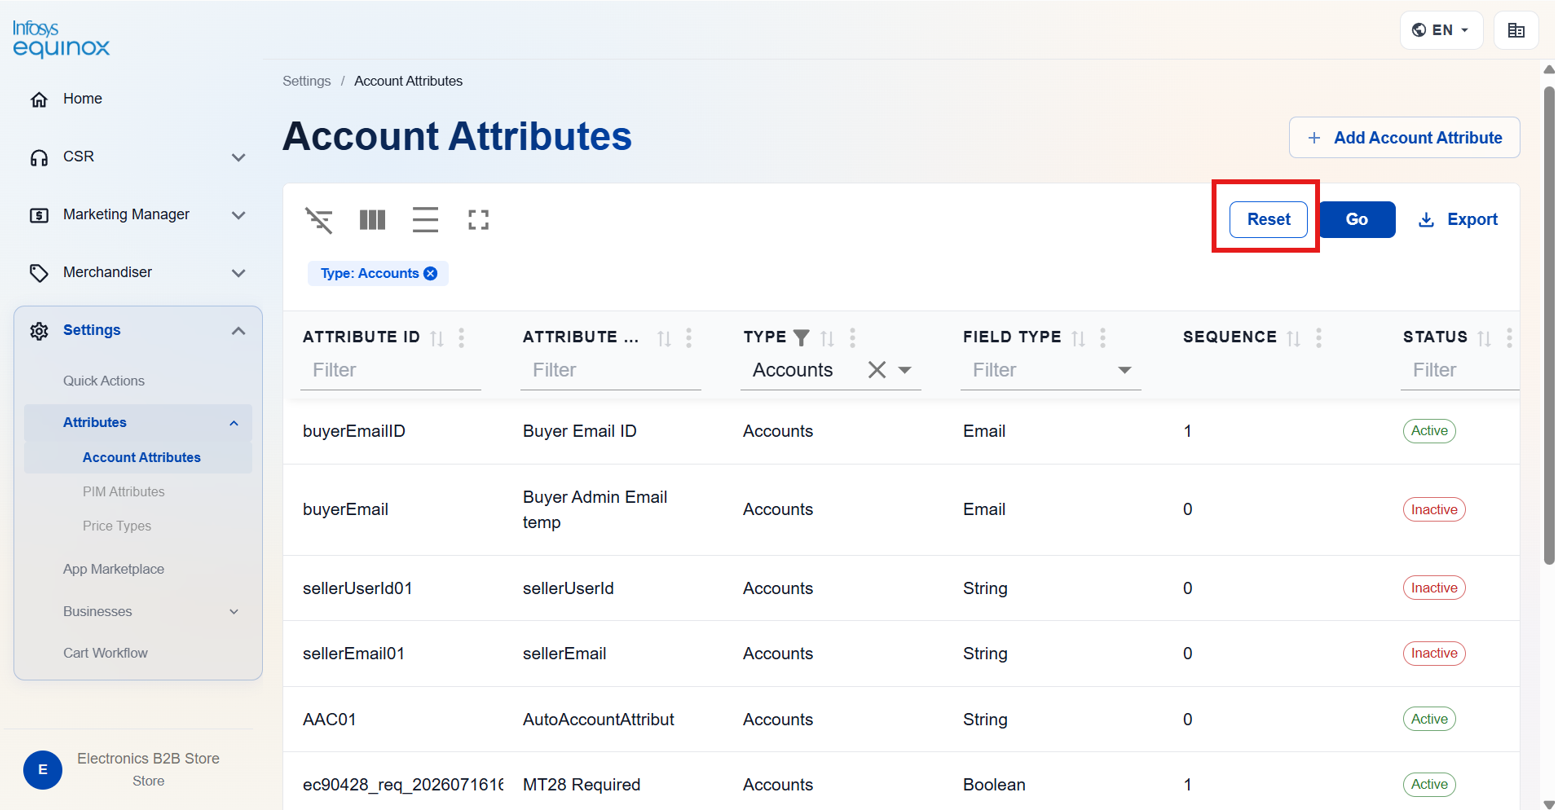
| Field Type | Select the data type of the attribute value using the Select Field Type dropdown. | Supported types: Boolean, Date, Decimal, Email, List, Multiple List, Number, String, Text Area, URL. See the Field Type Reference section for details. |
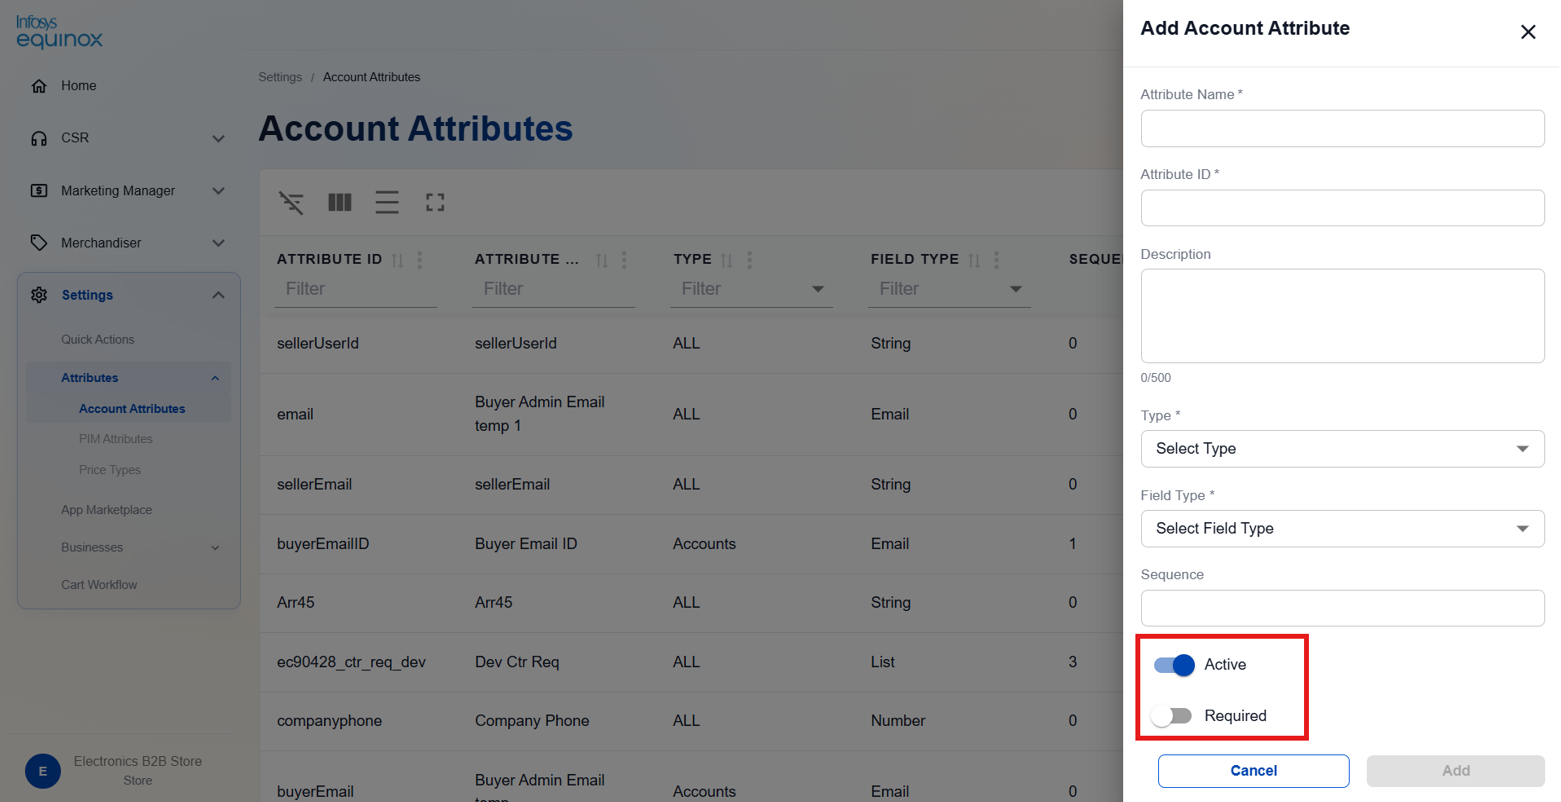
Configure the attribute behavior toggles:
| Toggle | Default | Description |
|---|---|---|
| Active | On | When enabled, the attribute is active and applied to account records. Disable to temporarily deactivate the attribute without deleting it. |
| Required | Off | When enabled, a value for this attribute must be provided whenever an account record is created or updated. |
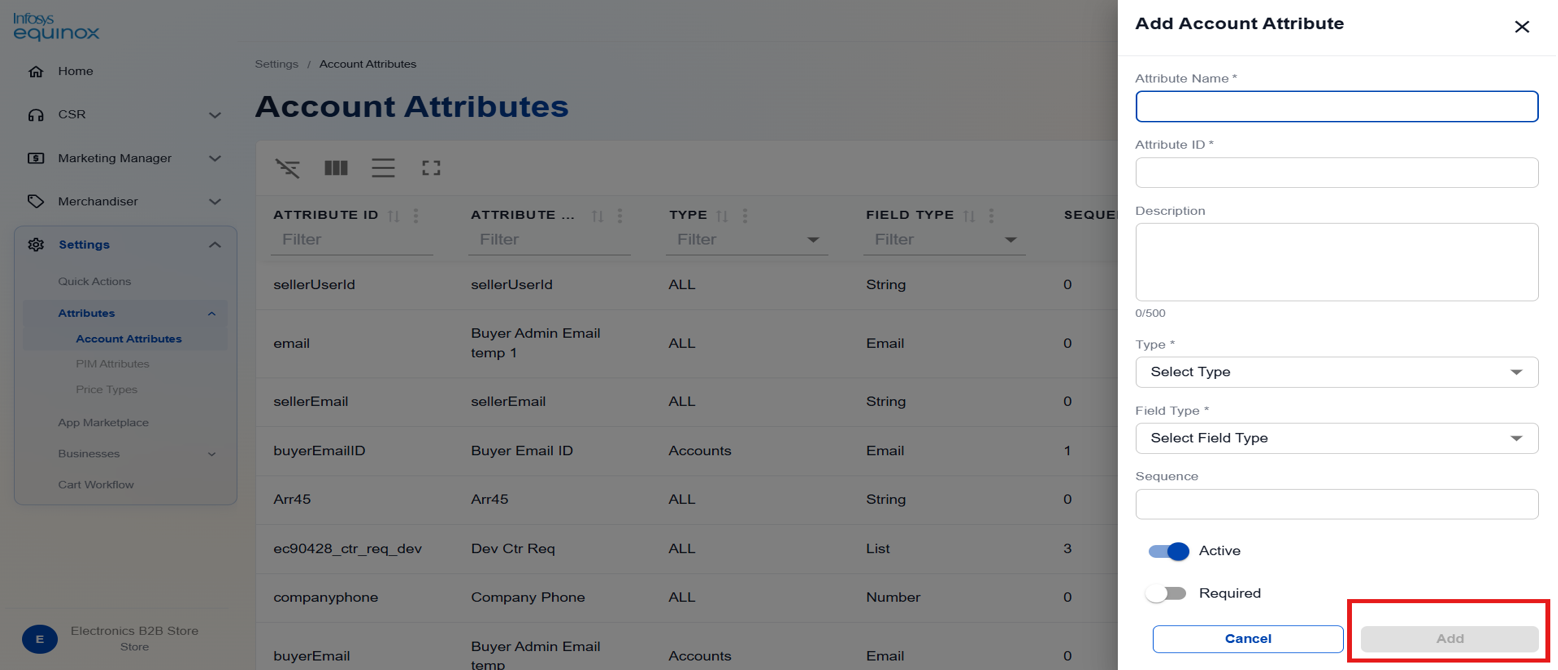
Click ADD to create the attribute. The new attribute appears in the Account Attributes table.
To discard the form without saving, click CANCEL.
Edit an Account Attribute
- Log in to the Infosys Equinox Admin Console using your credentials.
- On the left navigation panel, click Settings > Attributes > Account Attributes.
- Locate the attribute in the table.
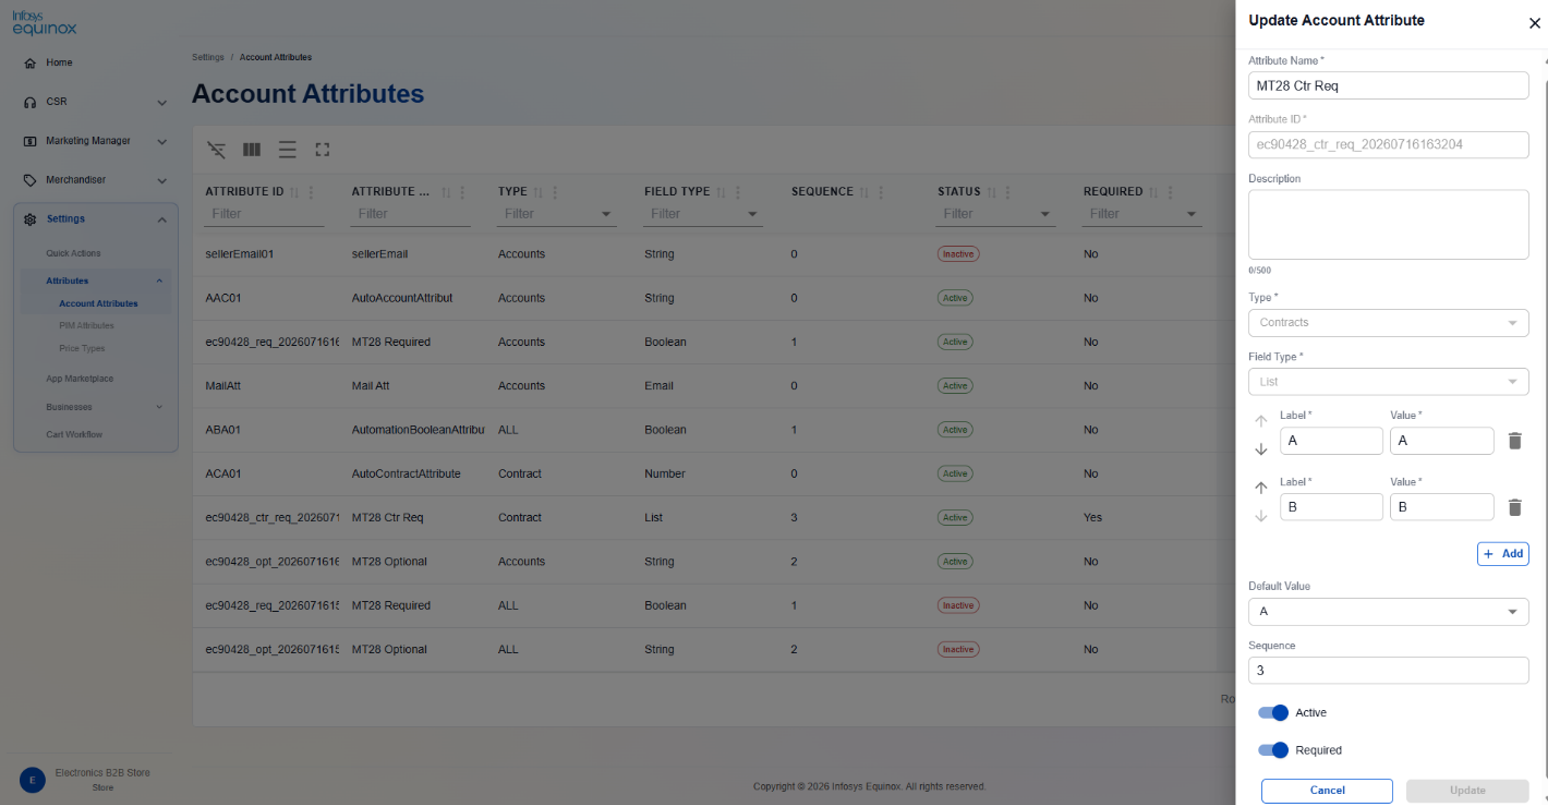
- Click the attribute name or its row action control. The attribute panel opens.
- Modify the required fields.
- The Attribute ID and Type fields cannot be edited after creation.
- Use the row-level action controls to toggle the attribute Status between Active and Inactive.
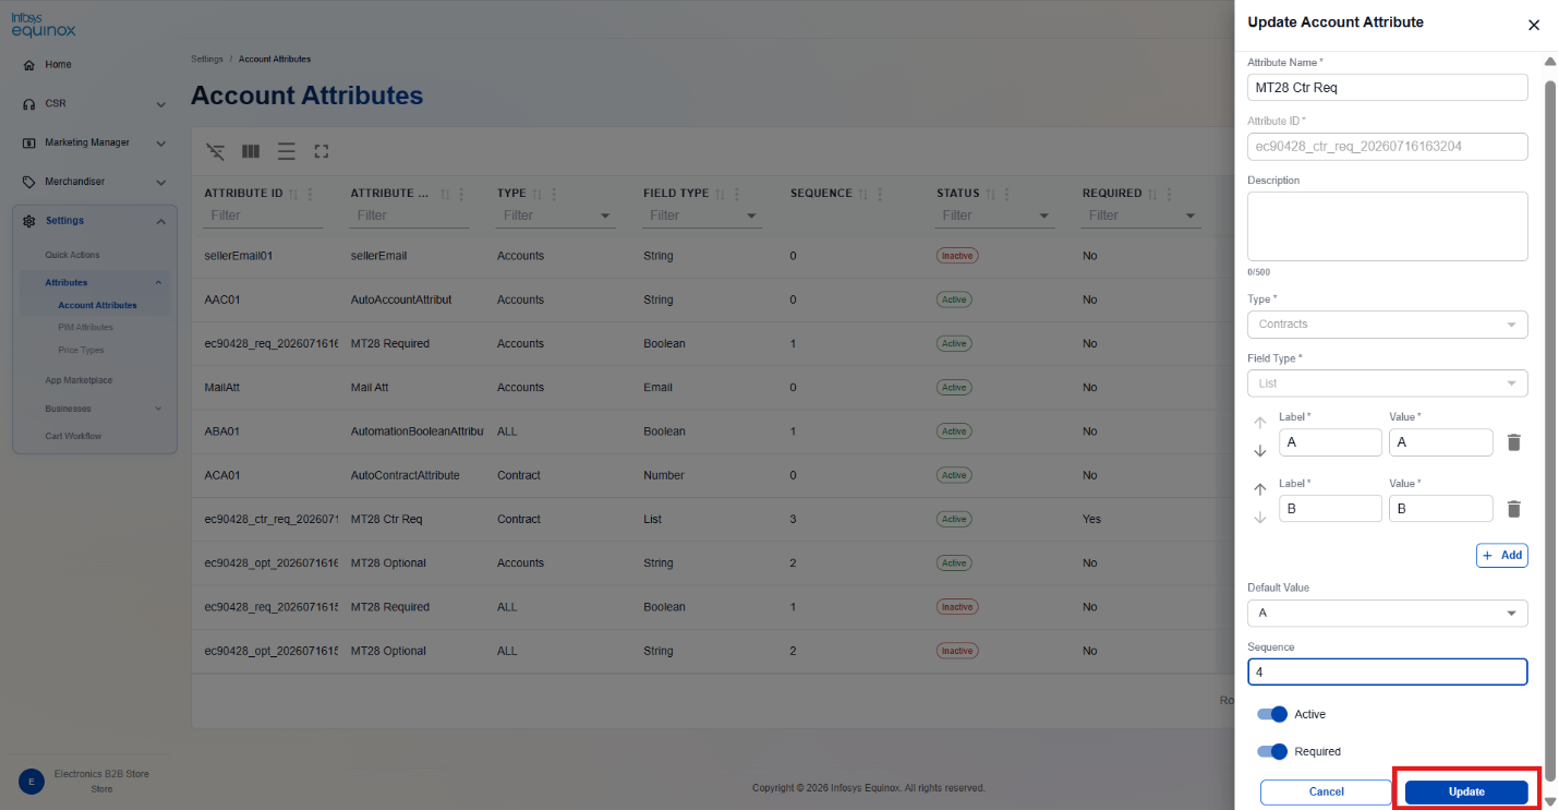
- Click UPDATE to save your changes.
Export Account Attributes
- Log in to the Infosys Equinox Admin Console using your credentials.
- On the left navigation panel, click Settings > Attributes > Account Attributes.
- Click EXPORT to download the current account attributes list. The export includes all attributes regardless of active filter settings.
Filter the Table
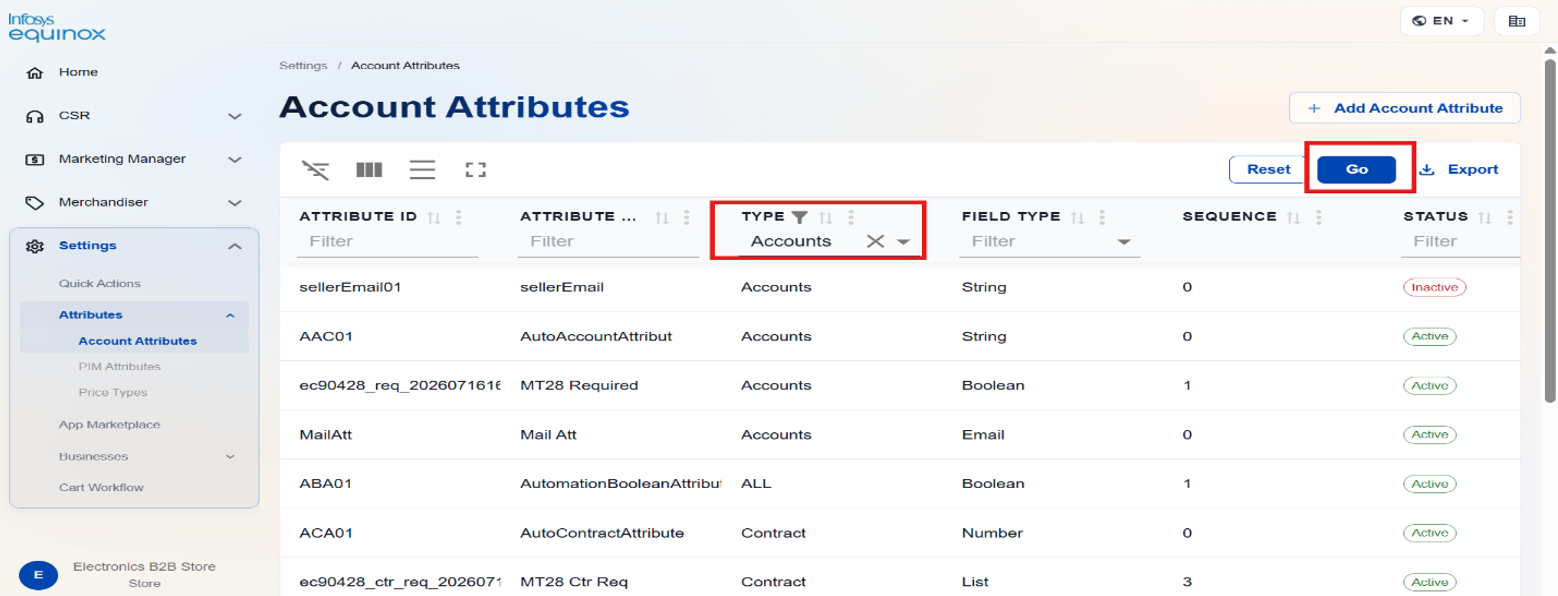
Use the filter row beneath each column header (such as Attribute ID, Attribute Name, Type, Field Type, Sequence, or Status) by typing in the respective field. Click GO to apply the filters.
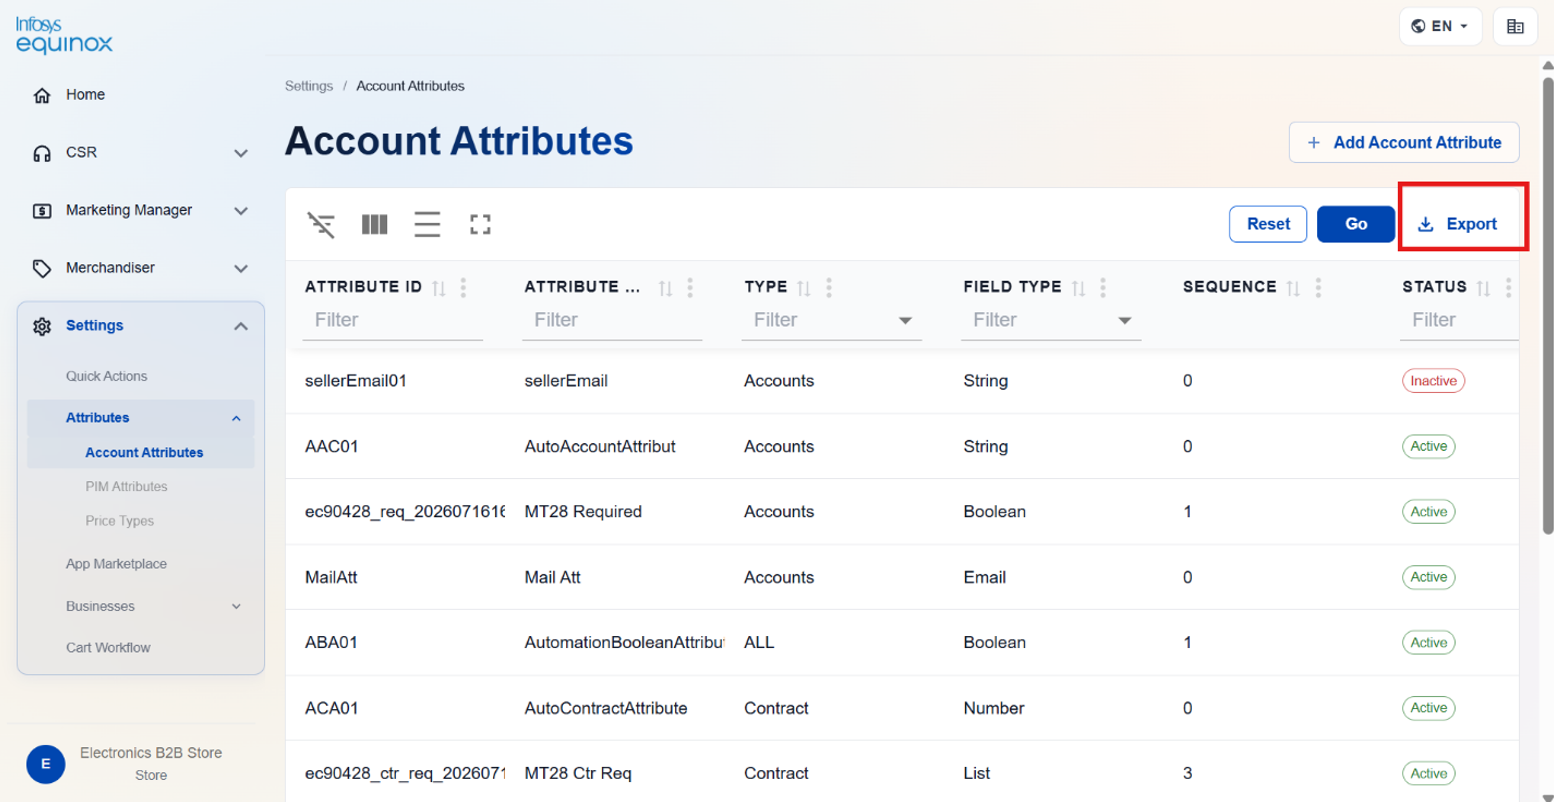
Note: To clear all active filters and return to the default view, click RESET.
Field Type Reference
The Field Type dropdown determines the kind of data the attribute stores and how it is rendered in forms and processed in integrations.
| Field Type | Description | Example Use Case |
|---|---|---|
| Boolean | Stores a true/false value. Renders as a toggle or checkbox in the profile form. | isLoyaltyEnabled, marketingOptIn |
| Date | Stores a calendar date value (without time). Renders as a date picker. | membershipExpiryDate, dateOfBirth |
| Decimal | Stores a numeric value that supports decimal places. | creditBalance, discountRate |
| Stores a value validated as an email address format. | secondaryEmail, billingContactEmail | |
| List | Stores a single value selected from a predefined list of allowed values. | customerTier (Bronze, Silver, Gold) |
| Multiple List | Stores multiple values selected from a predefined list. | preferredCategories, subscribedNotifications |
| Number | Stores a whole integer numeric value. | loyaltyPoints, referralCount |
| String | Stores free-form text. | csrNotes, externalCustomerID |
| Text Area | Stores long-form free text. Renders as a multi-line input. | internalNotes, detailedDescription |
| URL | Stores a value validated as a URL. | profileLink, documentURL |
PIM Attributes
PIM Attributes extend the default product and SKU records with additional descriptive or operational data specific to the business. These attributes are also available as filter facets in catalog search and as rule conditions in the Promotions microservice.
After creating a product attribute, add it to a Product Attributes Group to enable it at the product or SKU level on the product detail page.
The Product Attributes page is organized into the following tabs:
| Tab | Description |
|---|---|
| ATTRIBUTES | The default view listing all individual product and SKU-level attributes. After the attributes are created, they must be grouped via the Product Attributes Group tab. |
| ATTRIBUTES GROUP | Manage logical groupings of product attributes for organized display on product detail pages. |
| IMPORT | Bulk import product attributes from an CSV file. |
Viewing Product Attributes
- Log in to the Infosys Equinox Admin Console using your credentials.
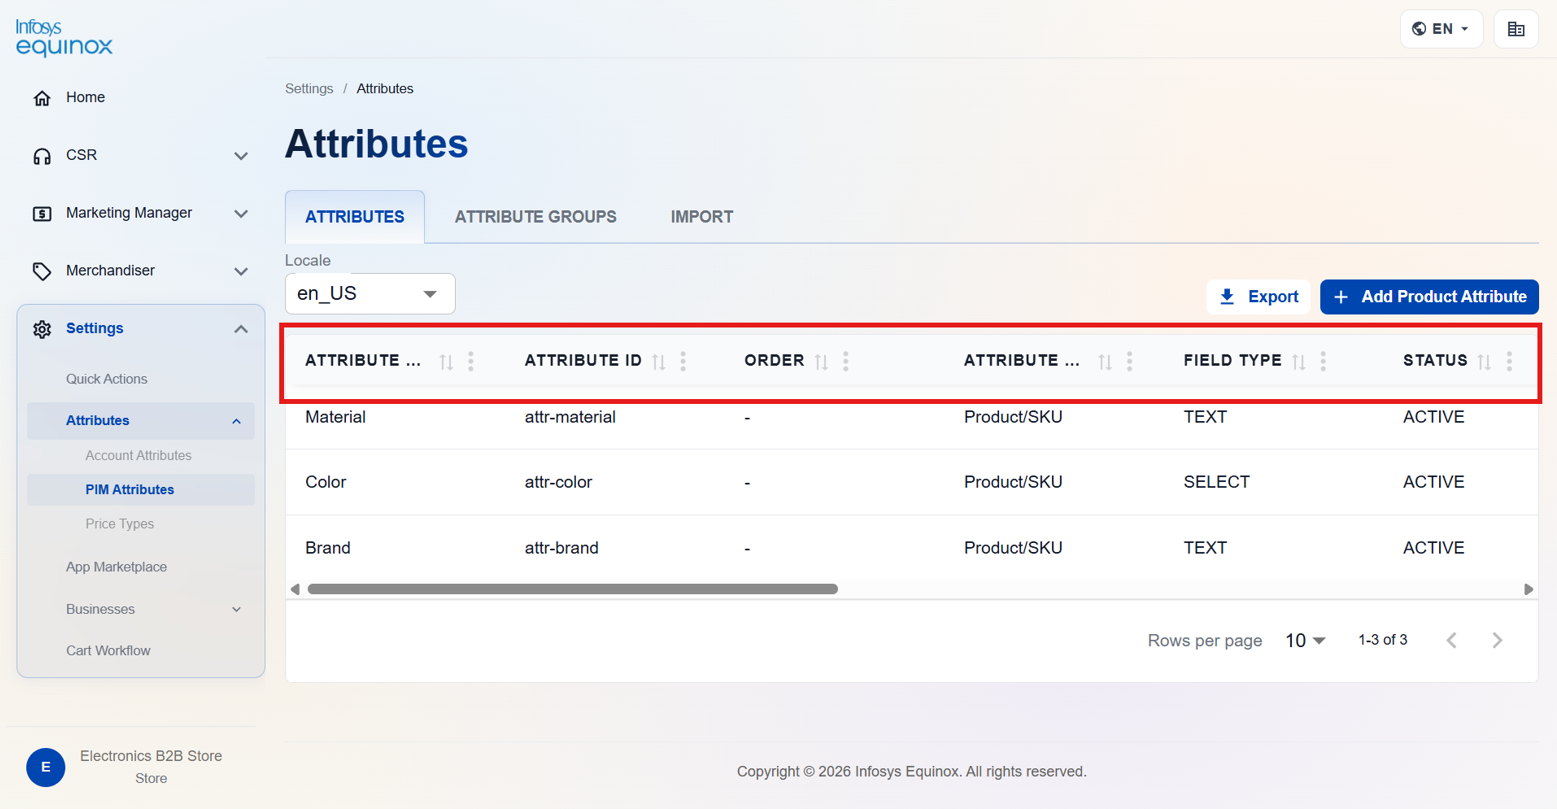
- On the left navigation panel, click Settings > Attributes > PIM Attributes.
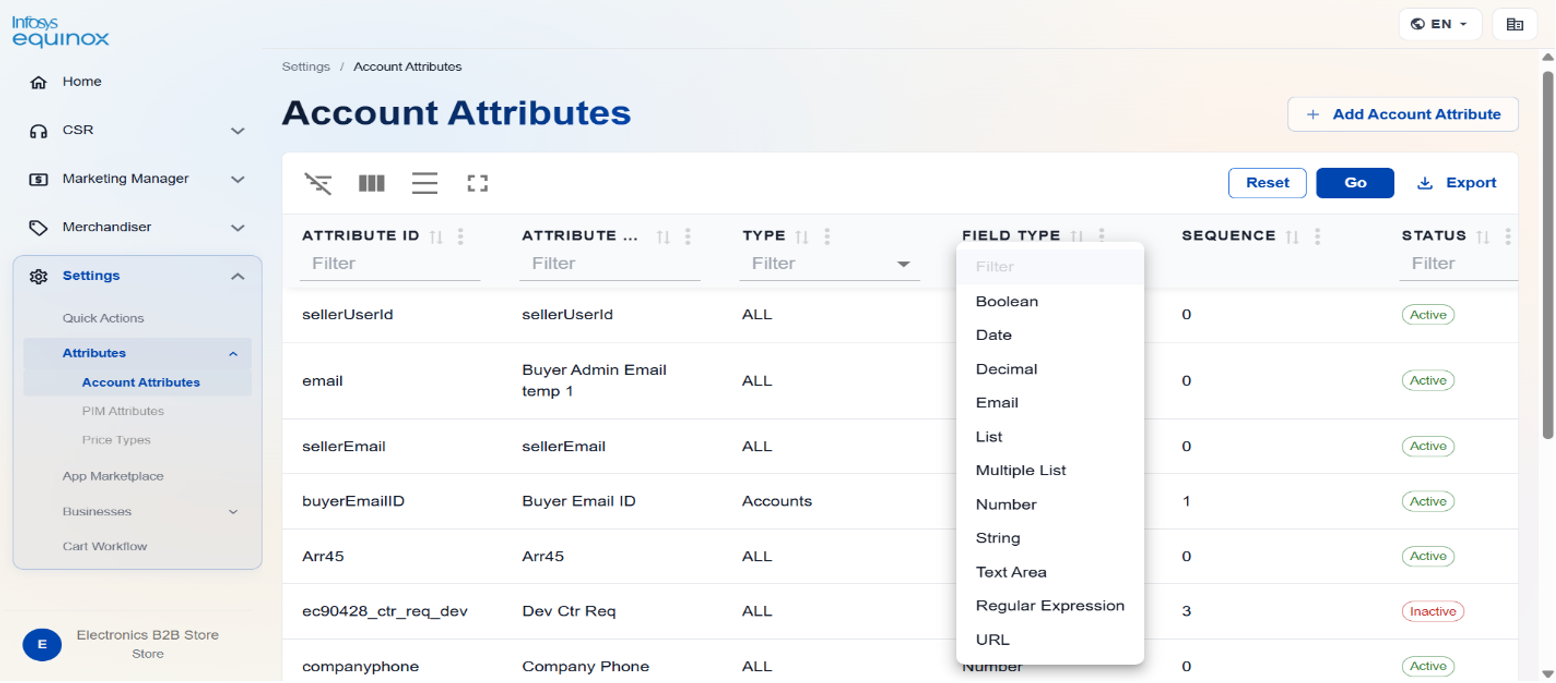
The Product Attributes page opens at the path: Settings > Attributes > Product Attributes. A Locale dropdown in the top-right corner controls the locale context for locale-specific attributes.
The Product Attributes table displays the following details:
| Column | Description |
|---|---|
| Attribute Name | The human-readable name of the attribute displayed on product pages. Sortable and filterable by text. |
| Attribute ID | The unique system identifier for the attribute, used in API calls and integrations. Sortable and filterable by text. |
| Attribute Level | The scope at which the attribute applies. Common values include Products (product-level only) and Product/SKU (both product and variant level). Filterable by dropdown. |
| Field Type | The data type of the attribute value. Supported types include Boolean, String, List Item, Decimal, Model, Number, and others. Filterable by dropdown. |
| Status | The activation state of the attribute: Active or Inactive. Filterable by dropdown. |
Create a Product Attribute
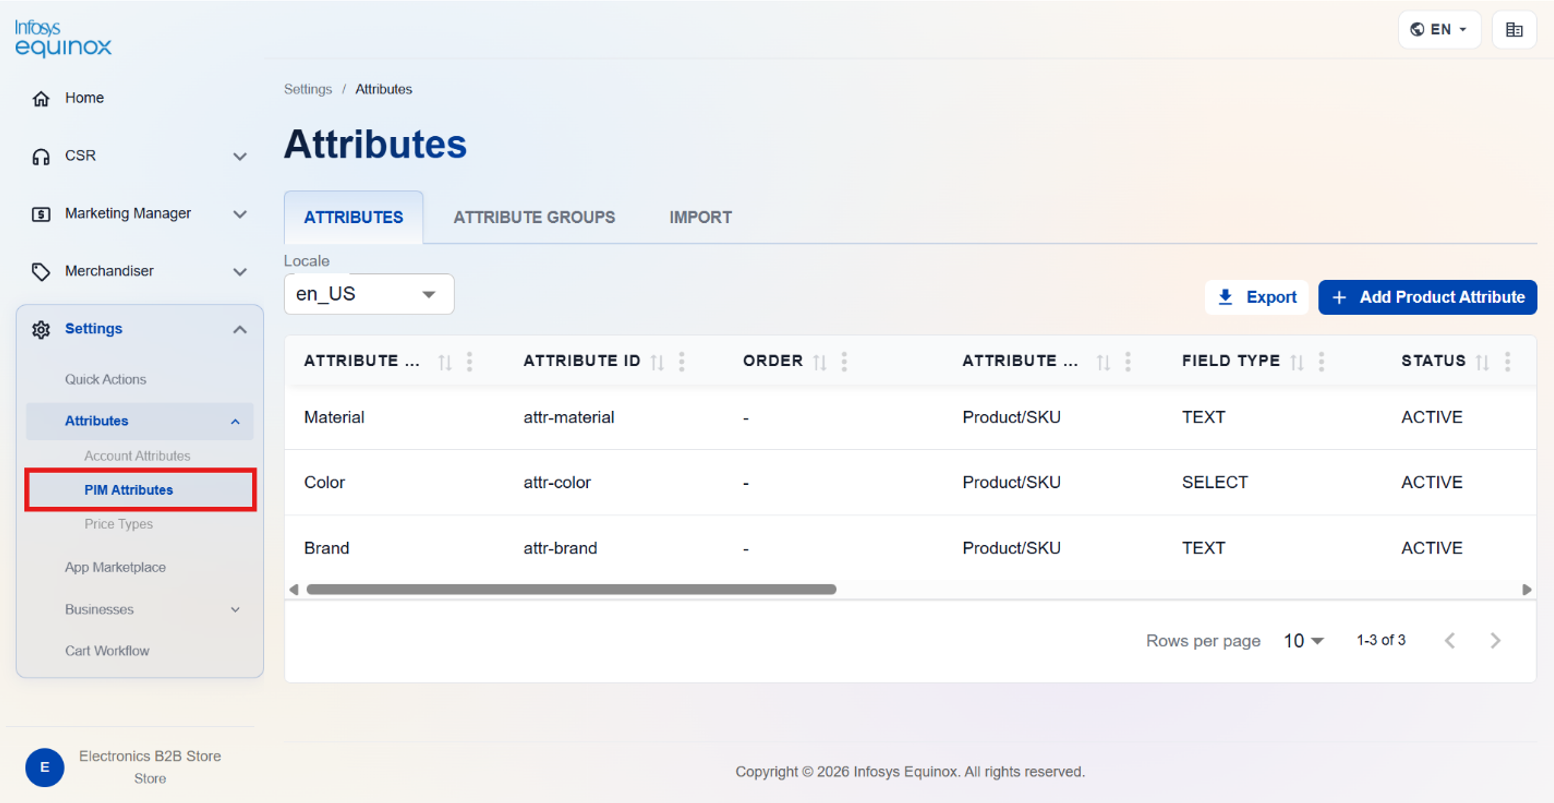
When a store is created, default product attributes are generated automatically. Custom product attributes can be created in addition to the defaults.
To create a new custom product attribute:
- Log in to the Infosys Equinox Admin Console using your credentials.
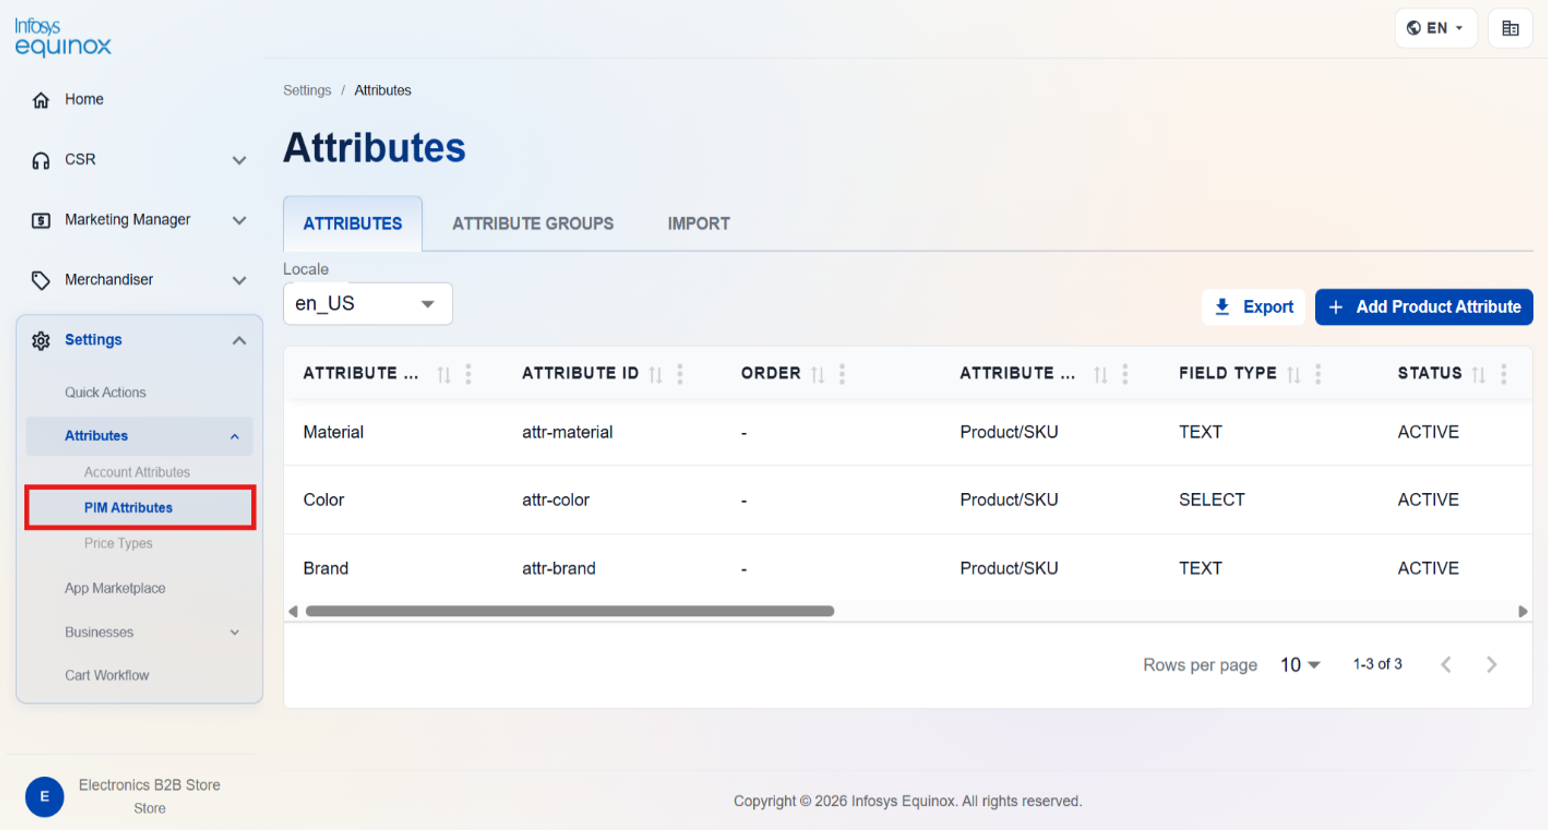
- On the left navigation panel, click Settings > Attributes > PIM Attributes.
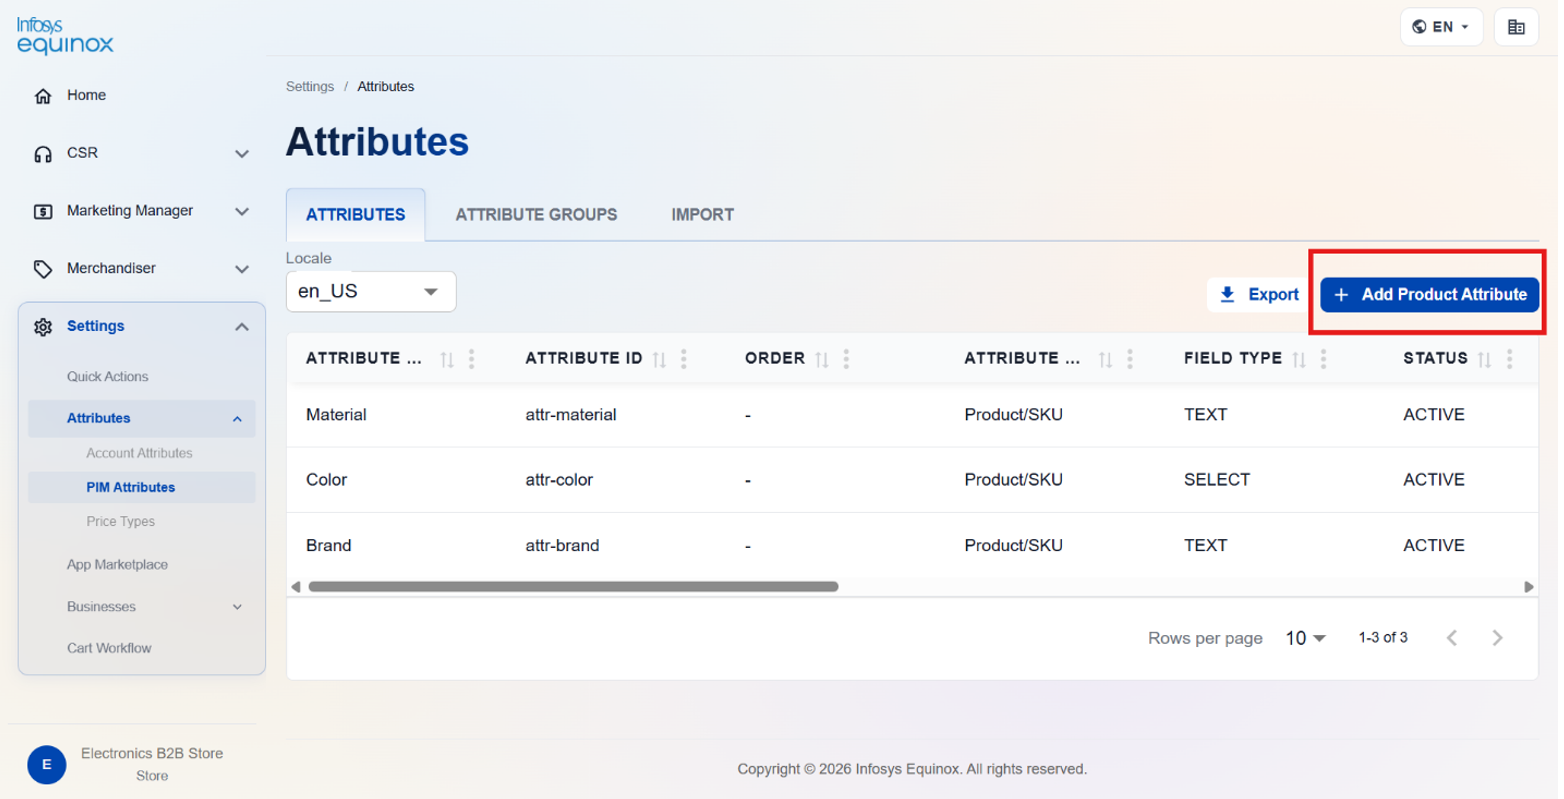
- On the ATTRIBUTES tab, click ADD PRODUCT ATTRIBUTE.
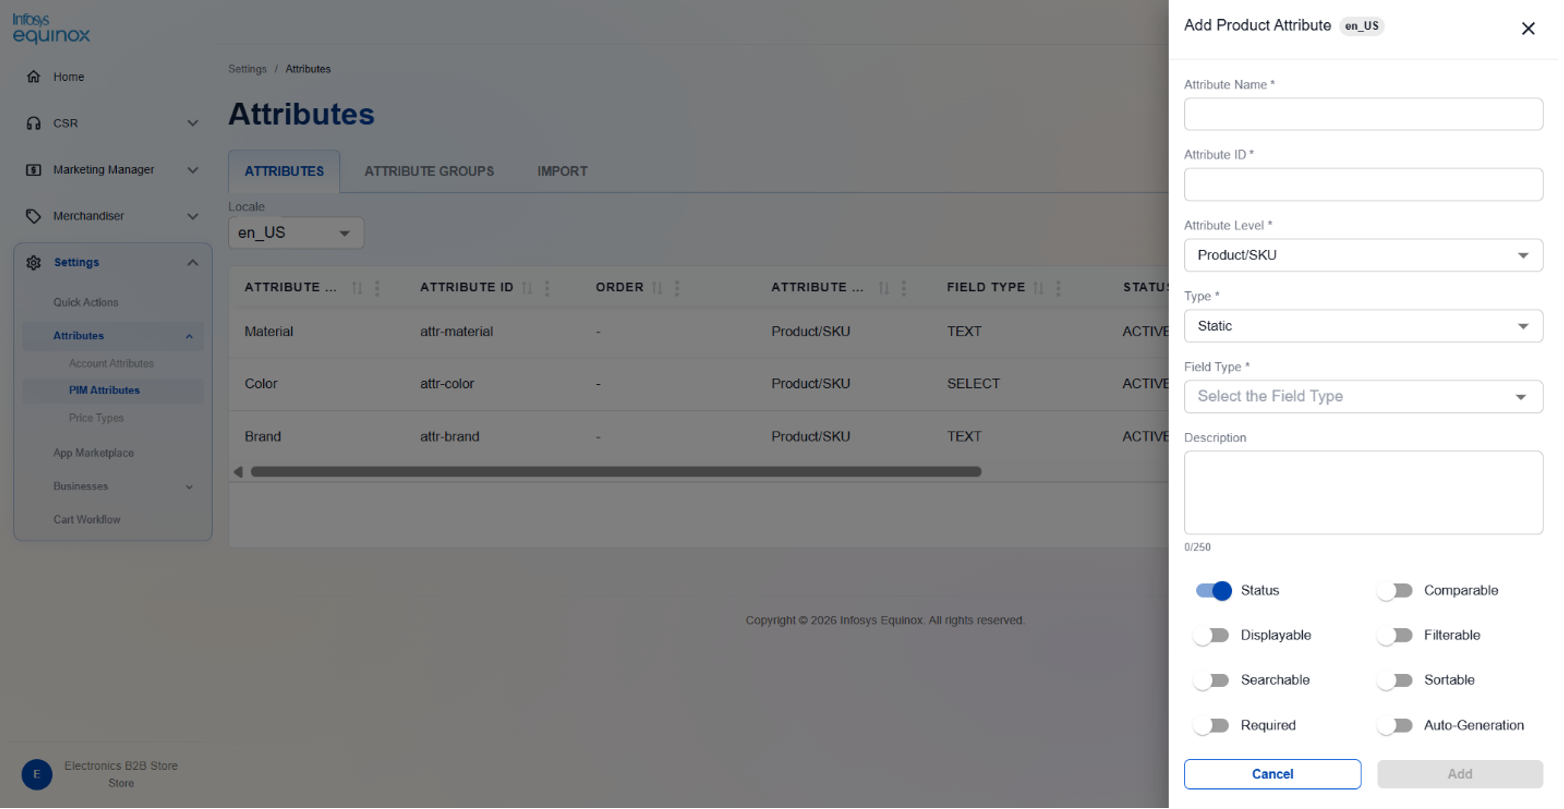
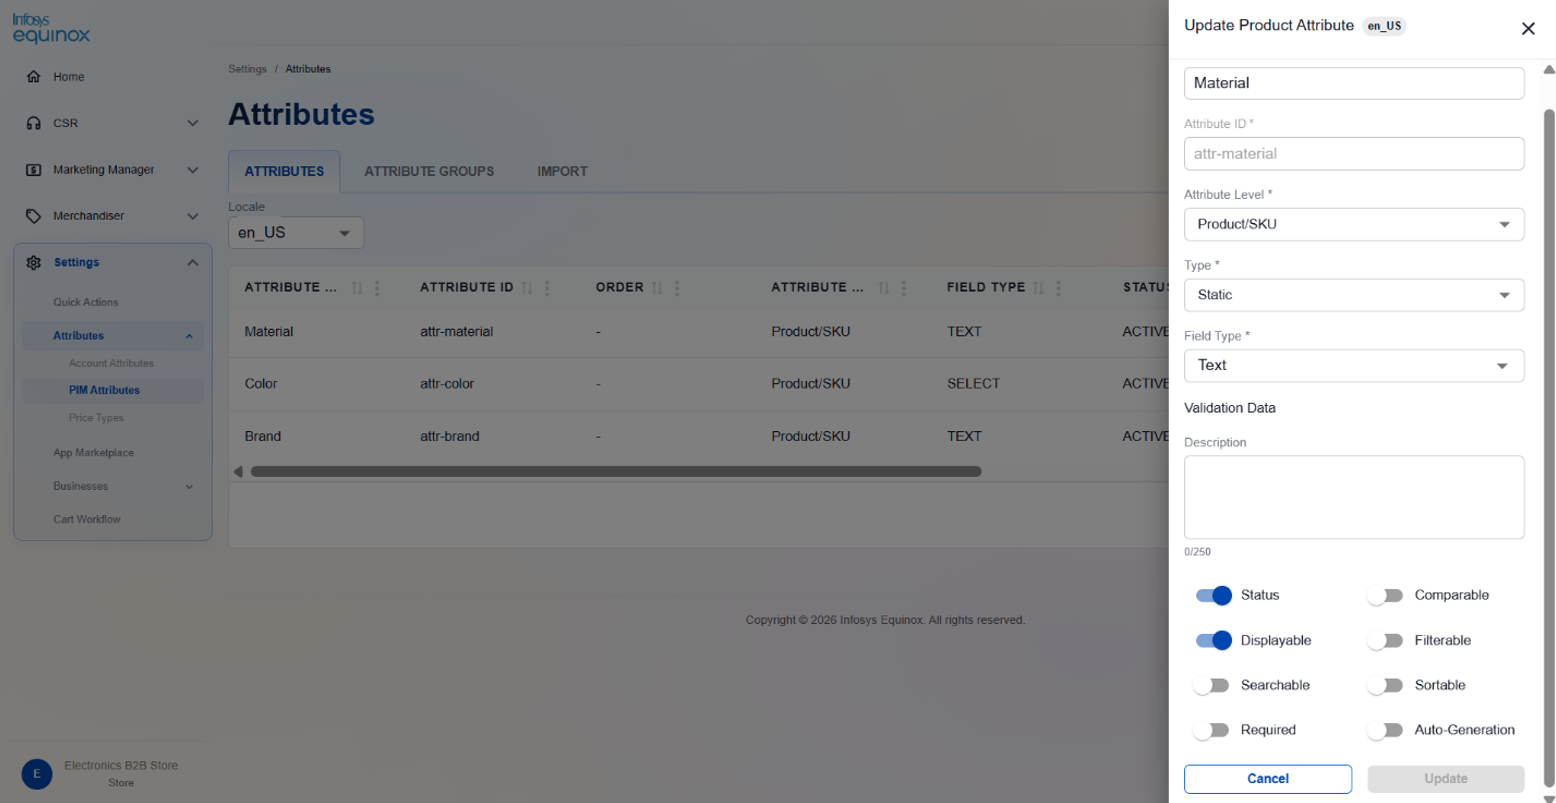
- In the Add Product Attribute panel that opens on the right, complete the form:
| Field | Description |
|---|---|
| Attribute Name | Enter a human-readable label for the attribute. Minimum 2 characters, maximum 100. |
| Attribute ID | Enter a unique system identifier using alphanumeric characters, hyphens, and underscores; no spaces. Cannot be changed after creation. |
| Attribute Level | Select the scope. Defaults to Product/SKU. |
| Type | Select the attribute value type: Static (standard field types) or Dynamic (image-based field types). Defaults to Static. |
| Field Type | Select the data type. Static types include Boolean, Date, Decimal, Email, Group List, HTML Content, List Item, Model, Multiple List, Optional Multiple List, Number, Regular Expression, String, Text Area, URL. Dynamic types include Image and Image with Caption. |
| Description | Enter an optional description for the attribute. Maximum 500 characters. |
Configure the attribute behavior toggles:
| Toggle | Default | Description |
|---|---|---|
| Status | On | When enabled, the attribute is active and applied to product records. |
| Comparable | Off | When enabled, the attribute can be used in product comparison views. |
| Displayable | Off | When enabled, the attribute value is displayed on the product detail page. |
| Filterable | Off | When enabled, the attribute is available as a filter facet in catalog search. |
| Searchable | Off | When enabled, the attribute is indexed for full-text search. |
| Sortable | Off | When enabled, product lists can be sorted by this attribute value. |
| Required | Off | When enabled, the attribute must be populated on every product or SKU record. |
| Locale Restricted | Off | When enabled, the attribute value is locale-specific. |
- Click ADD to create the attribute. After creation, add the attribute to a Product Attributes Group to display it on product records. To discard the changes, click CANCEL.
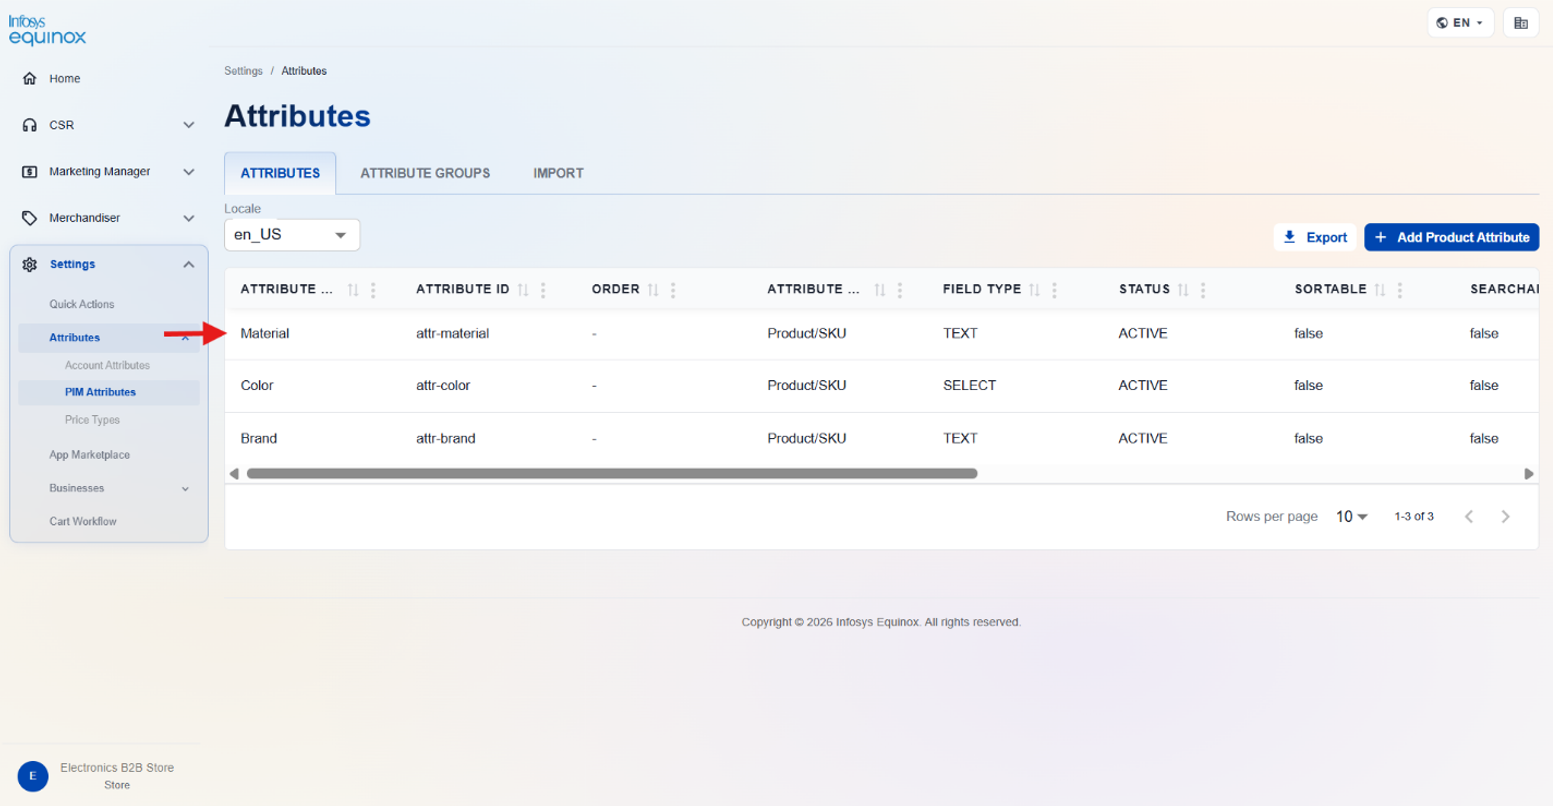
Edit a Product Attribute
- Log in to the Infosys Equinox Admin Console using your credentials.
- On the left navigation panel, click Settings > Attributes > PIM/Product Attributes.
- Locate the attribute in the table.
- Click the attribute row.
- Modify the required fields in the edit panel.
- The Attribute ID and Type fields cannot be edited after creation.
- Use the row-level action controls to toggle the attribute Status between Active and Inactive.
- Click UPDATE to save your changes.
Attributes Group
The PRODUCT ATTRIBUTES GROUP tab lists logical groupings of product attributes. Attribute groups control how attributes are organized on product detail pages in the admin console and on the Storefront.
Note: Before creating a product attribute group, create the product attributes you intend to group.
Viewing Product Attributes Group
- Log in to the Infosys Equinox Admin Console using your credentials.
- On the left navigation panel, click Settings > Attributes > PIM Attributes.
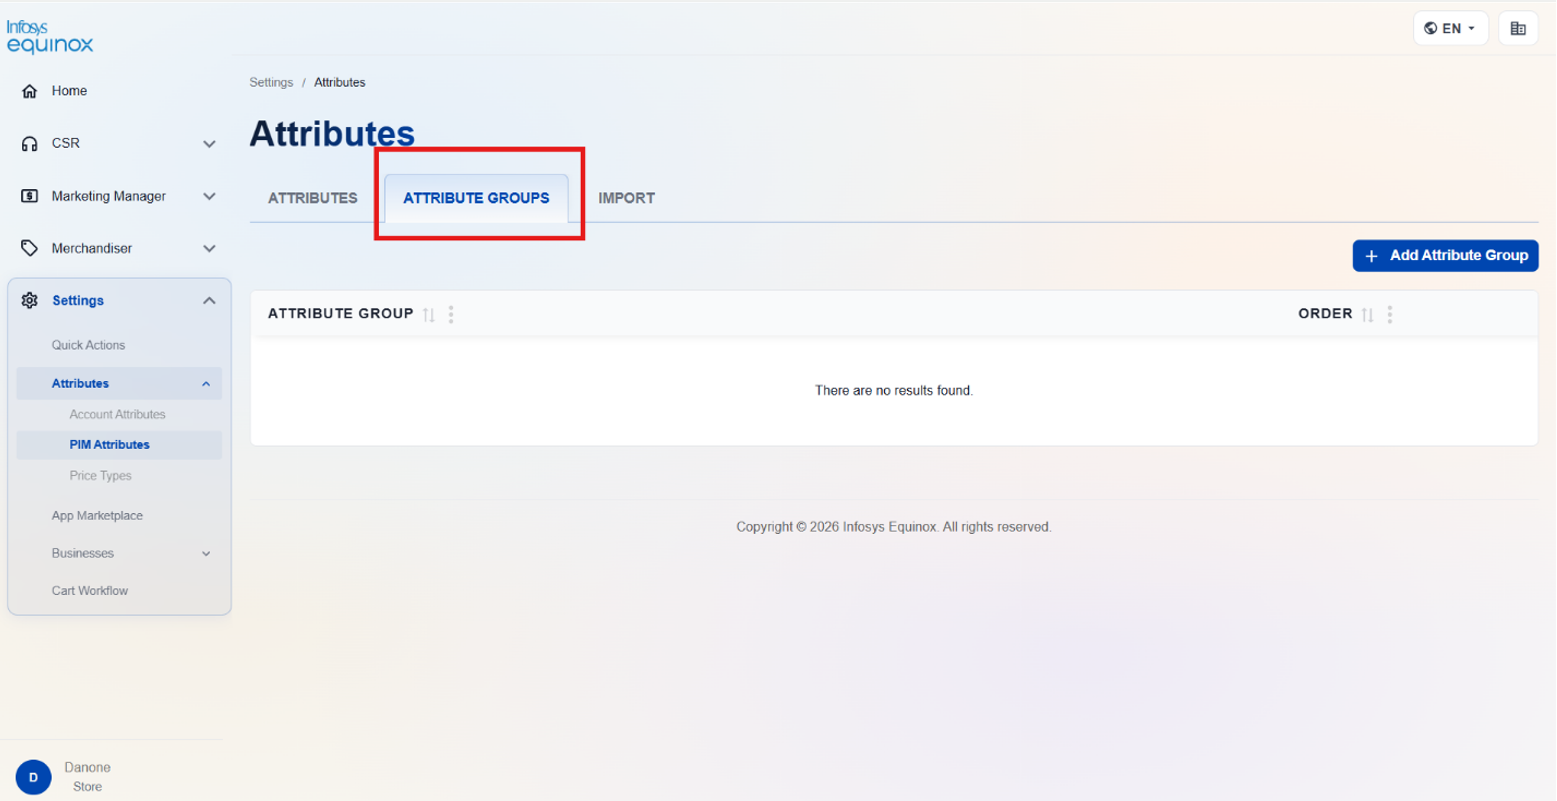
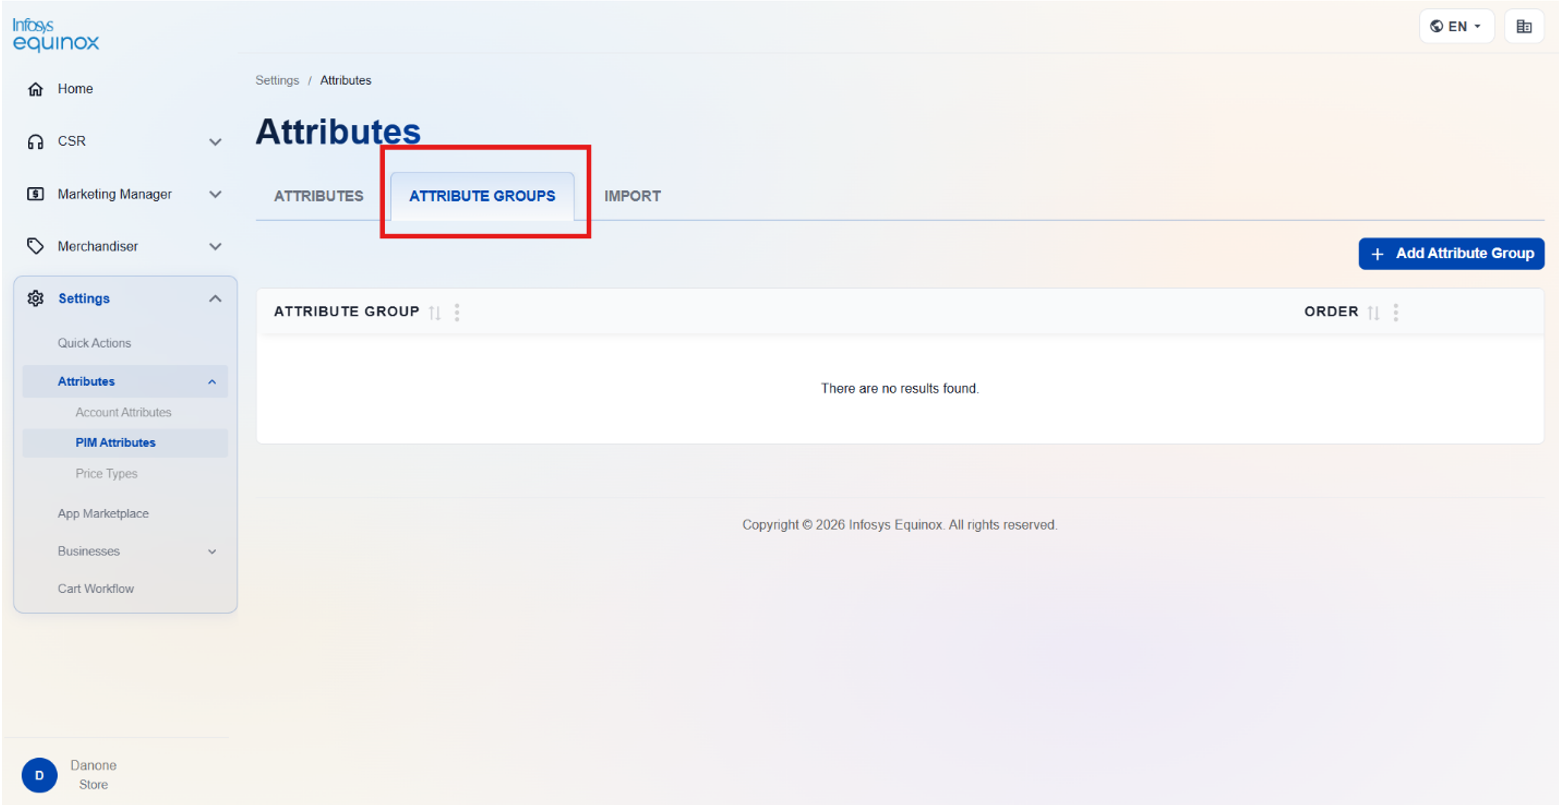
- On the Product Attributes page, click the PRODUCT ATTRIBUTES GROUP tab.
The table displays Attribute Group and Order columns.
| Column | Description |
|---|---|
| Attribute Group | The name of the product attribute group. Filterable by text using the Filter by Attribute Group field. |
| Order | The numeric display order of the group. Filterable by text using the Filter by Order field. |
Create a PIM Attribute Group
- Log in to the Infosys Equinox Admin Console using your credentials.
- On the left navigation panel, click Settings > Attributes > PIM Attributes.
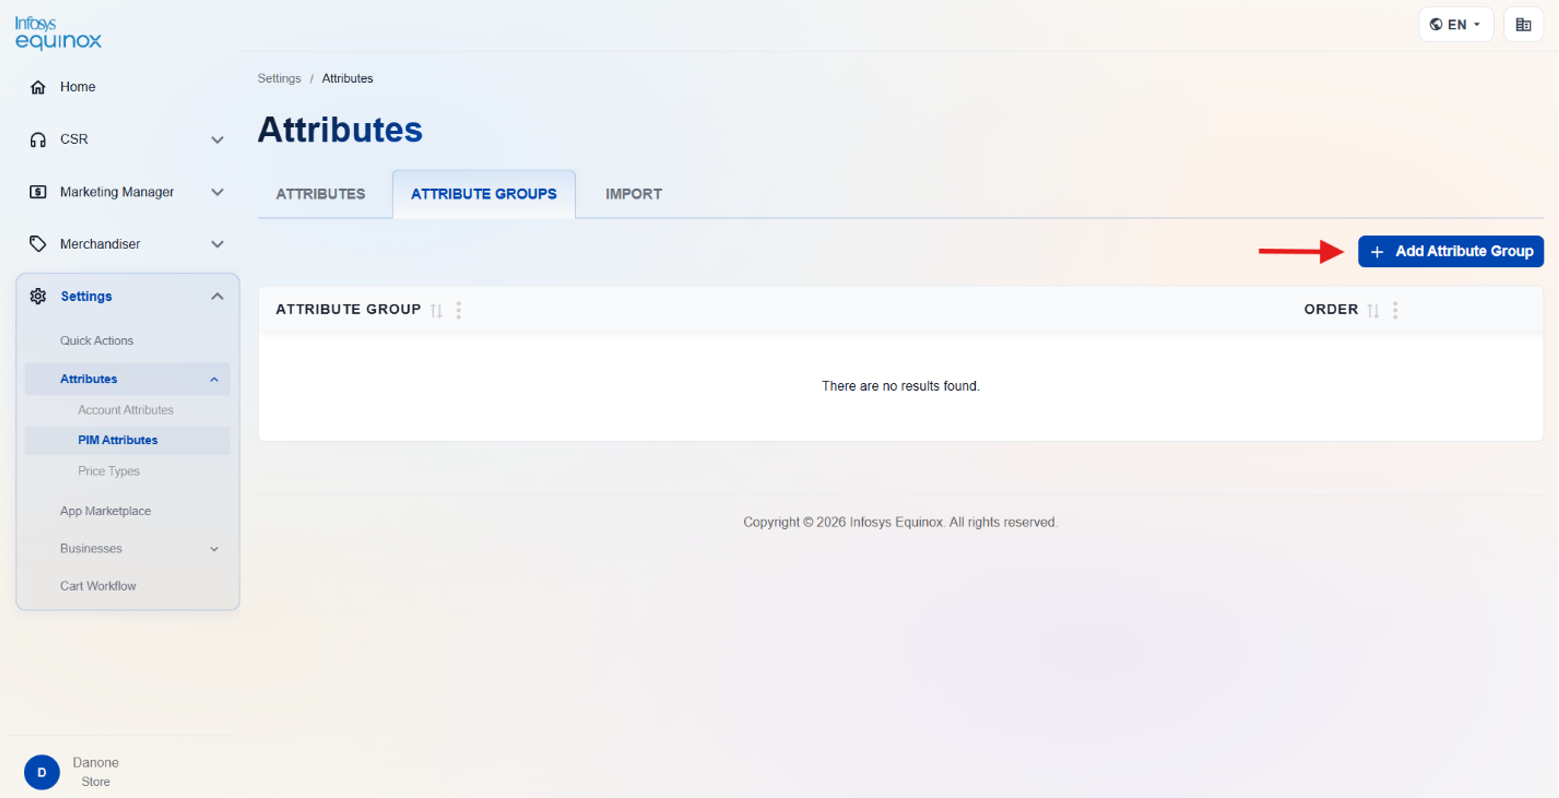
- On the PIM Attributes page, click the PRODUCT ATTRIBUTES GROUP tab.
- Click ADD ATTRIBUTE GROUP.
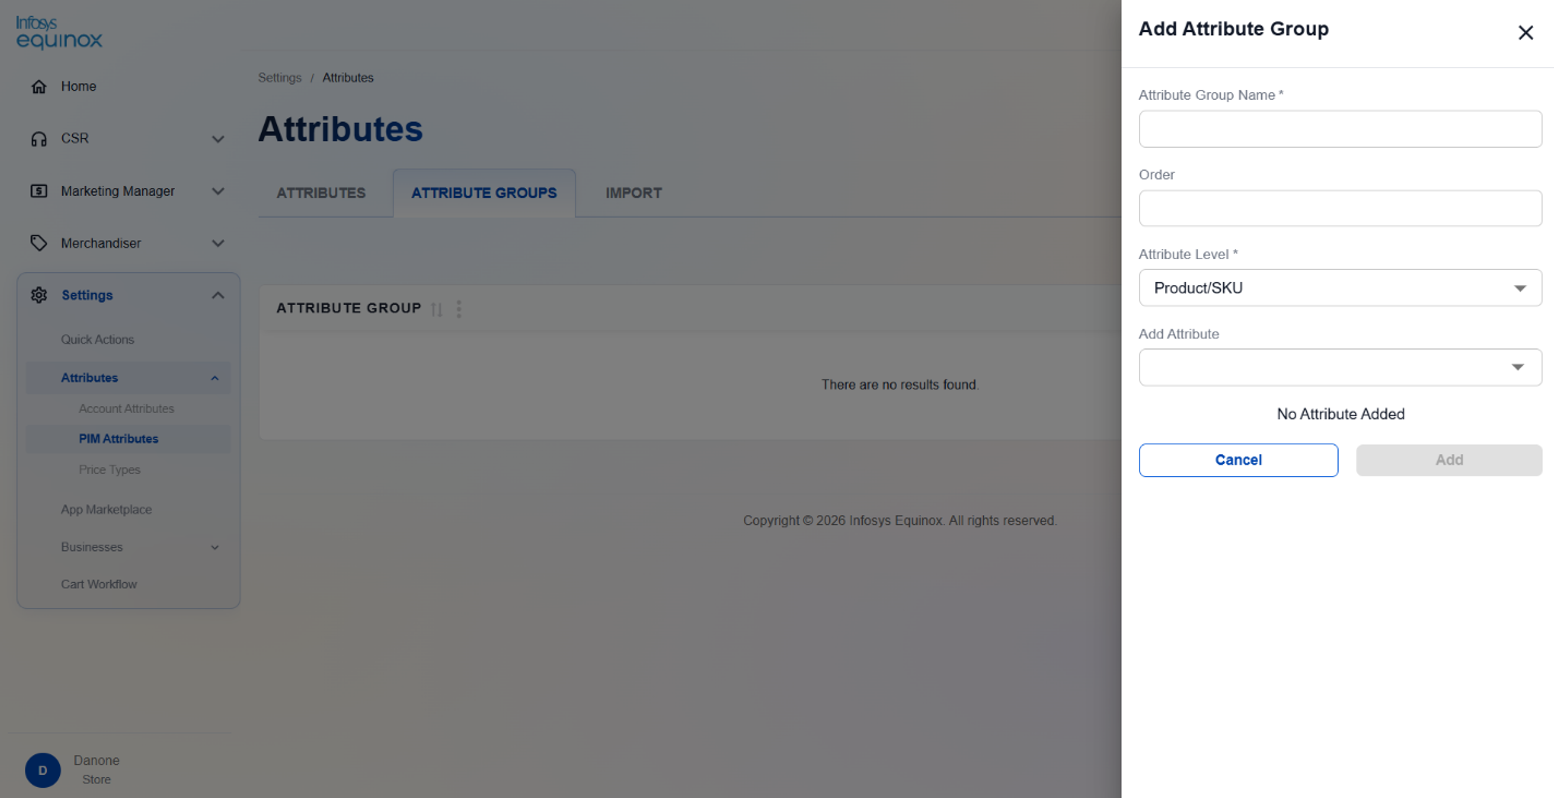
- In the Add Attribute Group panel, complete the form:
| Field | Description |
|---|---|
| Attribute Group Name | Enter a unique name for the attribute group. |
| Order | Enter a numeric value to control the display order of the group. |
| Add Attribute | Select one or more existing product attributes to assign to this group using the dropdown. Only attributes that have already been created appear in this list. |
- Click ADD to save the group. To discard the changes, click CANCEL.
Import PIM Attributes
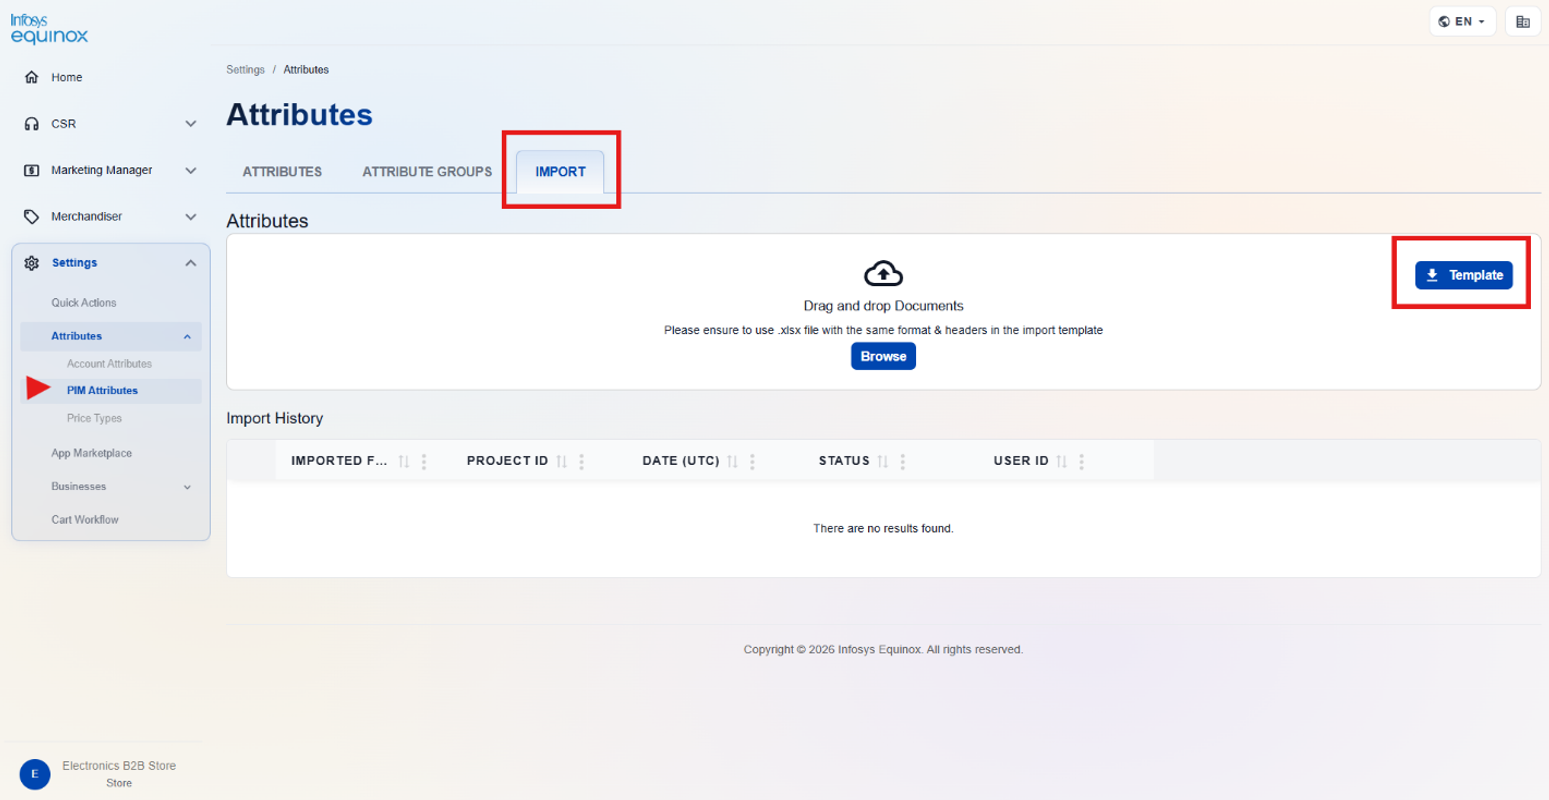
The IMPORT tab enables bulk creation of product attributes by uploading a pre-formatted XLSX file. An Import History table records all previous import attempts.
Warning: The file must use the .xlsx format with the same column headers as the import template. Using an incorrect format or modifying the headers will cause the import to fail.
Download the Import Template
- Log in to the Infosys Equinox Admin Console using your credentials.
- On the left navigation panel, click Settings > Attributes > PIM Attributes.
- On the Attributes page, click the IMPORT tab.
- Click the TEMPLATE button in the top-right corner to download the official import template.
- Populate the template in Excel or a compatible spreadsheet application, ensuring all required columns and headers match the template format exactly.
Import Product Attributes
- Log in to the Infosys Equinox Admin Console using your credentials.
- On the left navigation panel, click Settings > Attributes > PIM Attributes.
- On the Attributes page, click the IMPORT tab.
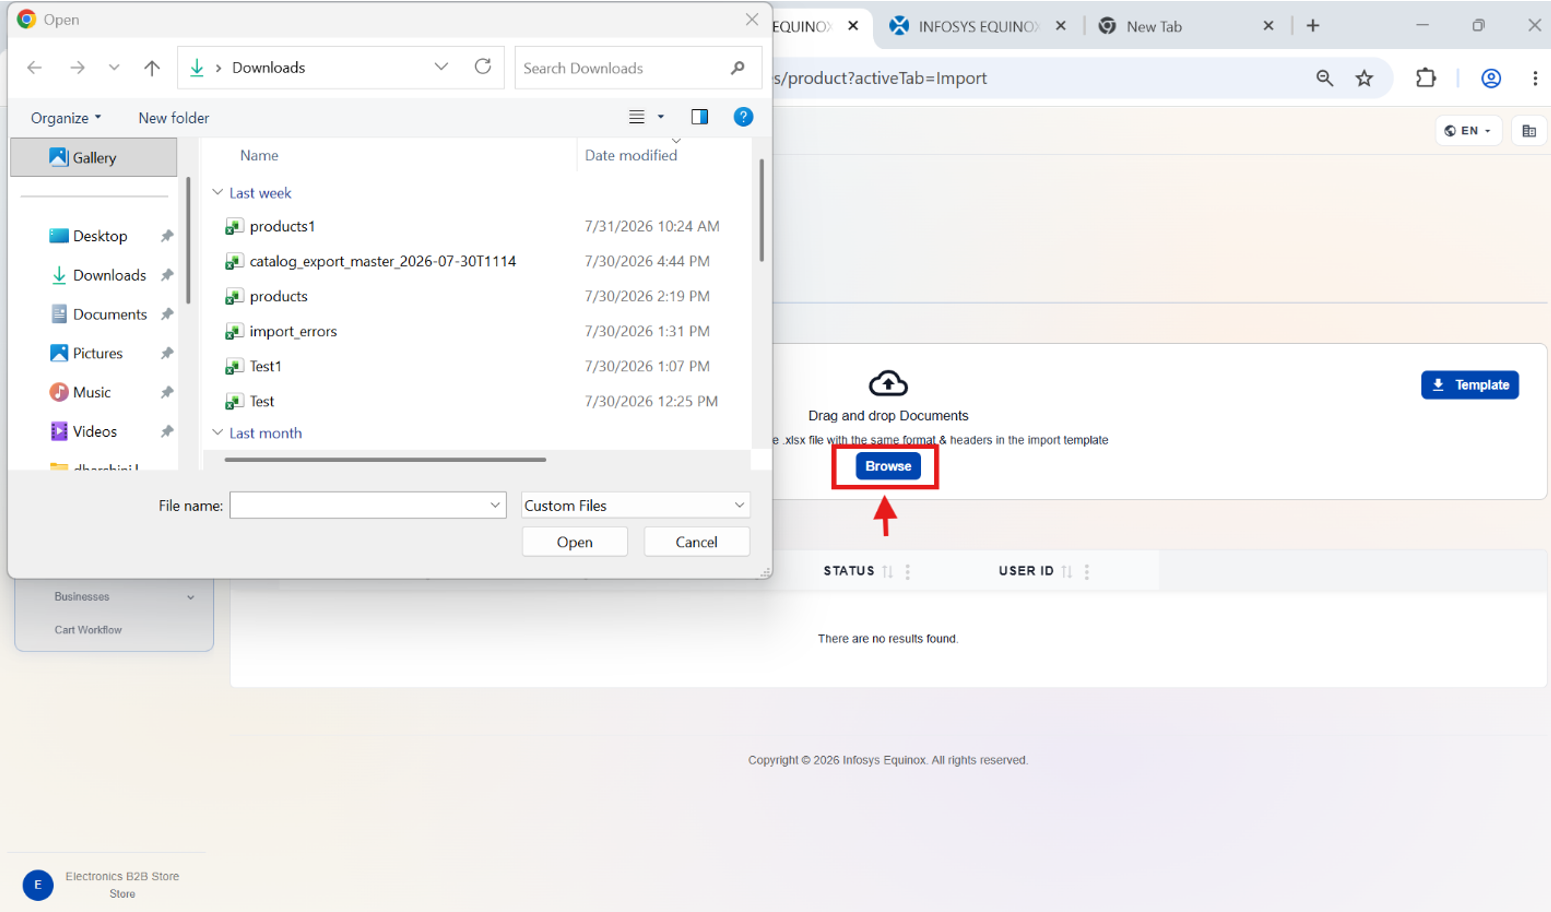
- Drag and drop a completed .xlsx file onto the upload area, or click BROWSE to select a file from your local machine. The system processes the file and the result is recorded in the Import History table.
Import History
The Import History table displays the outcome of each previous import attempt:
| Column | Description |
|---|---|
| Imported File | The name of the uploaded file. |
| Project ID | The project or store context associated with the import. |
| Date (UTC) | The date and time the import was processed, displayed in UTC. |
| Status | The outcome of the import: success or failure. |
| User ID | The identifier of the user who initiated the import. |
Price Types
Price Types define the pricing classifications available for products in the store. The platform provides a set of built-in Default Price Types, and administrators can create additional Custom Price Types to support differentiated pricing strategies (for example, member pricing, wholesale pricing).
Viewing Price Types
- Log in to the Infosys Equinox Admin Console using your credentials.
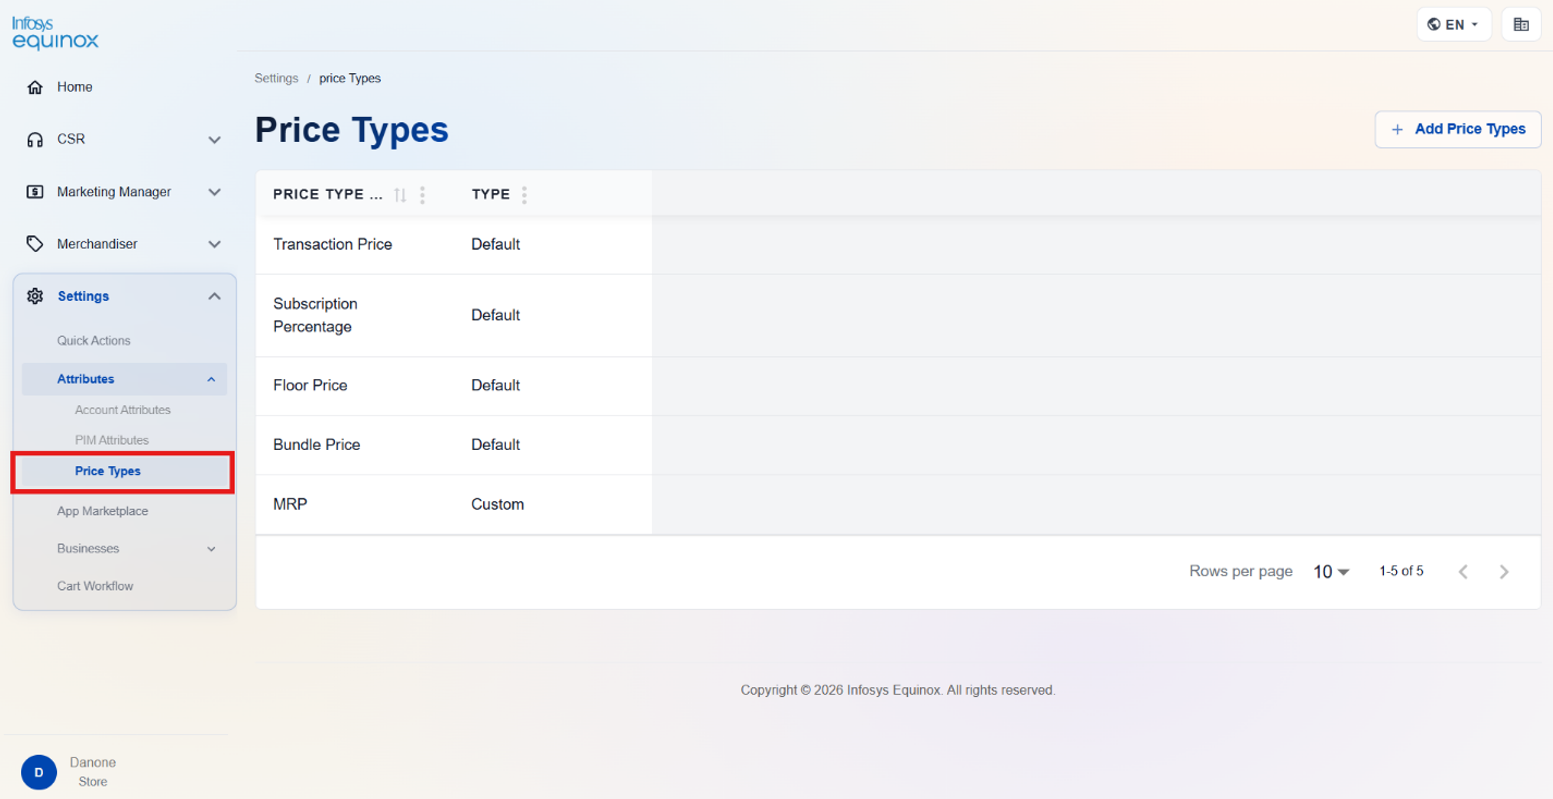
- On the left navigation panel, click Settings > Attributes > Price Types.
The Price Types page opens at the path: Settings > Price Types. A badge next to the page title (for example, 130 Price Types) indicates the total count.
The table lists price types with the following columns:
| Column | Description |
|---|---|
| Price Type Name | The name of the price type as displayed in the platform. Sortable and filterable. |
| Type | Indicates whether the price type is Default (platform-provided, non-deletable) or Custom (administrator-created). Filterable. |
Default Price Types
The following price types are provided by the platform and cannot be deleted:
| Price Type Name | Description |
|---|---|
| Transaction Price | The standard price at which a product is sold in a transaction. |
| Subscription Percentage | A percentage-based price type used for subscription-model products. |
| Floor Price | The minimum price threshold below which a product cannot be discounted. |
| Bundle Price | The price applied when a product is sold as part of a bundle. |
Add a Custom Price Type
- Log in to the Infosys Equinox Admin Console using your credentials.
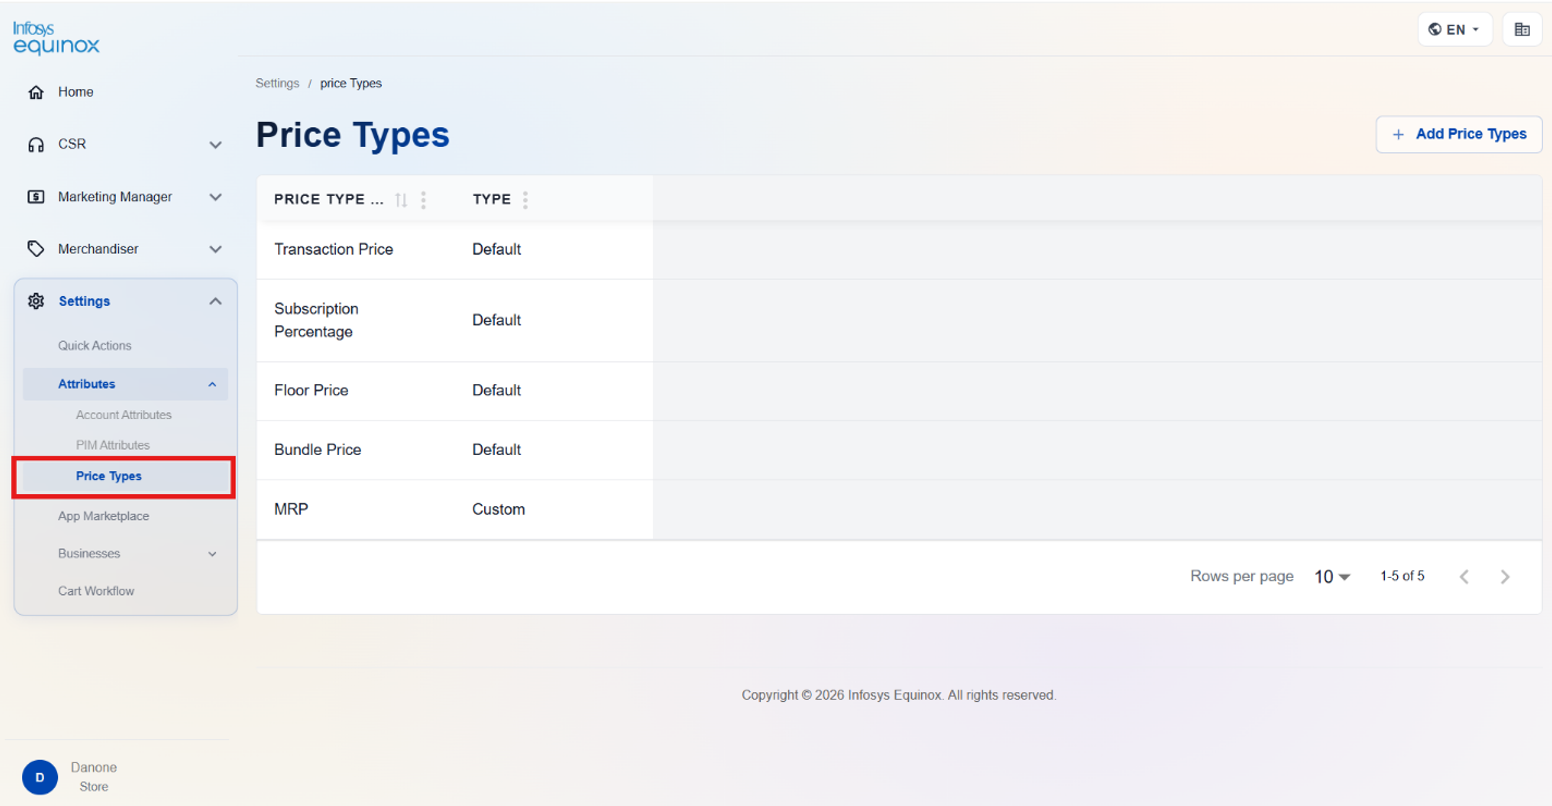
- On the left navigation panel, click Settings > Attributes > Price Types.
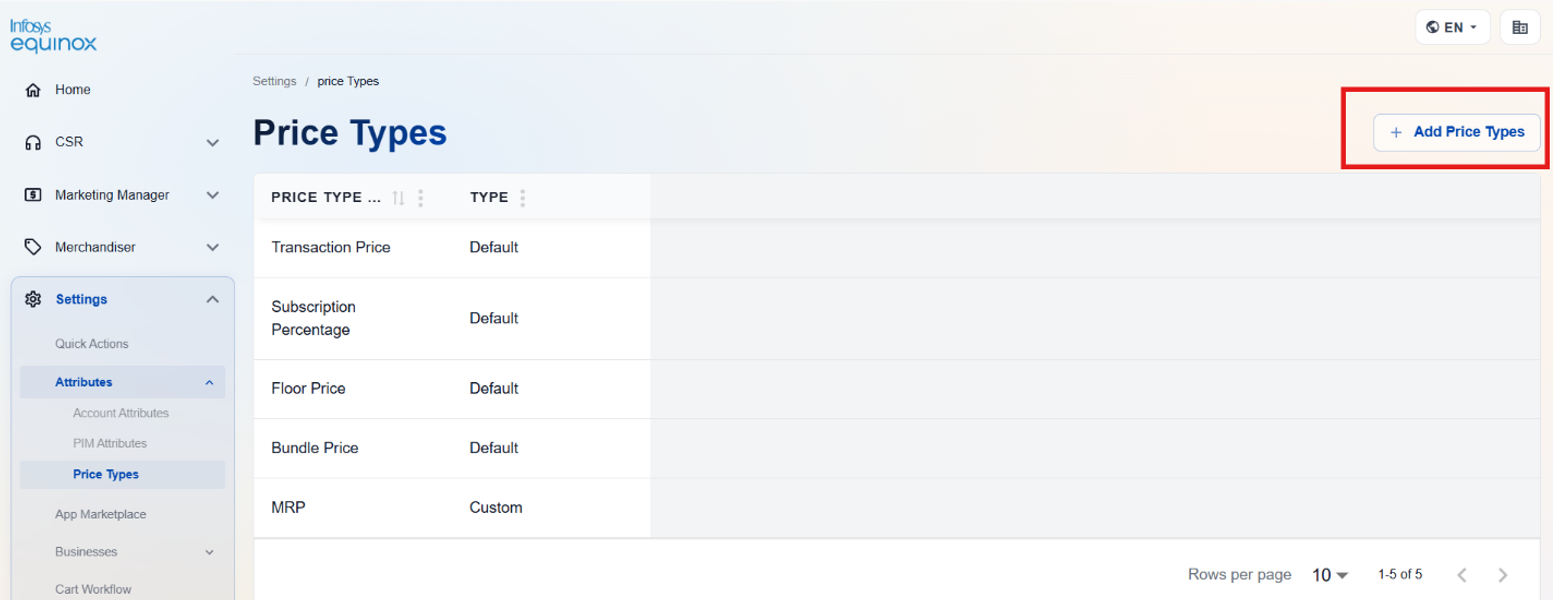
- On the Price Types page, click ADD PRICE TYPES.
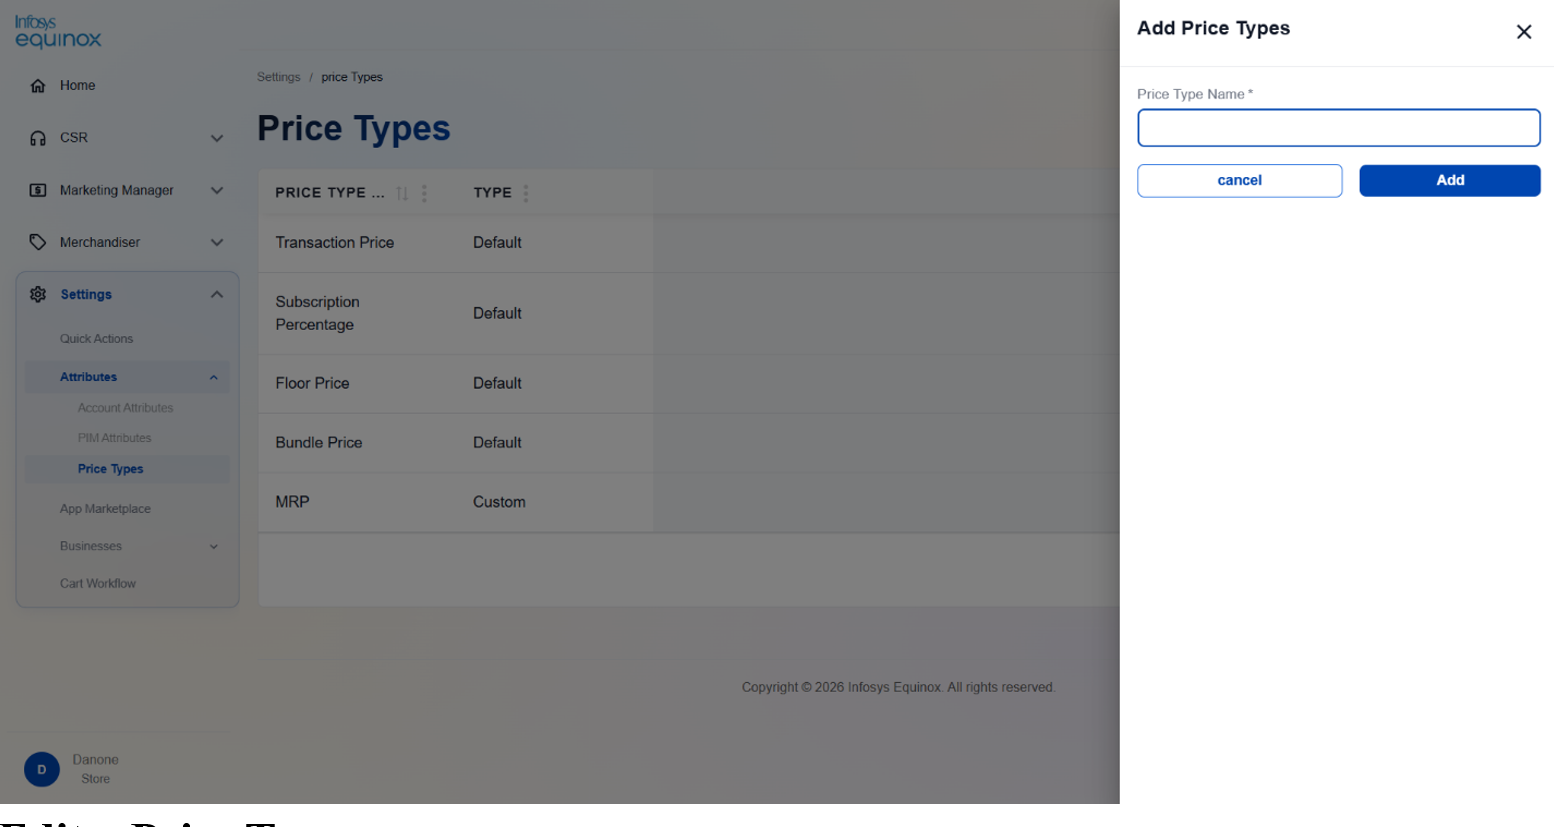
- In the drawer, enter the Price Type Name. Use only alphanumeric characters and spaces. Minimum 2 characters, maximum 200.
- Click Save. The new price type is added to the list with Type: Custom.
Edit a Price Type
- Log in to the Infosys Equinox Admin Console using your credentials.
- On the left navigation panel, click Settings > Attributes > Price Types.
- Locate the price type in the table.
- Click the price type name or its row action control.
- Modify the name as required.
- Click Save.
App Marketplace
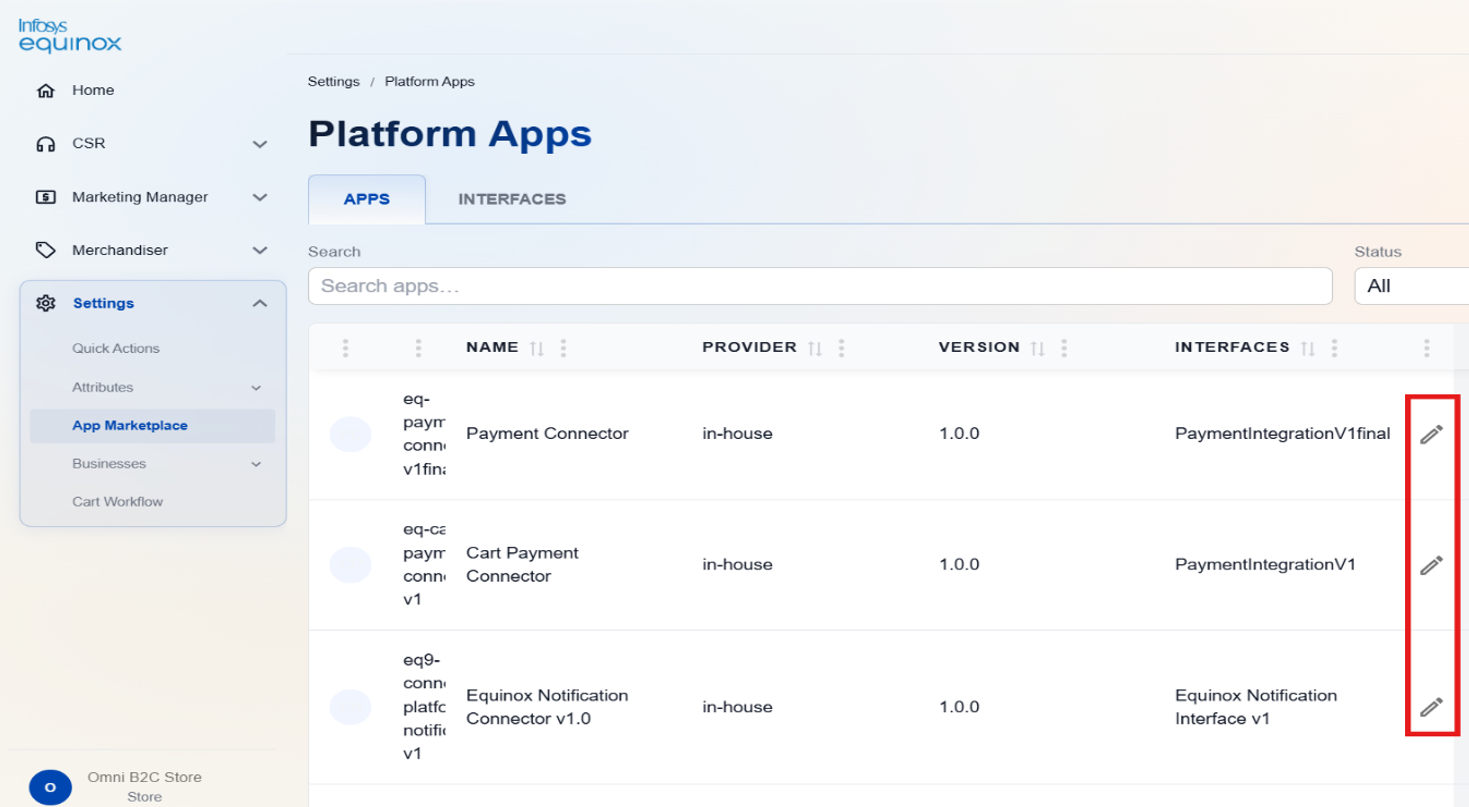
The App Marketplace section in Settings opens the Platform Apps page, which is the central registry for all applications integrated into the Infosys Equinox platform. Platform administrators use this page to register new applications and define the interfaces they implement. These registered apps become available to businesses for enabling payment, shipment, notification, and other commerce capabilities in their stores.
The Platform Apps page is accessible at the path: Settings / Platform Apps.
Accessing Platform Apps
- Log in to the Infosys Equinox Admin Console using your credentials.
- On the left navigation panel, click Settings > App Marketplace.
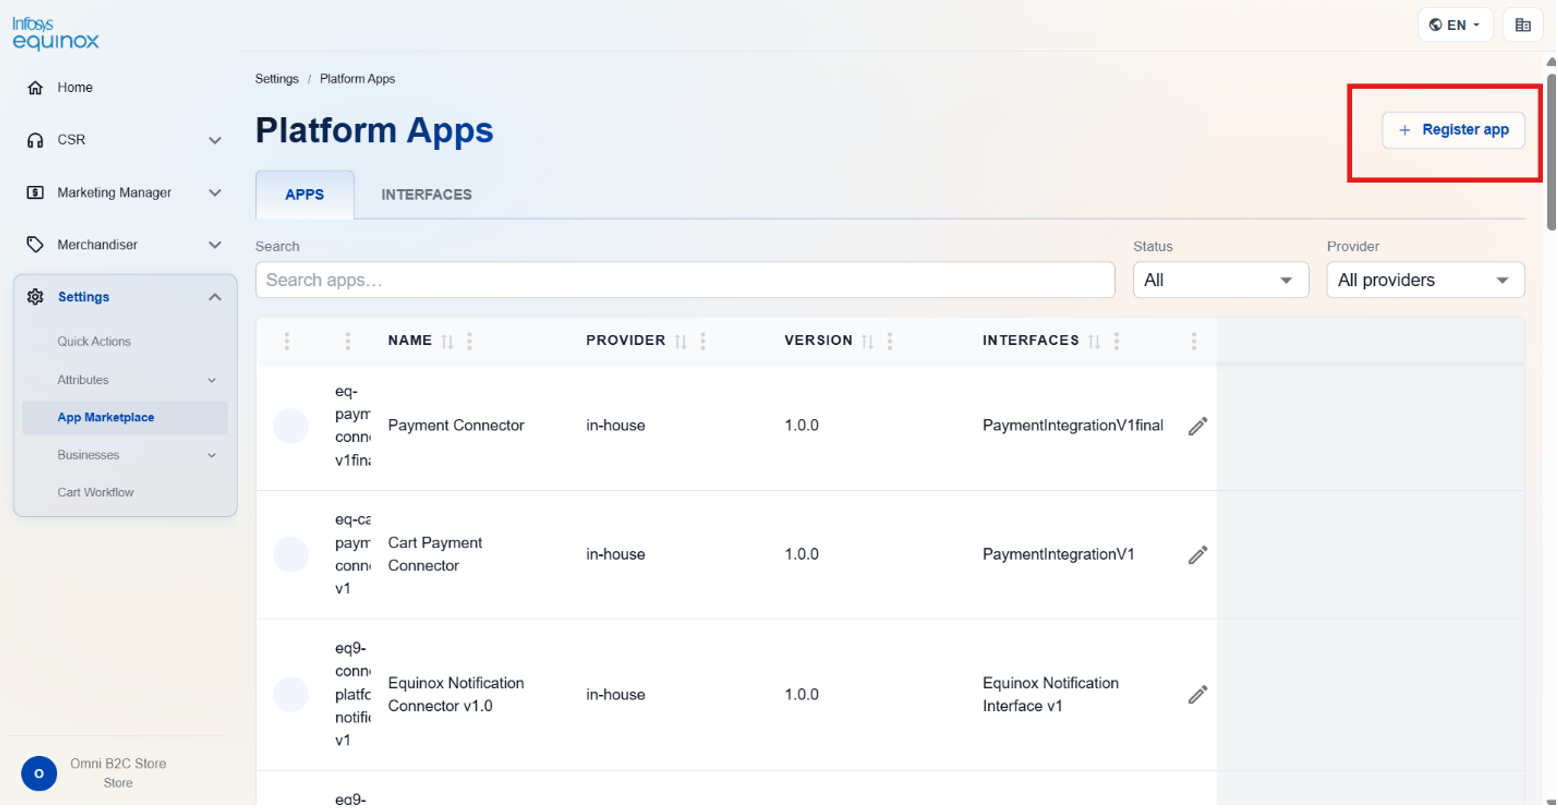
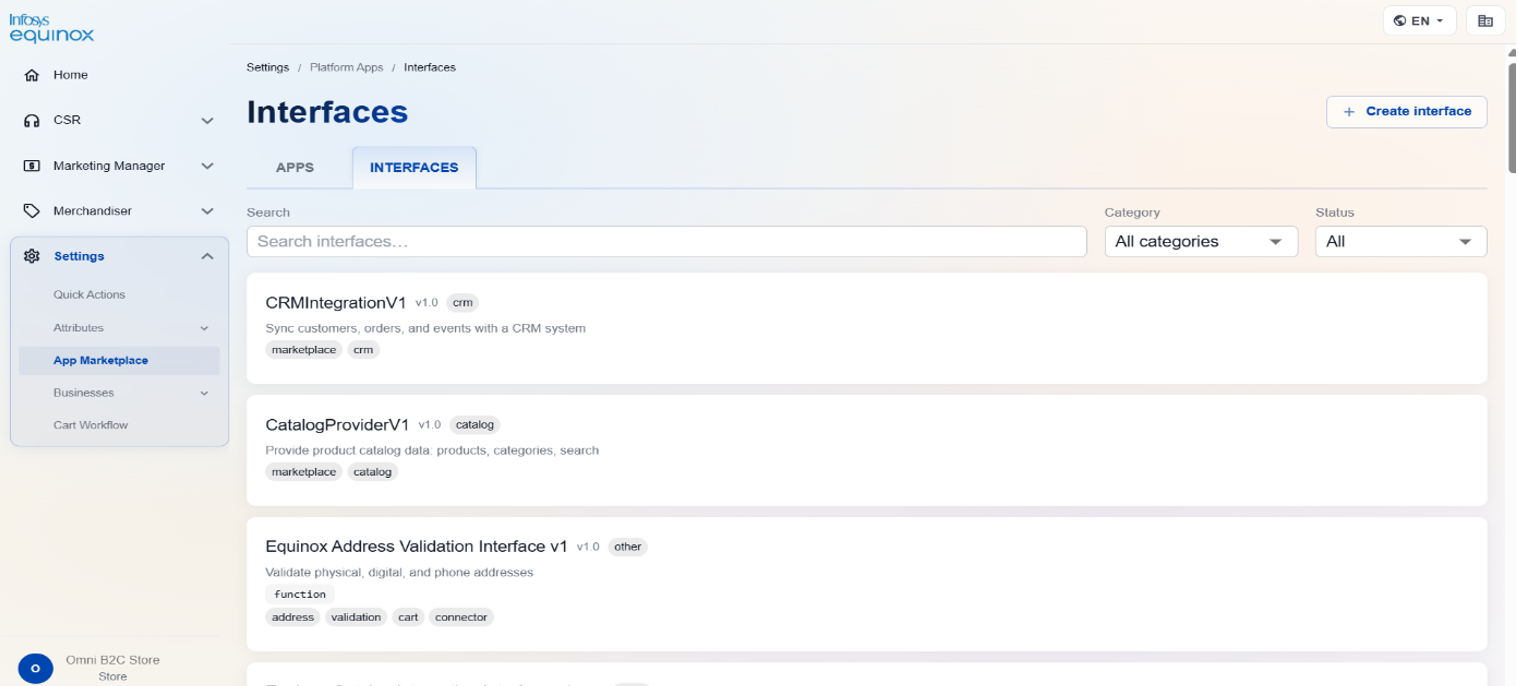
The Platform Apps page opens. It is organized into two tabs:
| Tab | Description |
|---|---|
| APPS | Lists all applications registered in the platform, with their name, provider, version, and supported interfaces. |
| INTERFACES | Lists all interface contracts defined in the platform that apps can implement (for example, PaymentIntegrationV1, Equinox Notification Interface v1). |
Viewing Platform Apps
- On the left navigation panel, click Settings > App Marketplace.
- The APPS tab is active by default, displaying all registered platform apps.
Use the filter controls above the table to narrow the list:
| Filter | Description |
|---|---|
| Search | Enter text to search for apps by name or identifier. |
| Status | Filter by app status: All, Active, or Inactive. |
| Provider | Filter by provider: All providers, or a specific provider name. |
The APPS table displays the following columns:
| Column | Description |
|---|---|
| (App Icon) | The logo or icon associated with the application. |
| Name | The display name of the registered application (for example, Payment Connector, Cart Payment Connector, Equinox Notification Connector v1.0). |
| Provider | The organization or team that owns and maintains the application (for example, in-house). |
| Version | The semantic version of the application (for example, 1.0.0). |
| Interfaces | The platform interface contracts implemented by this application (for example, PaymentIntegrationV1final, Equinox Notification Interface v1). |
| (Edit) | Click the edit icon on any row to open the app registration form and modify the app’s details. |
Register a New App
Platform administrators can register new applications in the platform catalog.
- On the left navigation panel, click Settings > App Marketplace.
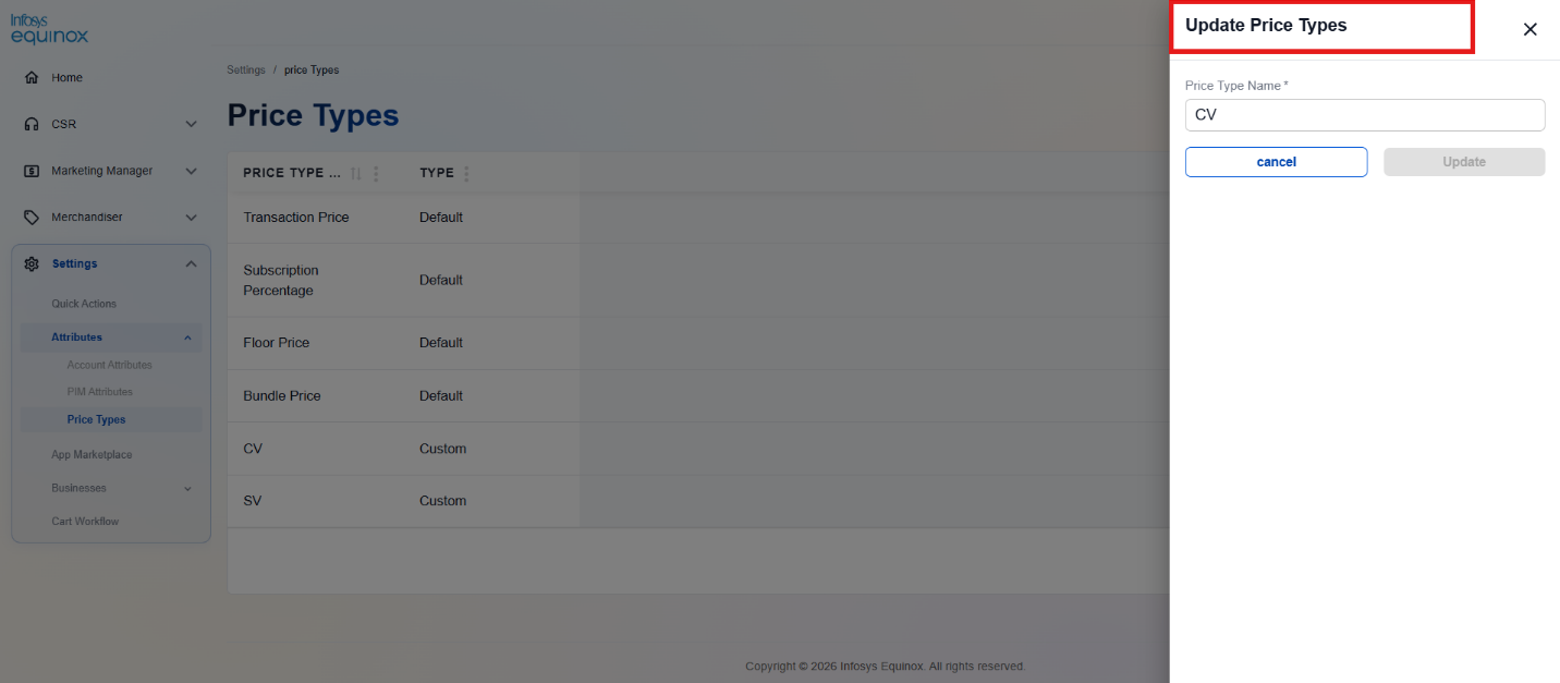
- Click + Register app in the top-right corner of the page.
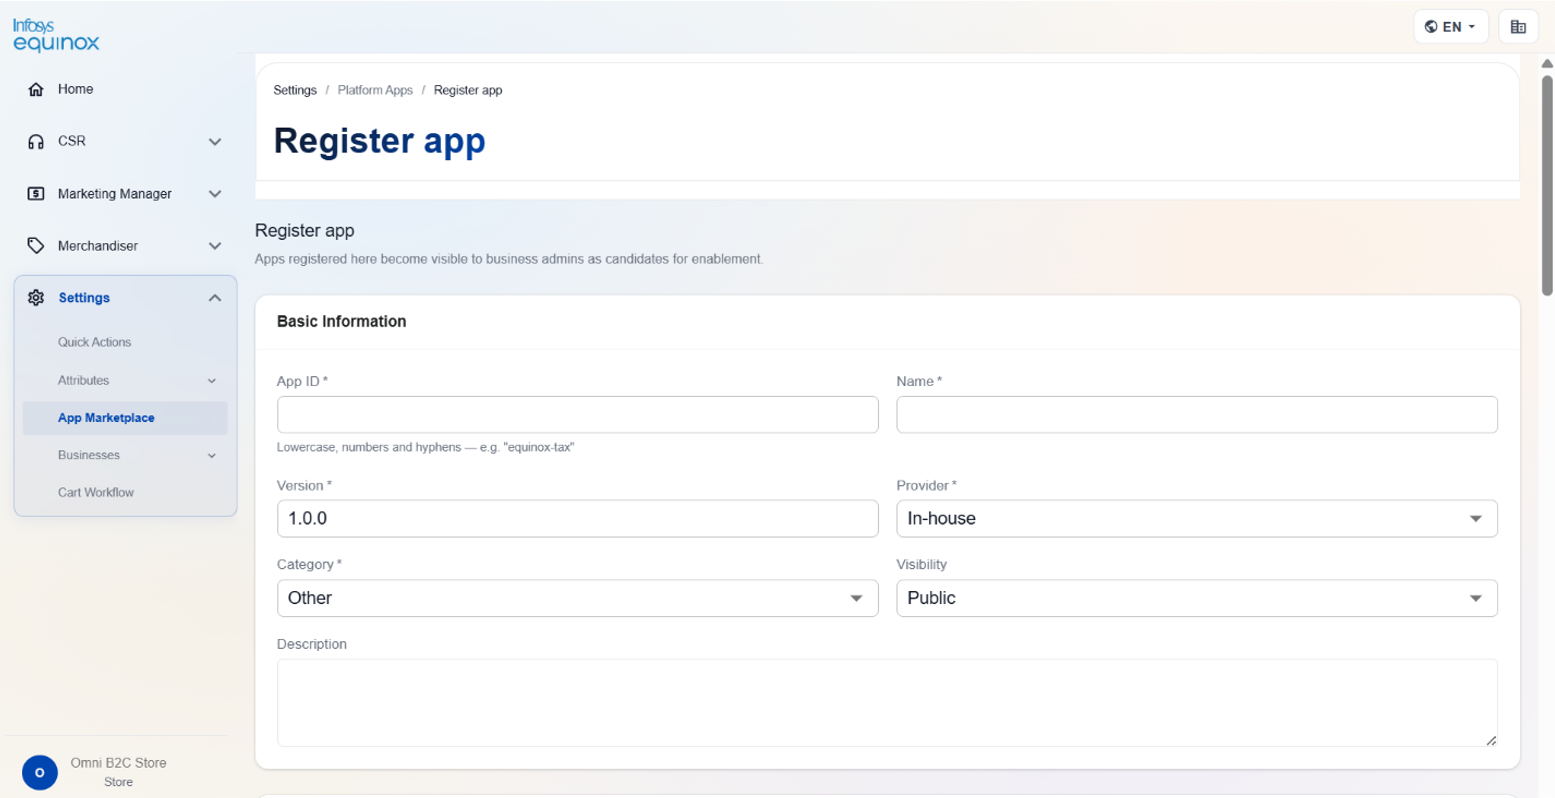
- Complete the registration form with the following details:
- App Name — The display name of the application.
- Provider — The provider or team responsible for the application.
- Version — The semantic version of the application.
- Interfaces — The platform interfaces (for example, PaymentIntegrationV1, shipment, tax) this app implements.
- Deployment — The deployment configuration including endpoint URLs and environment targets.
- UI Manifest (optional) — Configuration for any UI components the app injects into the admin console.
- Click Save to register the app. The app appears in the APPS table and becomes available for enablement by businesses.
Edit a Registered App
- On the left navigation panel, click Settings > App Marketplace.
- In the APPS table, locate the app you want to modify.
- Click the edit icon (pencil icon) on the app’s row.
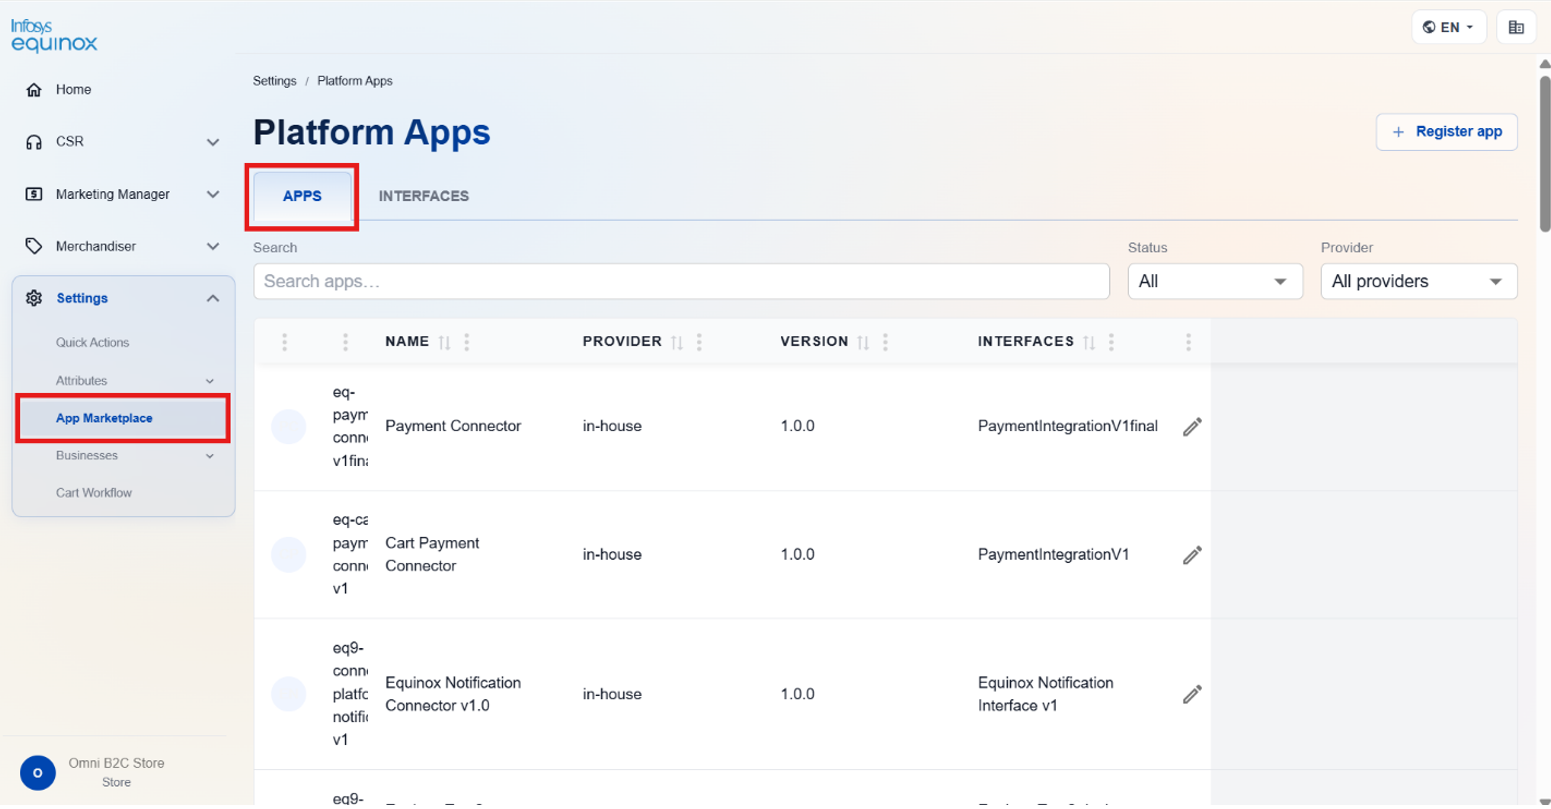
- Update the required fields in the registration form.
- Click Save to apply the changes.
Managing Interfaces
The INTERFACES tab lists all platform interface contracts. Interfaces define the standard API contract that an app must implement to provide a specific capability (for example, payment processing, notification delivery).
- On the left navigation panel, click Settings > App Marketplace.
- Click the INTERFACES tab.
The Interfaces table lists all defined interface contracts, including the interface name and version. Platform administrators can create new interfaces and edit existing ones from this tab.
Businesses
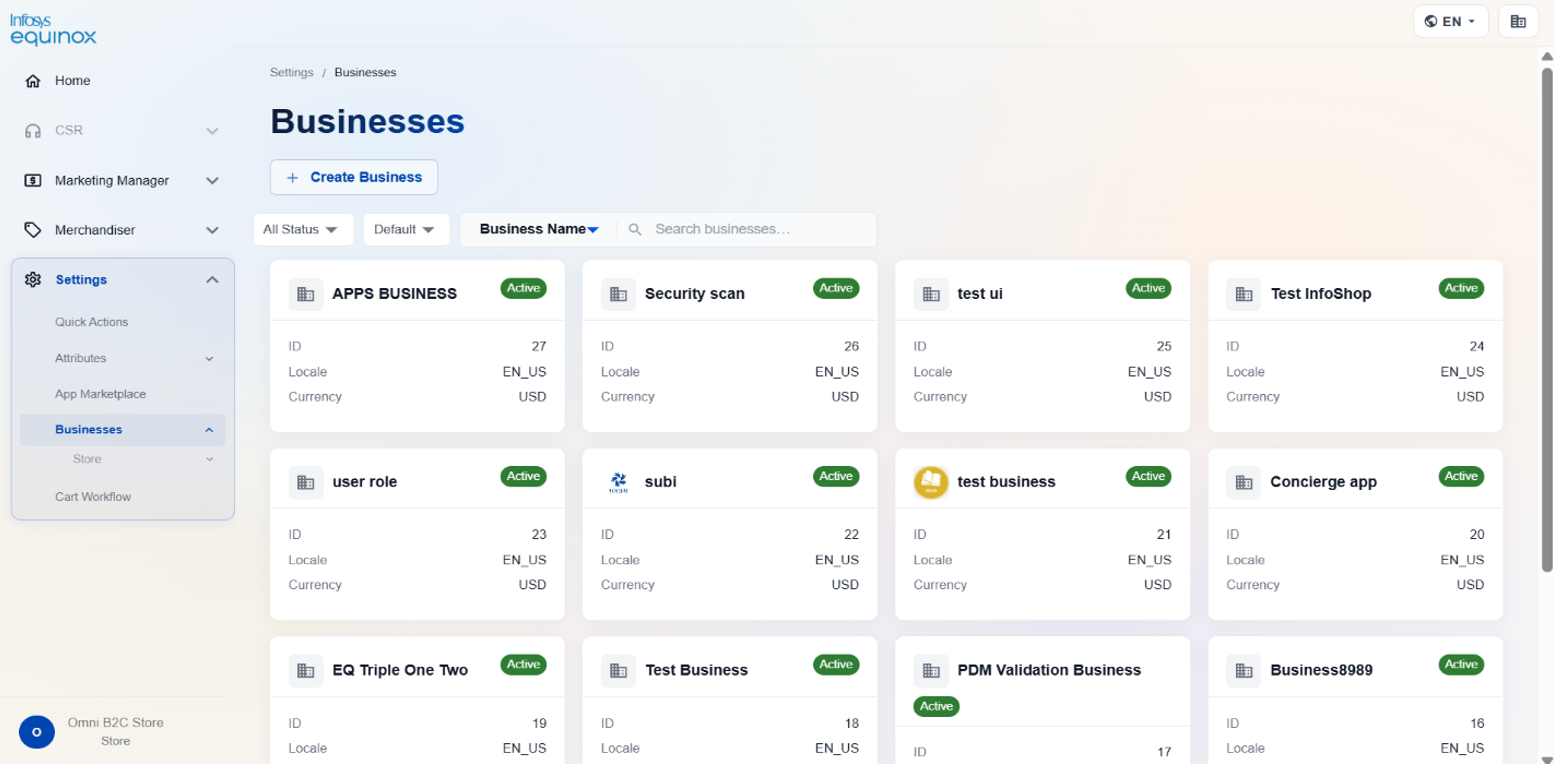
The Businesses section provides a centralized view for managing the businesses registered in the platform and their associated stores. From this section, administrators can view business details, manage store configurations, and access store-level settings including payment methods and shipment methods.
Accessing Businesses
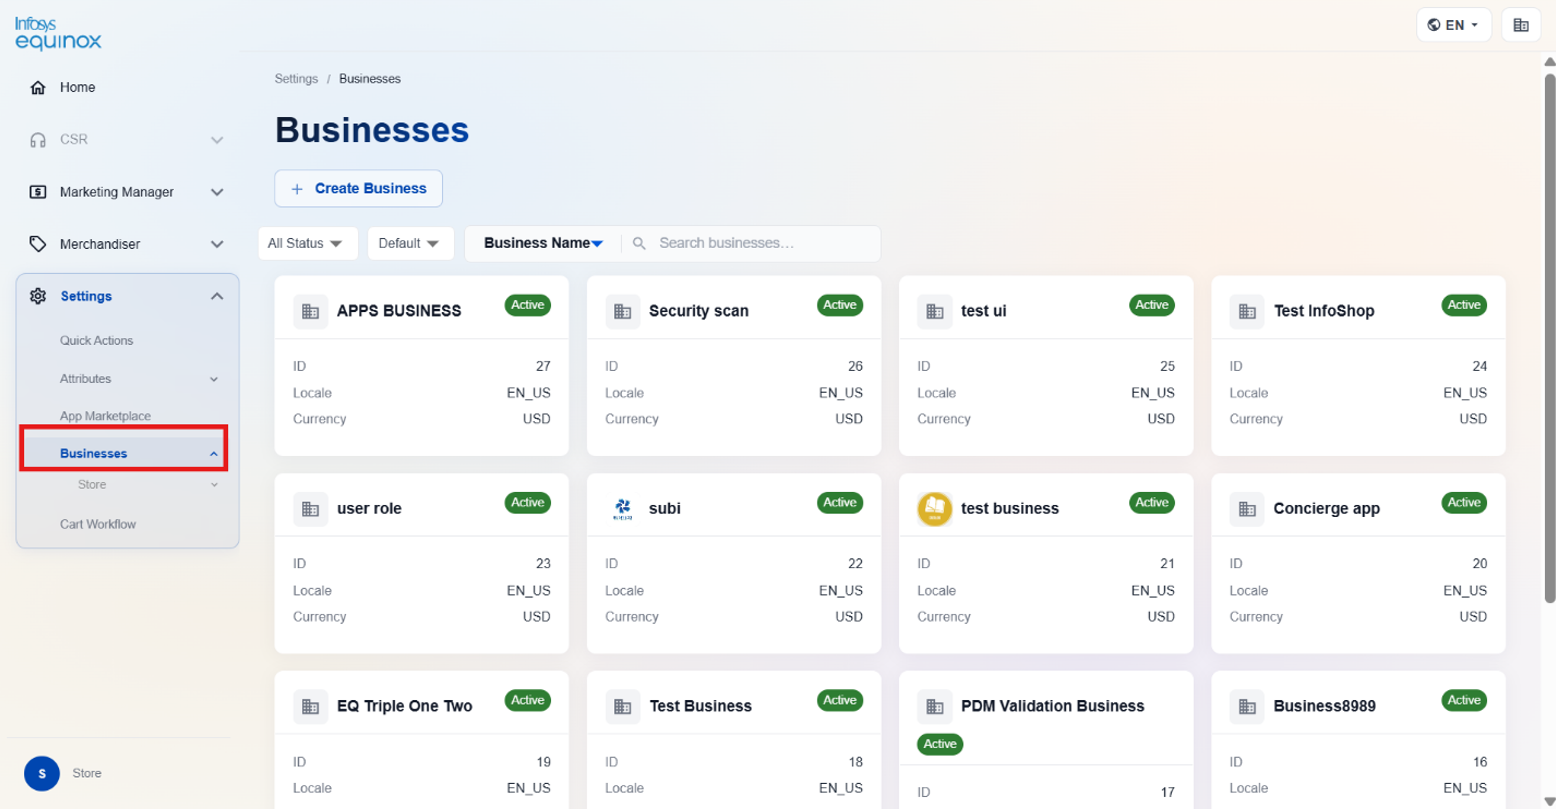
- Log in to the Infosys Equinox Admin Console using your credentials.
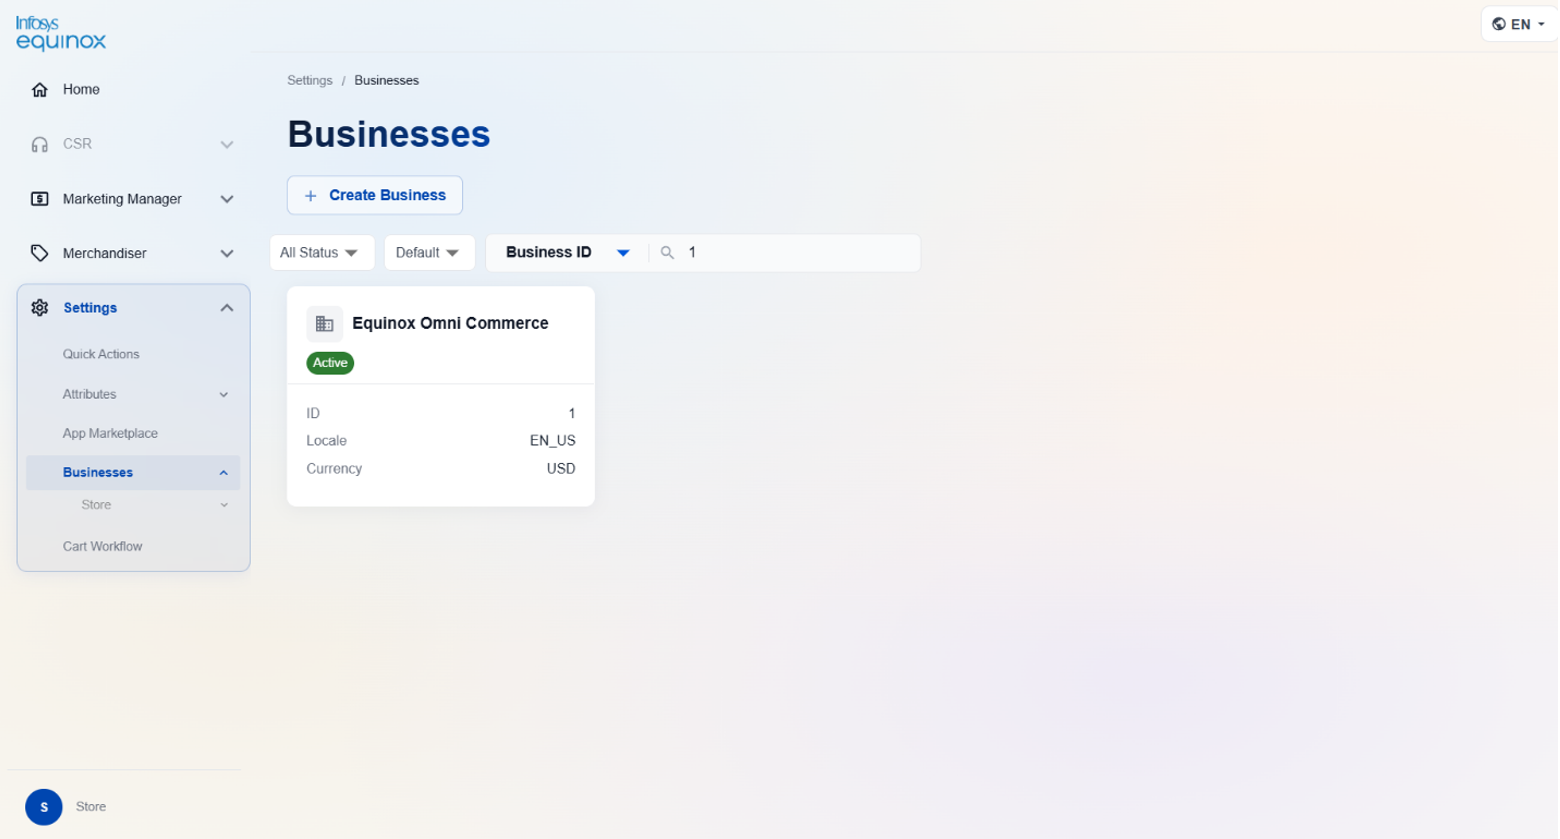
- On the left navigation panel, click Settings > Businesses.
The Businesses list page opens at the path: Settings > Businesses. The page displays all businesses accessible to the current user.
Viewing the Business List
The Businesses page displays a searchable list of all businesses. Use the search field to filter businesses by name or identifier.
| Column | Description |
|---|---|
| Business Name | The display name of the business. |
| Business ID | The unique system identifier of the business. |
| Status | The current status of the business: Active or Inactive. |
View Business Details
- On the left navigation panel, click Settings > Businesses.
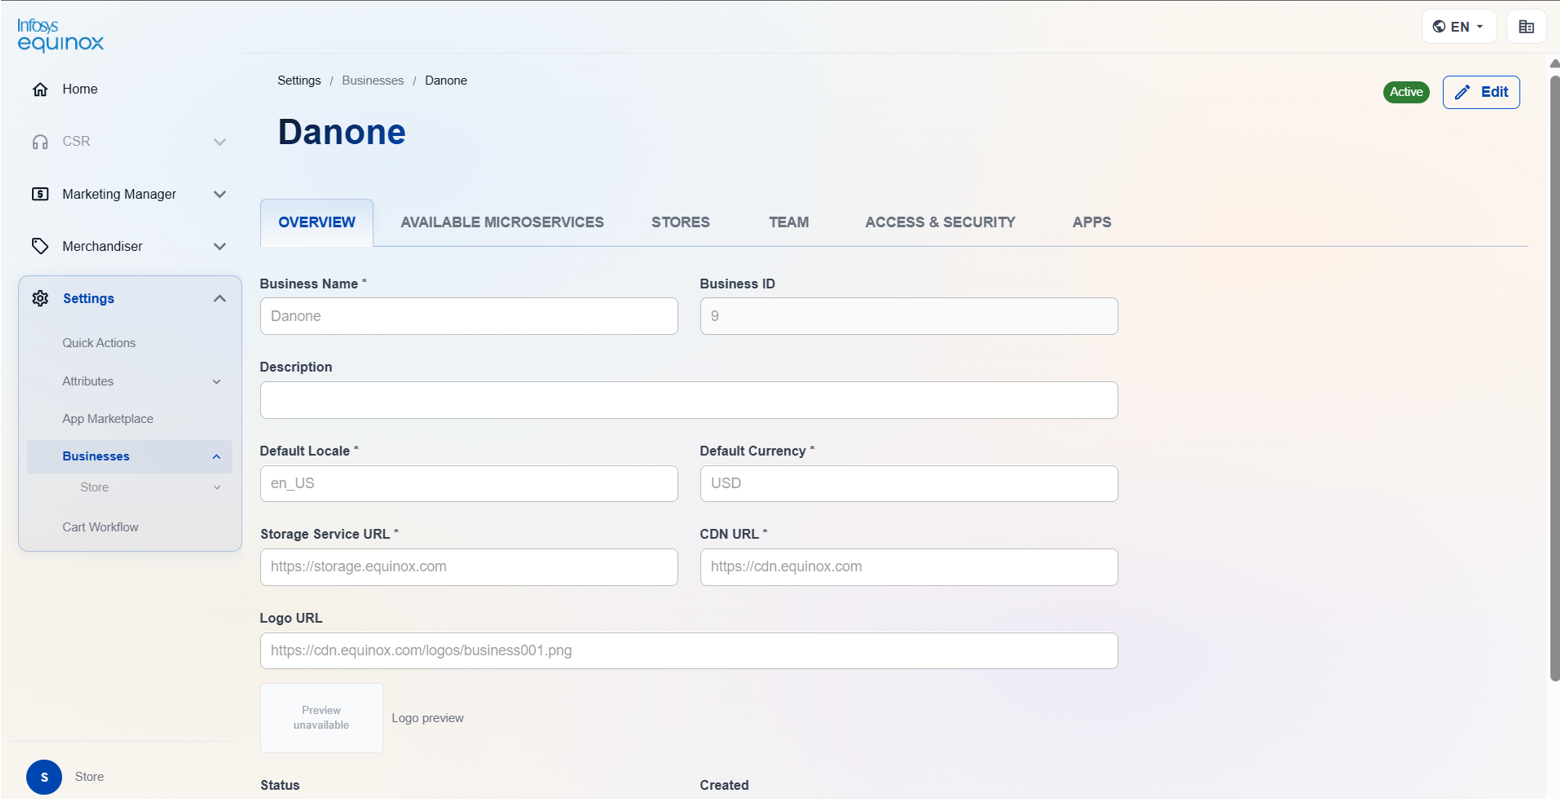
- Click the business name to open the business detail page or search using the Business Id or Business name to easily navigate to the particular store.
The business detail page is organized into tabs:
| Tab | Description |
|---|---|
| Overview | Displays core business configuration: Business Name, Business ID, Description, Default Locale, Default Currency, Storage Service URL, CDN URL, Logo URL, and Status. |
| Available Microservices | Lists the microservices available to this business, showing which platform services are accessible for the business’s operations. |
| Stores | Displays all stores configured under this business. Admins can view existing stores and create new stores from this tab. |
| Team | Lists the team members associated with this business, including their roles and access assignments. |
| Access & Security | Manages authentication policies, role-based access rules, and security configurations applied at the business level. |
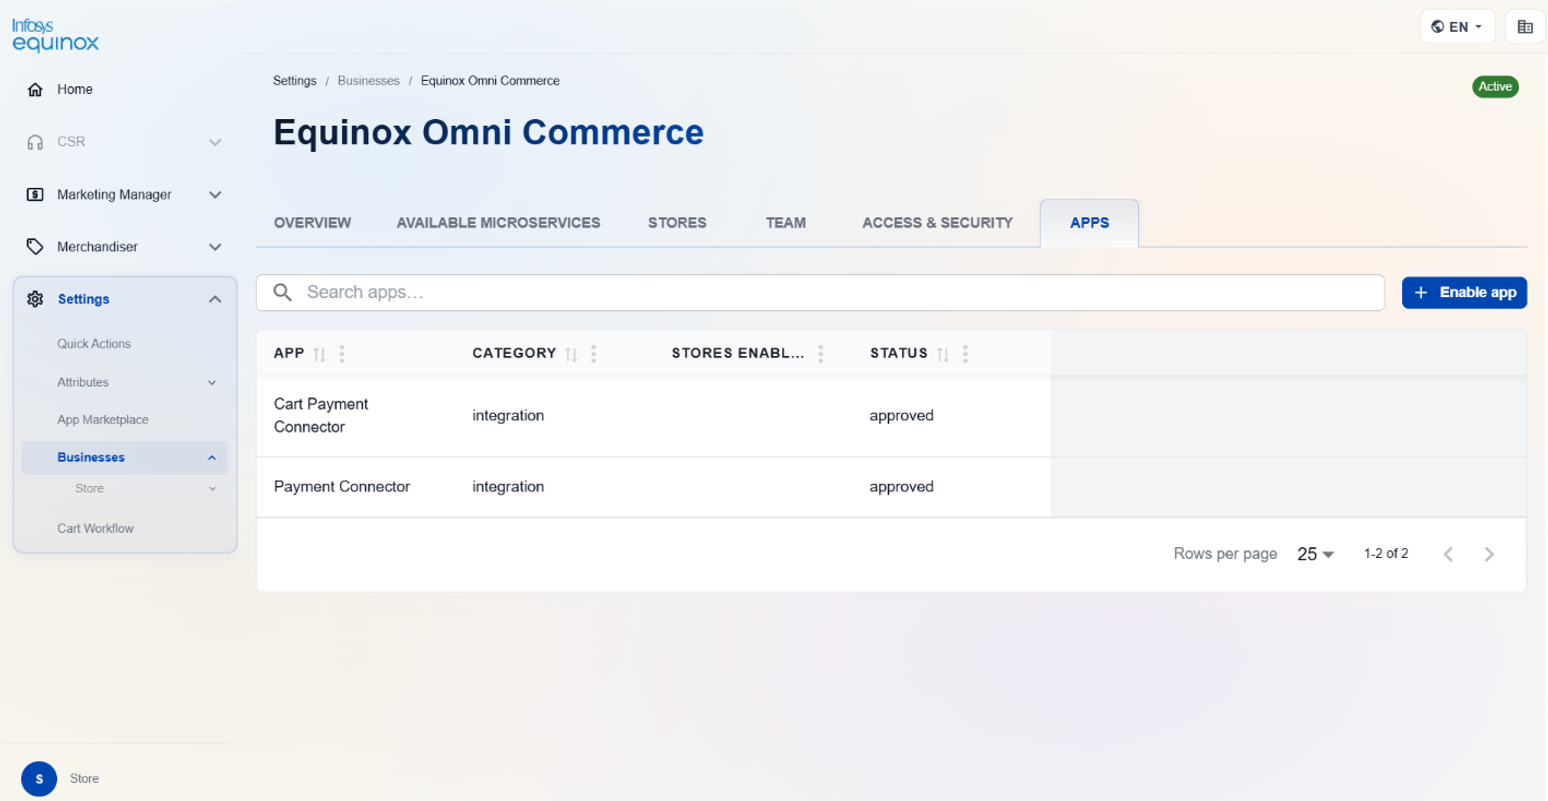
| Apps | Lists the apps enabled for this business, with options to enable or disable individual apps per business context. |
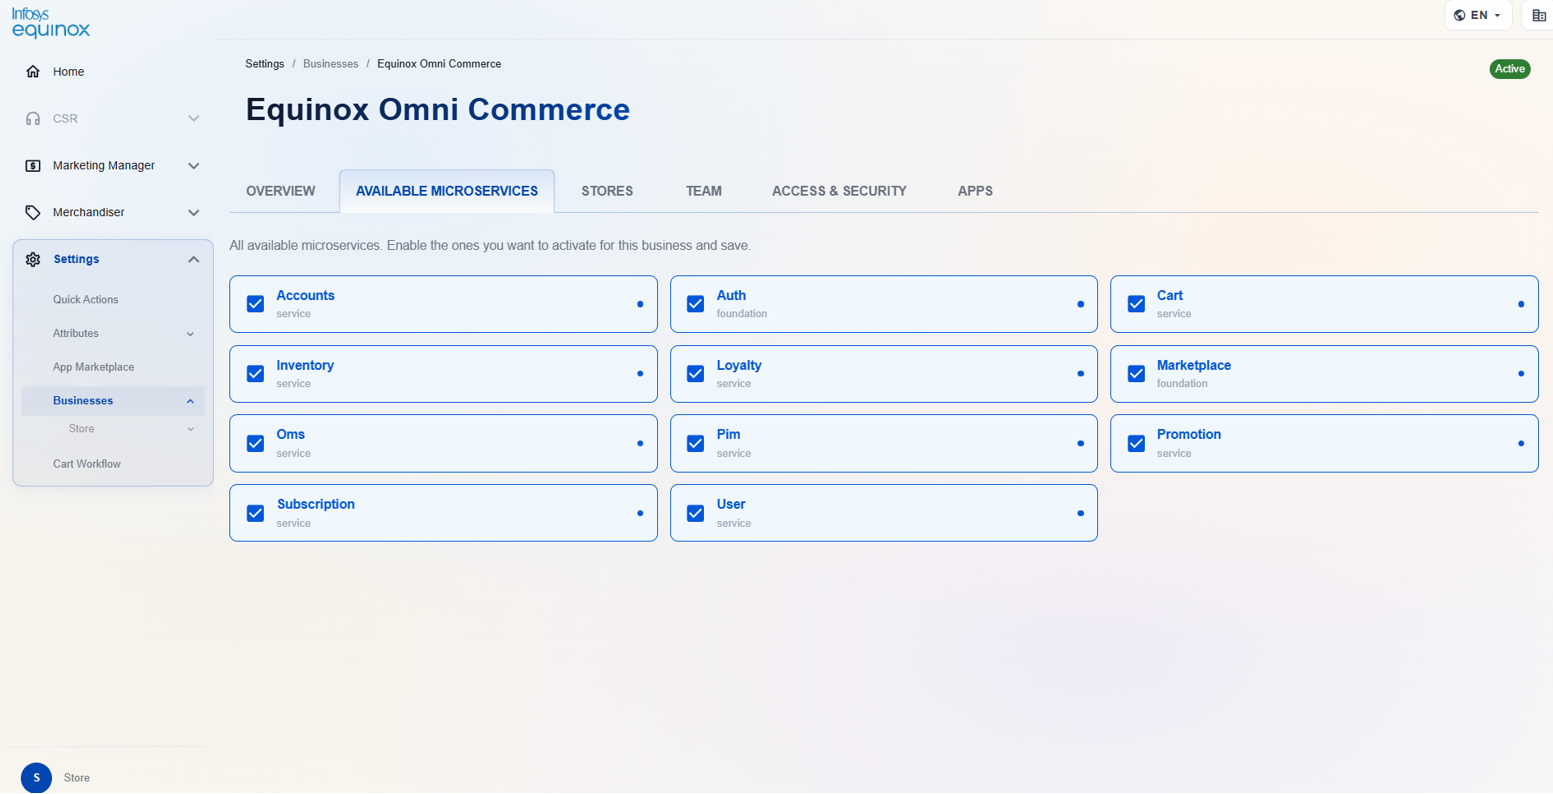
Available Microservices tab: This page shows all the microservices available in the business.
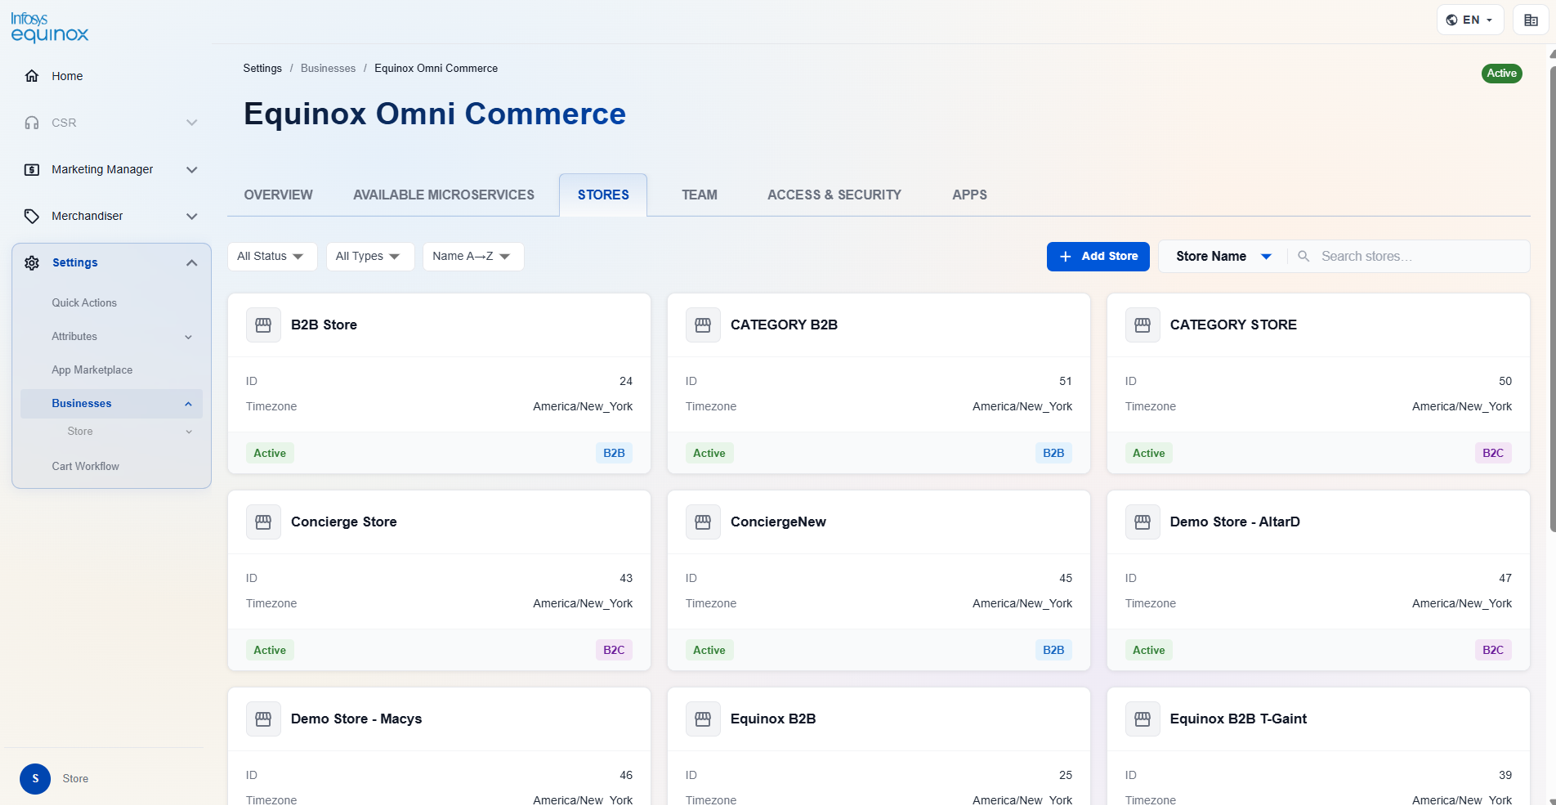
Store tab:
This store tab lists the associated stores of the business and also have the Add Store button to create a store for that respective business. It also have the option to search the store using Store name or Store Id.
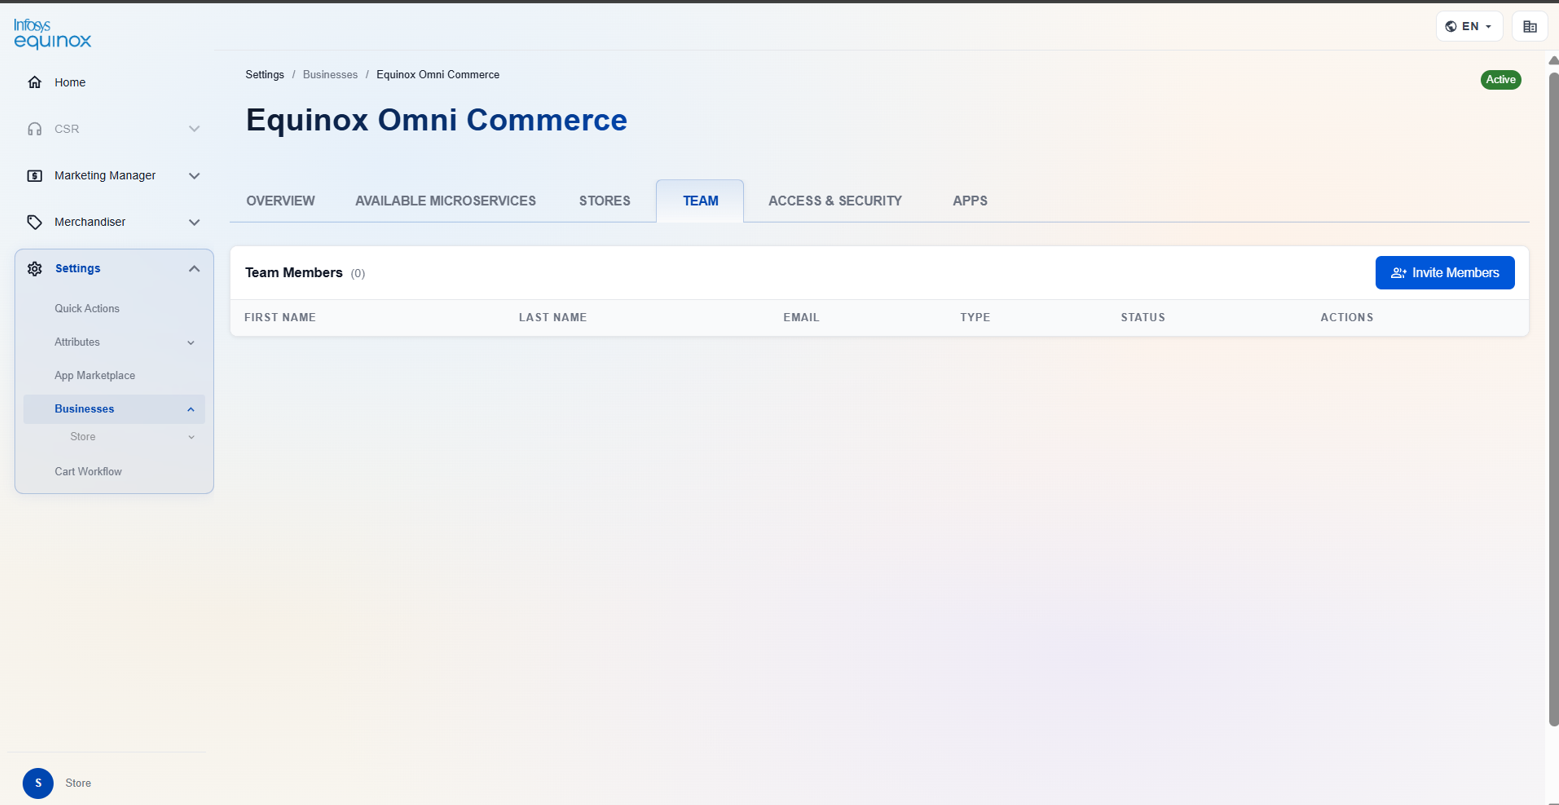
Team Tab:
This tab has the Invite Member option to invite the users.
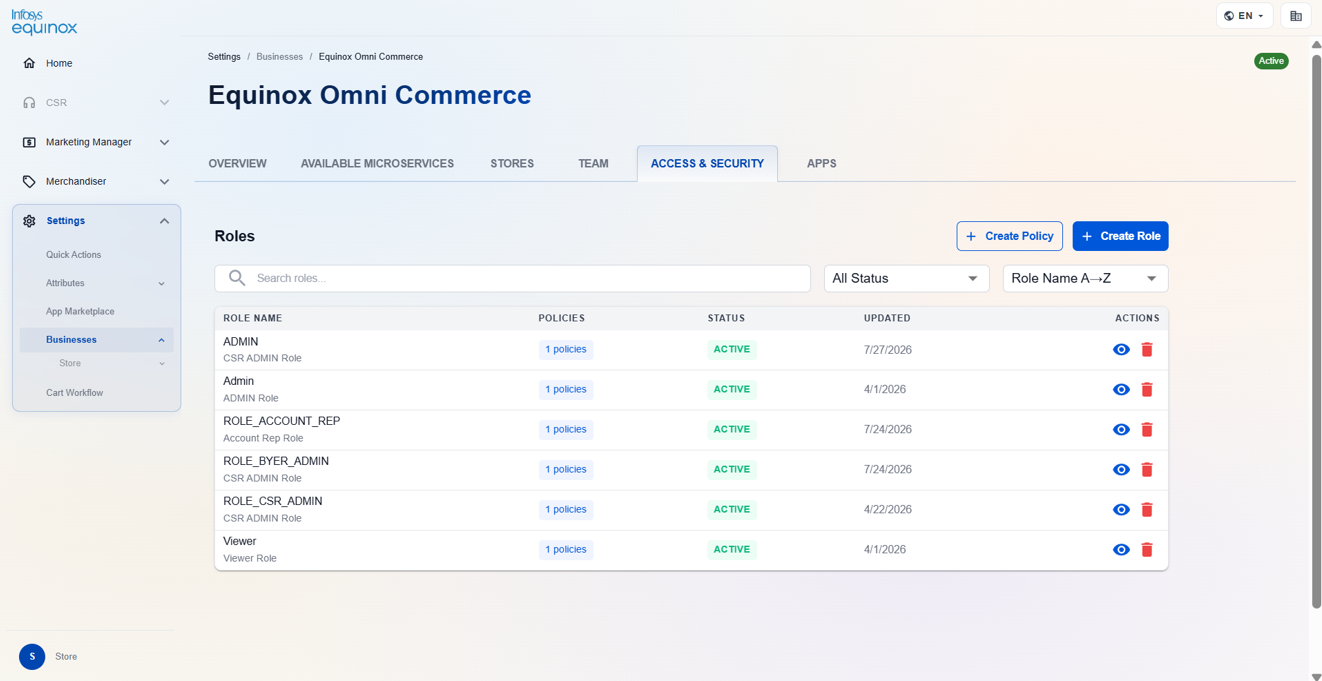
Access & Security Tab:
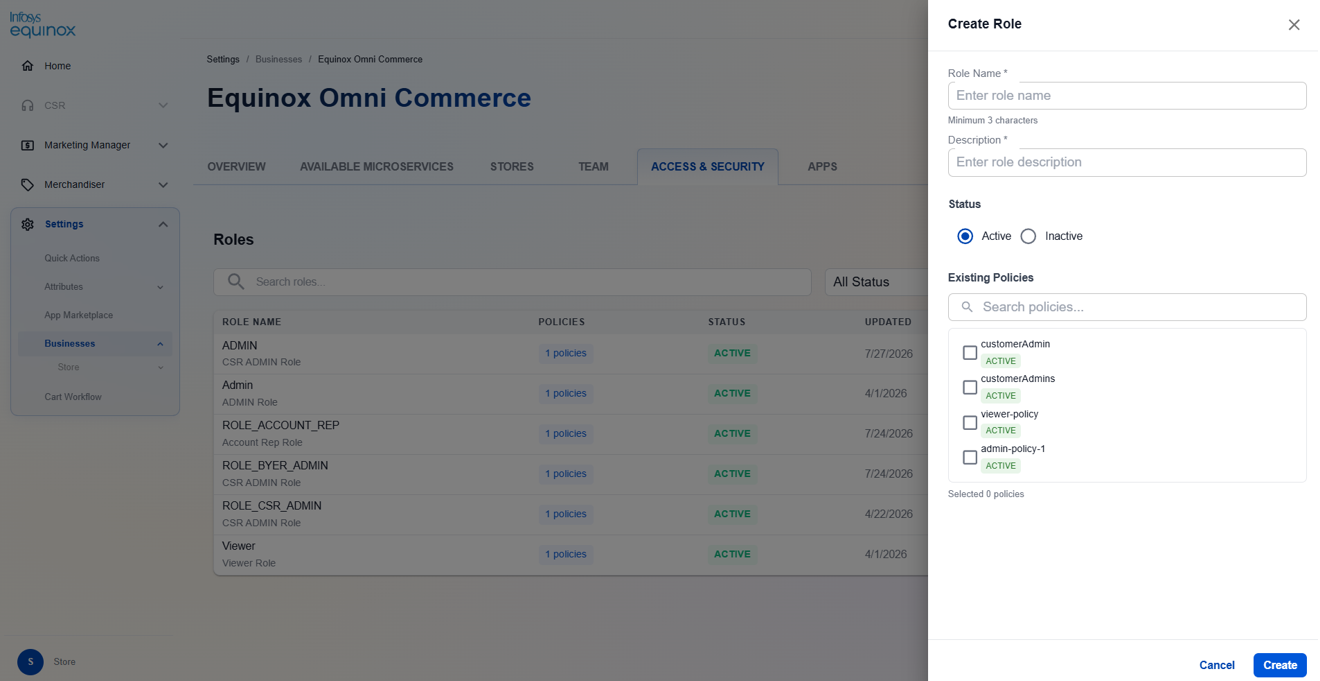
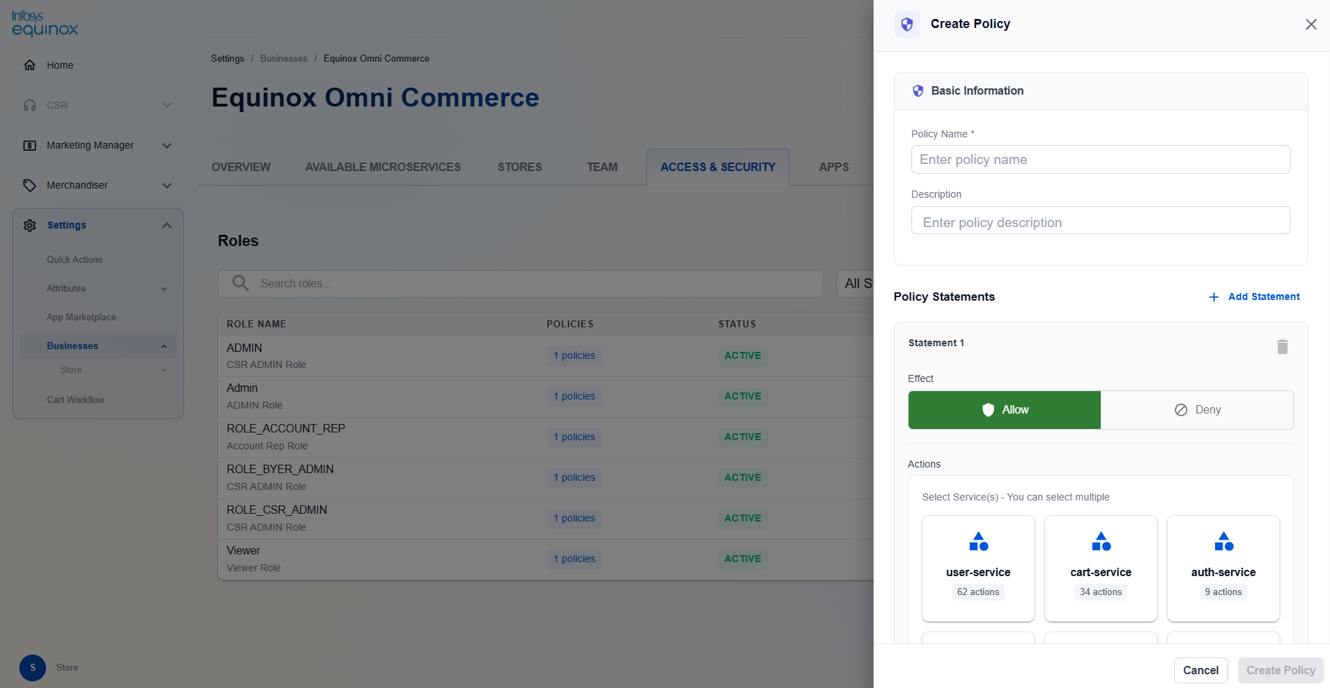
This page is used to manage user roles and access permissions for the business. It provides administrators with the ability to:
- View all available roles and their associated policies.
- Check the status of each role (Active/Inactive).
- Search, filter, and sort roles easily.
- Create new roles using Create Role.
- Define access policies using Create Policy.
- View role details or delete roles through the available action icons.
- Monitor role updates through the Updated date column.
Manage Business Apps
- Navigate to the business detail page (Settings > Businesses > [Business Name]).
- Click the Apps tab.
- The Apps tab lists all platform apps available for enablement at the business level.
Note: Enabling an app at the business level makes it available for use in stores associated with the business. Payment and shipment apps enabled here appear in the app selection panels when adding payment or shipment methods in the store.
Access Store Configuration
Store-level settings (including payment methods and shipment methods) are accessible from within the store context. Once a store is selected in the admin console context, the left navigation panel under Settings > Businesses > Store shows the Payment and Shipment sub-sections.
To navigate directly to a store:
- On the left navigation panel, click Settings > Businesses.
- Click a business name to open the business detail page.
- Navigate to the associated store within the business.
- Once the store context is active, Payment and Shipment appear in the left navigation panel under Settings > Businesses > Store.
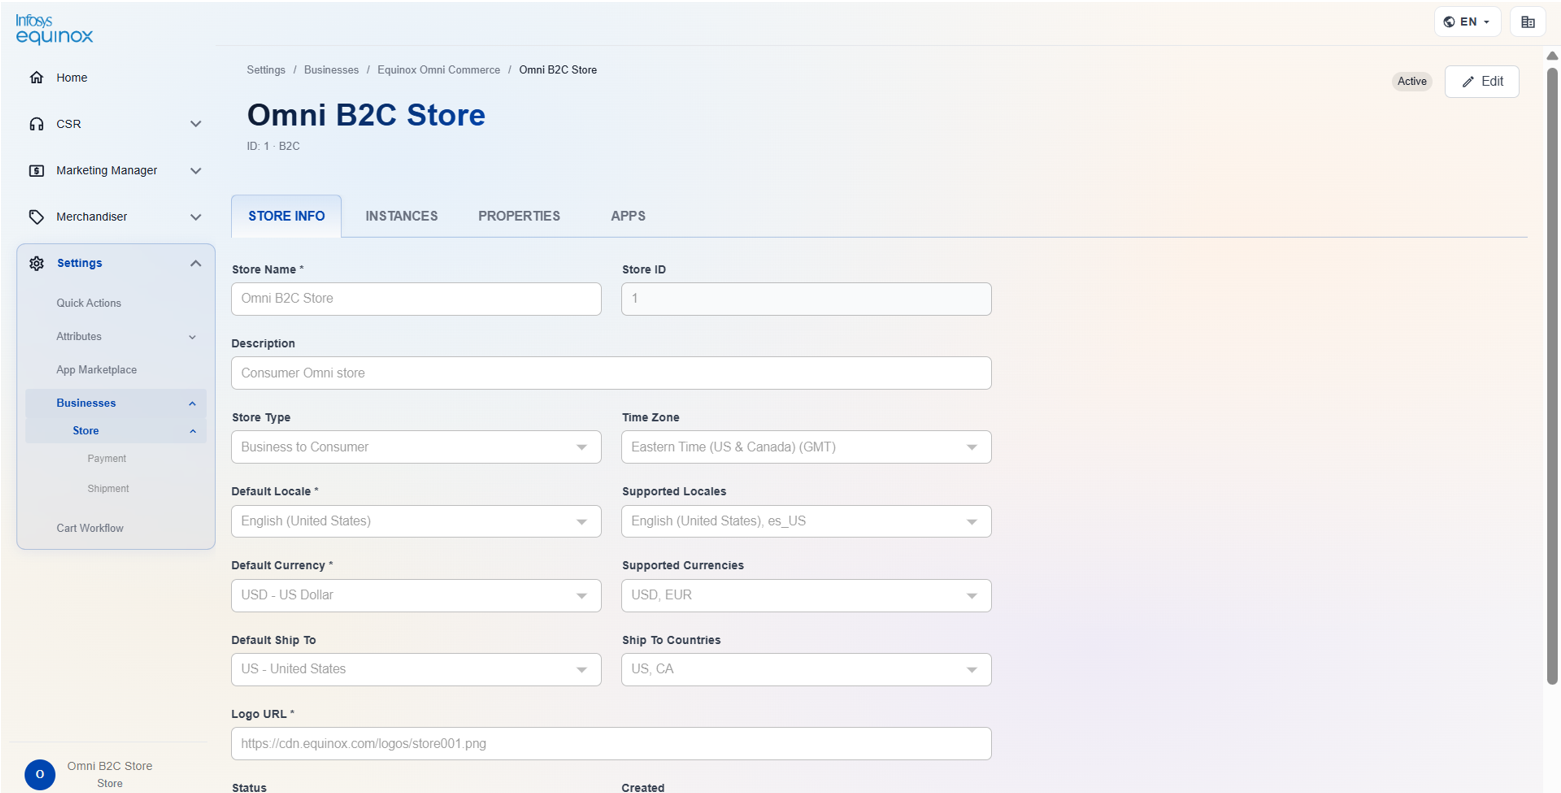
The store detail page is organized into tabs:
| Tab | Description |
|---|---|
| Store Info | Displays the core store configuration details including store name, store ID, store type (B2B, B2C, B2B2C), locale, currency, and associated URLs. |
| Instances | Lists the runtime instances associated with this store, showing deployment and service instance details. |
| Properties | Displays additional configurable properties for the store, such as feature flags or store-level custom settings. |
| Apps | Helps users browse the marketplace to discover, install, and manage apps available for the store. |
Revision History
2026-08-10 | JP – Created the page and added the content.